
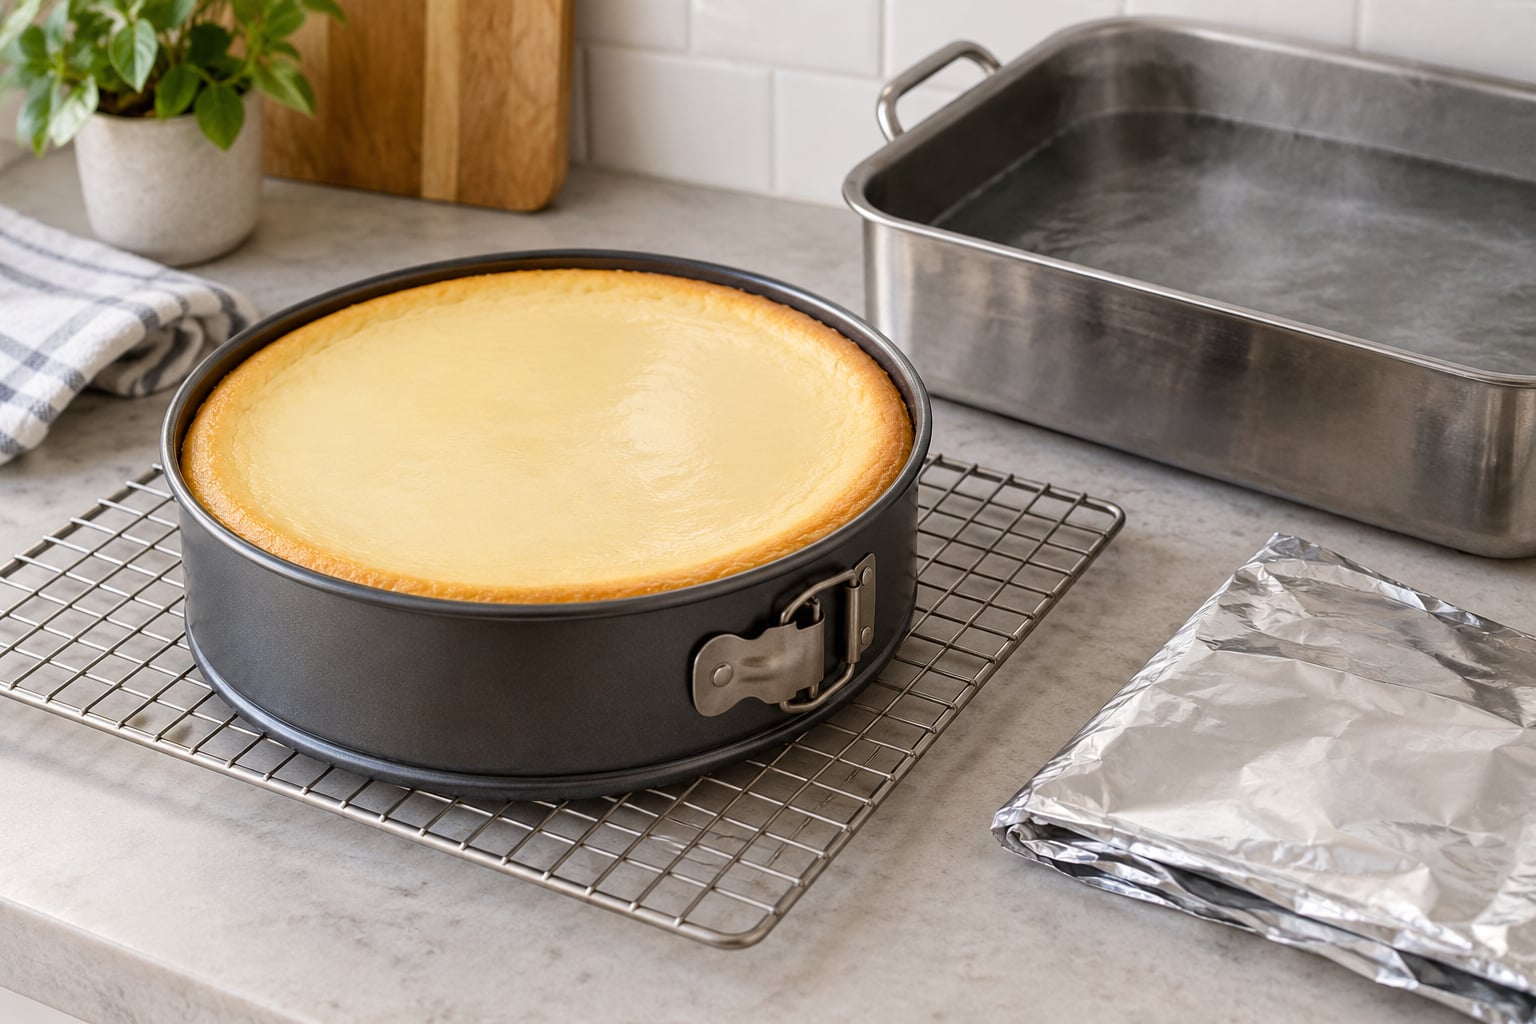
Bake the cheesecake in a water bath, mix the eggs in gently with barely any beating, and let it cool slowly inside the turned-off oven for about an hour before it touches the counter. Those three habits fix most of what goes wrong. Cheesecake is a custard, and a custard cracks for physics reasons more often than skill reasons.
Cheesecake is closer to a soft set pudding than to a cake. There is no flour doing the structural work, and there is nowhere for a shrinking top to hide. Once the surface sets, the middle is still shrinking and still warm, so any small flaw in that skin opens into a crack. Getting a smooth top is less about technique than about keeping that skin flexible for as long as possible.
Cooling is where most people lose. In oven after oven, the crack appears in the hour the cake sits in the switched-off oven, not during baking, and the baker decides the oven ruined it. That is almost never what happened.
Below is the whole process, followed by a way to read the crack you already have so you can tell which stage went wrong.
What You Need
A 9-inch springform pan and a roasting pan large enough to nest it are the only tools that genuinely change your odds. Everything else is a nice-to-have.
- 9-inch springform pan. Cheesecake in a 9-inch pan is about 2 inches deep. A deep cake has more mass holding the top down, and depth is where cracks live. Ten-inch works too, but so does a 9-inch pie plate if you lower the sugar slightly.
- Roasting pan with about 1 inch of clearance around the springform on every side. That clearance is the water reservoir. If the water is only a quarter inch deep, the humidity drops fast and you lose most of the benefit.
- Heavy-duty aluminum foil. Two sheets wrapped around the springform, alternating corners, form a waterproof boot. Ordinary foil tears along its crease under the weight of water and floods your crust.
- Room-temperature dairy. Full-fat cream cheese blocks, softened 30 to 60 minutes, plus sour cream or heavy cream. Cold dairy against warm eggs is the single most common cause of a lumpy batter that gets overmixed trying to fix it.
- Eggs. Room temperature, added last, one at a time.
- Sugar, a splash of vanilla, and a small pinch of salt. Salt is not optional; it sharpens the dairy and keeps the filling from tasting flat.
- Instant-read thermometer. A probe is the only way to stop guessing at doneness, and guessing is how cheesecakes get overbaked.
Two things you can skip: a stand mixer whisk attachment on high speed, and any recipe that tells you to beat until fluffy. Cheesecake filling is not whipped. If a recipe calls for a stand mixer, use the lowest speed and the paddle, or use a hand mixer, or use the food processor in short pulses.
Planning ahead matters too. This is a two-day bake in terms of your calendar. The filling only takes 20 minutes, but the cake needs an hour in the oven, an hour in the switched-off oven, then 4 to 8 hours in the fridge. Cheesecake is a poor choice as an after-dinner dessert. If you are feeding a group, plan the day around it the way you would around a brunch for a crowd without stress and start the morning of.
Step-by-Step: How to Make Cheesecake Without Cracks
Step 1: Prepare the Pan and Crust
Heat the oven to 325F and put the empty springform pan inside while it heats. A cold springform plus a cold crust plus hot filling is a thermal shock waiting to happen.
Wrap the outside of the springform in two sheets of heavy-duty foil before the crust goes in. Press the foil snug against the base and up the sides, and crimp it at the corners so it seals when folded over the top. If you wrap after filling, you will drop crumbs in, and if you wrap before the water goes in, you can fold the top edge down over the batter to keep it from floating.
For a standard graham crust: pulse about 2 cups of crumbs with 3 tablespoons of melted butter and 2 tablespoons of sugar until it holds together when squeezed. Press it firmly into the pan with the bottom of a glass. Packing matters more than mixing. If the crust is loose, the filling leaks underneath and you get a soggy base instead of a crack.
Blind-bake the crust for 10 minutes, then cool it completely before pouring filling. Warm crust plus cold filling is another temperature jump, and this one happens while the pan is still in the oven. You will know it worked when the shell looks dry and pale gold, not when it browns.
Step 2: Mix the Filling Gently
Beat the softened cream cheese on low speed until it is lump-free and looks like smooth paste, scraping down the bowl twice. If you have been fighting lumps, the cream cheese was too cold. Lumps that survive mixing are almost always handled by turning the speed up, and speed is what you are trying to avoid.
Add sugar and beat only until it disappears. Add the sour cream or cream, then the salt and vanilla, mixing at the lowest setting the machine has. Add the eggs one at a time, and stop beating the moment the last egg disappears into the batter. You want to see the paddle just once through.
Overmixing is what turns the top into a pockmarked crater field. Beaten egg whites and air pockets expand during baking, then collapse as the filling settles and cools, and the surface tears along the collapse lines. Several home bakers describe themselves as habitual over-mixers and credit this single change for their smoothest cakes.
Add the vanilla last, then set the bowl on the counter and tap it firmly two or three times so trapped bubbles rise to the surface. Skim the foam off. The batter should slump slowly off the spatula, not ribbon like a cake batter. If it pours like thin milk, you have too much liquid in there.
For zero lumps with almost no beating, run the filling through a blender for 20 seconds on low. This works because it smooths without aerating, which is the opposite of what a beater does.
Step 3: Add the Water Bath and Bake Low
Pour the filling into the cooled crust and jiggle the springform gently to level the top. Take the pan out, fold the foil flaps over the rim, and set the springform into the roasting pan.
Pour very hot water into the roasting pan until it comes about halfway up the side of the springform, roughly a half inch to an inch. Not boiling. Boiling water in a dry pan can flash to steam hard enough to fog and even crack the glass of the roasting pan. Water that has been off the boil for 30 seconds is plenty hot.
The water bath does not cook the cheesecake. It keeps the air in the oven humid so the custard sets slowly and evenly from the outside in, which keeps the top flexible enough to move as it shrinks instead of splitting. Think gentle steam, not a simmering pot.
Bake at 325F. Cheesecake is not a cake, and the standard 350F recommendation exists because people like a firmer top. If your oven cannot hold 325F, drop it to 300F and add roughly 20 minutes rather than baking hotter.
Do not open the door during the bake. Every opening drops the chamber temperature and lets cool air hit the setting top, and that is a crack forming. If the top browns before the center is done, tent it loosely with foil, but only do it toward the end.
Pull the cake when the center still wobbles in a two to three inch circle, the outer one to two inches are puffed slightly and matte, and the whole thing jiggles like gelatin rather than sloshing like liquid. Some people also see a slight dome fall in the middle as it settles. If the surface looks wet and glossy all the way to the center, it needs more time. If it springs back like a sponge cake, it needs less, and there is no un-baking it.
For a thermometer, aim for 150F at the very center and do not exceed 175F one inch in from the edge. That 25 degree spread is the whole ballgame, and it is the number people skip because a door opening to check with a probe undoes half the work. Bake from cold, check at the earliest plausible moment, and plan for the check.
Step 4: Cool the Cheesecake Slowly
Turn the oven off and leave the door closed. Let the cake sit for 60 minutes inside the switched-off oven, then lift it out of the water bath and set it on a wire rack.
Some bakers crack the oven door open for that hour instead. Both camps report success, and the honest answer is that the door-ajar version gives you a slightly faster cool with a slightly larger temperature change. If you crack it, open it a few inches so a warm draft escapes slowly, and do not let a child slam it the rest of the way shut.
Do not remove the springform sides during cooling. The pan holds the filling in place while it contracts. Lifting the ring while the cake is still warm is a direct path to a center split, because the filling has nothing holding its outer edge.
This cooling phase is where most cracks are born, and the reason is mechanical. The filling is a milk protein and fat network. As it cools, that network tightens and pulls inward. If the sides are glued to the pan or the outer wall, the contracting center has to split somewhere, and the top surface is the weak point. If the cake is free to shrink all the way down, there is no tension to relieve.
Once the cake reaches roughly room temperature, move it to the refrigerator. Some people warm a microwave with a glass of water inside and cool there instead, since a microwave with the light on is a warm, draft-free box.
Custard cooling is the same story with different numbers. If you are doing crème brûlée without a torch, the sugar is easier to scorch than a cheesecake, but both punish you for a rapid chill.
Step 5: Chill, Slice, and Serve
Refrigerate for 4 to 8 hours, or overnight for a firmer, cleaner slice. Cover it once it is fully cool and dry. Wrapping a warm cheesecake traps condensation under the foil or plastic and drips all over the fridge shelf on its way to a soggy top.
Run a long, thin sharp knife under hot water and wipe it dry between every cut. A warm blade melts the surface just enough to close the cut line as it goes, and the slice comes away clean without dragging filling with it. Never use a serrated knife. Those teeth tear the top skin.
Cheesecake keeps 3 to 4 days refrigerated at 40F or below, covered, and a plain classic can also be frozen for up to a month if you chill it fully first. If you are serving it after a sit-down meal, take it out about 20 minutes ahead so it is not refrigerator-cold, which flattens the flavor.
Common Mistakes That Cause Cheesecake Cracks
Six mistakes that cause nearly every crack
- Overbaking. This is the single most common cause, and the reason it happens is that cake instincts say to bake until the middle is set. It should not be set. It should wobble in a 2 to 3 inch circle when you pull it.
- Overmixing the eggs. Air in the batter expands, then collapses as it cools, and the surface tears along the collapse lines.
- A sudden temperature change. Opening the oven door, moving the cake to a cold counter, or setting a hot springform on cold metal. A blow of cool air across a skin that has set while the center is still warm is enough to crack it.
- Adhesion to the pan sides. If the filling sticks to the pan wall, it cannot shrink as it cools and pulls apart at the center instead.
- Dry edges. The rim of the pan is the hottest part of the cake and dries out first, and dry cheesecake cracks. That is also why an edge crack points at overbaking rather than at your mixing bowl.
- Too much egg or too much liquid for the pan size. A deep, thin, large-pan batter sets differently than a shallow one. Adding eggs to compensate for a cheesecake that feels too rich makes it fragile.
Diagnose your crack: what the pattern tells you
The shape of the crack tells you which stage failed. Read the pattern before you change anything, because bakers tend to fix the step they distrust rather than the one that broke.
| What you see | Likely cause | Fix for next time |
|---|---|---|
| One long split down the center | Filling adhered to the pan sides and tore as it contracted, or a jolt of temperature during in-oven cooling | Rough the sides of the pan before pouring, and leave the ring on during the full cool |
| Cracks concentrated around the rim | Overbaking or a hot spot in your oven | Pull at 150F center, and check your oven temperature with an independent thermometer |
| Many small pits and craters, no deep split | Overmixing, especially air beaten into the eggs | Add eggs one at a time at the lowest speed and stop the moment they disappear |
| Split that opened while the cake cooled in the switched-off oven | Cooling too fast, or thermal shock from moving it too soon | Leave it 60 minutes with the oven off, then cool on a wire rack |
| Sunken center with cracks radiating out | Baked too long or at too high a temperature | Drop to 300F and add 20 minutes instead of raising heat |
Reading the pattern beats guessing because cheesecake cracks for exactly four reasons: overbaking, air, thermal shock, and sticking to the pan. Every fix maps to one of them.
Doneness reference
| What you see or measure | Reading | What to do |
|---|---|---|
| Center wobbles in a 2 to 3 inch circle, edges puffed and matte | Done | Pull it and move on to slow cooling |
| Surface wet and glossy across the whole top | Underdone | Another 5 to 10 minutes |
| Probe reads 150F at center, 175F or under at 1 inch from the edge | Correct | Take it out now |
| Any edge reading above 175F | Past the safe point for a smooth top | It will likely crack at the rim |
| Top springs back like a sponge | Overbaked | No fix; cover it and call it rustic |
Preventing cracks without a full water bath
If you do not own a roasting pan large enough to nest the springform, you are not stuck. Four approaches come up in almost every discussion of the problem, and the ranking below is the order that holds up in a home kitchen.
| Method | How it works | How well it works | Watch out for |
|---|---|---|---|
| Springform nested in a roasting pan with 1 inch of hot water | Steady humidity surrounds the cake so the custard sets evenly | Best all-round result | Needs a pan with clearance on all sides |
| Cake strips soaked 10 to 15 minutes and wrapped around the springform | Insulates the pan so the edges bake at the same rate as the middle | Good for the rim, no help with humidity | Does nothing about cooling |
| Pan of water on the rack below, cake on the rack above | Steam rises around the cake, which is part of the benefit without a big pan | Partial help | Add hot water mid-bake so it does not boil away |
| No water bath at all | Dry heat, so the rim sets early and hard | Least effective | Lower the sugar a little and add sour cream for extra moisture |
The oven steam function works as a stand-in if your oven has one. Some home bakers also run a kettle of water and rely on the residual steam, which is weaker than any of the four methods above. A thin strip of parchment buttered against the inside of the pan is reported by home bakers to ease adhesion, which attacks the center-split problem directly.
Liquid-rich cheesecakes are structurally calmer. Recipes with sour cream or heavy cream and slightly less sugar give you more slack, and so do thin cakes. A cheesecake baked in a 9-inch pie plate at an inch deep, a jar cheesecake, and a no-bake cheesecake all crack far less often than a deep one, because there is less mass and less distance for a split to travel. Cheesecake bars are the least crack-prone format of all.
Common mistakes and quick fixes at a glance
- Water got into the crust. It means the foil seam gave. Wrap again with two sheets and alternate the corners. For next time, keep the crust edge slightly lower than usual.
- Your oven runs hot. A cheap oven thermometer in a preheated oven tells you in two minutes what a bakeseller thinks you should know. Many home ovens are 25 degrees off.
- Your oven has a hot spot. Rotate the cheesecake once, early, in the first 15 minutes, when the filling is still liquid enough not to break the skin. After that, leave it alone.
- You used a 10-inch pan with the 9-inch recipe. A thinner layer sets faster and dries at the edge. Baking a little longer and a little cooler is better than baking hot.
- Condensation wrapped it too early. Cool it fully on a rack before covering.
How to fix a cheesecake that already cracked
A crack is cosmetic. The filling under it is the same as the filling beside it, the texture is unaffected, and the cake is safe to eat as long as you have refrigerated it at 40F or below and it was not left out for hours. If the filling has not set properly or smells off or you have left it at room temperature all afternoon, that is a different problem, and it is a food-safety one.
Wait until the cake is fully chilled, because a crack keeps moving for a few hours as the cake finishes contracting.
- Melt it back together. Heat water in a heatproof bowl until it is near boiling. Dip an offset spatula or narrow knife in the hot water, wipe it dry, and run it along the crack in one slow pass. The metal re-melts the surface of the chilled custard and the crack closes behind the blade. Repeat in short strokes until it disappears. A kitchen torch works the same way.
- Cover it with something thick. Pipe whipped cream, spread a sour cream glaze, or pour a cooled ganache over the top. Use thick coverings, not thin sauces. Caramel and fruit coulis sink straight into a crack and make it more obvious, not less.
- Turn it into a different dessert. Cracked cheesecake bars still work, and so does a trifle, where the filling is cut into chunks and buried under cream and fruit.
Leaving the crack plain is a legitimate choice too. Plenty of cheesecakes are better for the imperfect record, and the next one will be easier.
Frequently Asked Questions
Can I fix a cheesecake that already has cracks?
Yes, if the cake is fully chilled. Heat water to near boiling, dip an offset spatula or thin knife in it, wipe it dry, and run it along the crack once. The hot metal re-melts the surface of the set custard and the crack closes behind the blade. Repeat in short strokes. A kitchen torch works the same way. Thick toppings like whipped cream, sour cream glaze, or ganache hide what is left, while thin caramel or fruit sauce sinks into the crack.
Why is my cheesecake cracking while it bakes?
Cracks that appear during the bake almost always trace back to heat or air. Baking too hot or too long dries the rim, and dry cheesecake splits. Beating the eggs on high speed traps air that expands, then collapses as the cake cools, tearing the top into pits. Opening the oven door also cools the setting surface. Bake at 325F or lower, add eggs one at a time at the lowest speed, and pull the cake while the center still wobbles in a 2 to 3 inch circle.
Do I need a water bath to prevent cheesecake cracks?
Not strictly, but it is the most effective single technique. A full water bath gives the best result, soaked cake strips help the rim, and a pan of water on the rack below only gets you part of the way. The bath works by keeping the oven humid so the custard sets slowly from the outside in. If you lack a large roasting pan, put a pan of hot water on the rack below, use your oven steam function, or wrap the springform in soaked cake strips.
How do I know when a cheesecake is baked enough?
Pull it when the center wobbles in a 2 to 3 inch circle while the outer one to two inches are puffed and matte. The whole surface should jiggle like gelatin, not sloshing like liquid. With a thermometer, aim for 150F at the very center and never exceed 175F one inch in from the edge. If the top springs back like a sponge cake, it is already overbaked. It is better to err toward underdone, because the cake continues setting as it cools.
Should I cover cheesecake while it cools?
Cover it late, not early. First cool the cake for 60 minutes inside the switched-off oven with the door closed or cracked, then 45 minutes or so on a wire rack until it is close to room temperature. Only then cover it and refrigerate for 4 to 8 hours. Wrapping or loosely tenting a warm cheesecake traps condensation, which drips onto the cake and onto the fridge shelf. Leave the springform ring on during the whole cool so the filling can contract without tearing.
What pan size is least likely to produce cracks?
A 9-inch springform pan is the safest choice. Cheesecake bakes about 2 inches deep there, and a shallow cake has less mass pulling on its setting top. A 10-inch pan gives a thinner layer that dries at the edges faster, and deep cheesecakes crack far more often because the contracting center is pulling against a taller wall. A 9-inch pie plate works and is even less crack-prone if you trim the sugar slightly. Bars, jars, and no-bake cheesecakes are the calmest formats of all.
Conclusion
Change four things on your next bake and nothing else. Beat the eggs in at the lowest speed and stop as soon as they disappear. Nest the springform in a roasting pan with about an inch of very hot water. Bake at 325F and pull it at a 150F center reading with a 2 to 3 inch wobble. Turn the oven off, leave the door closed for an hour, and do not lift the pan ring until the cake is nearly room temperature.
Run it once exactly like that before you change the recipe, the pan size, or the sugar. Most cracked cheesecakes are four habits, not four ingredients, and you cannot tell which habit is the problem if you changed all of them at once.