
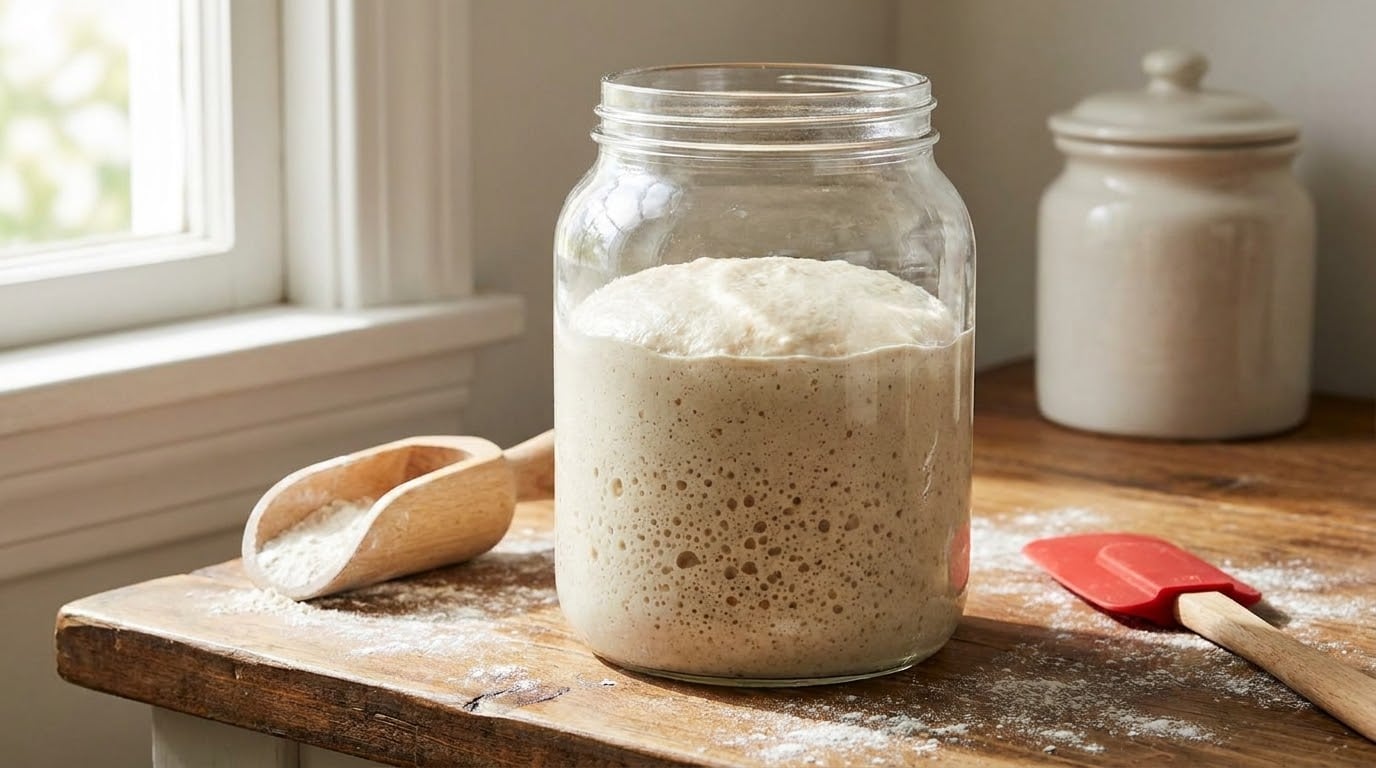
To make sourdough starter from scratch, mix equal parts flour and water by weight, then feed it once a day with a small portion of that mixture for 7 to 14 days until it reliably doubles in size. The whole process is nearly hands-off: about five minutes of work a day, mostly waiting. It is beginner-friendly, but it is a waiting project, not a rushed one, and the temperature of your kitchen matters more than anything else you do.
I have kept starters on the counter for years, and the ones that worked were never the ones with the most complicated schedule. They were the ones I fed the same way, at the same time, and kept reasonably warm. Once you have that routine down, the rest is watching for a few specific signs.
What You Need
Everything here is either a kitchen staple or a few dollars of a specialty aisle. You do not need any of it to be fancy, and you do not need most of it to be new.
- Flour: 100 grams to start, plus about 100 grams a day for feeding. Unbleached all-purpose flour works well and is easy to find. Whole wheat, rye, and bread flour all work too.
- Water: 100 grams of room-temperature water, plus more for feeding. Tap water is fine in most cities. See the note below if yours is heavily chlorinated.
- A glass jar: Straight-sided and wide enough for a spoon or spatula, ideally with a mark or line on the side so you can measure by volume. Around 500 milliliters is plenty for the first couple of weeks.
- A kitchen scale: A basic one that reads in grams. Measuring by weight instead of volume is the single biggest reason a starter behaves consistently, and it costs almost nothing to do it right.
- A rubber spatula or wooden spoon: For mixing and scraping the sides of the jar.
- A lid or rubber band: Loose enough for air to pass. A tight seal stops gas from escaping and a wide-open jar lets the mixture dry out.
- A marker or masking tape: To label the jar with the date and time of each feeding. This sounds fussy and turns out to be the thing you thank yourself for on day 9.
- A warm spot: Optional but useful. A turned-on oven light, the top of the refrigerator, a seed-starting mat, or a corner of the house that stays a few degrees warmer than the rest.
Two things get asked about constantly, so let me settle them now. Tap water is usually fine; chlorine levels in municipal water are low enough that a starter builds fine on it, and if yours has a strong chlorine smell, let the water sit uncovered overnight or use filtered water. And a metal spoon is not the problem people think it is. Stainless steel will not kill a starter, so use whatever utensil you have.
Which flour should you start with?
Any flour works, and they behave differently enough that it is worth knowing what you are picking. Faster activity comes from bran and minerals, which is why whole grains wake a starter up quickly.
| Flour | How fast it activates | Flavor it leans toward | Good for |
|---|---|---|---|
| Whole wheat | Fast, often visible bubbles in 2 to 3 days | Mild, slightly earthy, more lactic tang | Speeding up a sluggish new starter |
| Rye | Fastest of the four | Sharp, malty, complex | A jump-start in a cold kitchen; blend it in rather than use it alone long-term |
| Bread flour | Moderate | Mild and clean | Keeping an established starter strong for baking |
| All-purpose, unbleached | Moderate to slow | Neutral, easy to read | The default choice, and the easiest starter to judge as a beginner |
My own routine is 50 percent whole wheat and 50 percent unbleached all-purpose. It picks up faster in the early days than plain all-purpose, and the wheat keeps the flavor from going aggressively sour once it matures. Many people keep that blend permanently and never look back.
Step-by-Step: How to Make Sourdough Starter From Scratch
Days one through seven are where the discipline is, not the technique. Read every step once, then follow along in order.
Step 1: Mix the Flour and Water
Combine 100 grams of flour with 100 grams of room-temperature water in your jar. Stir with a rubber spatula until no dry flour is left, scraping the bottom and sides a couple of times.
The finished mixture should look like thick wet pancake batter, not glue and not dough. If it is so stiff that a spoon leaves a deep trench that holds its shape, add water 10 grams at a time until it loosens. If it runs like cream, add flour 10 grams at a time.
Cover the jar loosely and leave it on the counter for 12 to 24 hours. Resting before the first feeding gives the flour time to hydrate fully and gives any wild yeast and bacteria already on the flour a head start, which means less waste on the first discard.
Step 2: Begin the Daily Feeding Routine
Once the mixture has sat overnight, start feeding it the same time each day. The routine is always the same three moves: give away some of the starter, add fresh flour and water, mark the time.
For a beginner, a 1:1:1 ratio by weight is the most forgiving place to start. Take 50 grams of the existing starter out of the jar (this is the discard), then add 50 grams of flour and 50 grams of water. Stir, mark the jar, and wait 24 hours.
As the starter gets stronger you can feed it larger, which is how you learn the higher ratios. Bigger feed, slower rise. Smaller feed, faster rise.
| Ratio (starter : flour : water) | Roughly doubles in | Feed it every | Best for |
|---|---|---|---|
| 1:1:1 | 4 to 6 hours | 12 hours at room temperature, or daily | Beginners, and keeping a starter lively between bakes |
| 1:2:2 | 6 to 8 hours | 12 to 24 hours | A working starter on a once-a-day schedule |
| 1:3:3 (the rule people call 1/3/3) | 8 to 12 hours | 24 hours or longer | Baking on a relaxed schedule, or bulking up a starter before a big bake |
Keep the portion you discard small when you are starting out. Beginners often throw away far more culture than they need to, and 50 grams is plenty to keep the jar from crowding. Save it in a separate container in the fridge if you plan to bake more than once a week; otherwise a small scrap every day or two is not worth worrying about.
Step 3: Keep the Starter Warm
Sourdough ferments fastest around 24 to 27 C (75 to 80 F). Below about 20 C (68 F) a new starter can sit for weeks without visibly doing much, and that is the number one reason people give up.
Room temperature in a warm house is usually fine. If your kitchen is cool, put the jar on top of the refrigerator, inside a cabinet near the oven with the light on, or on a seed mat set to low. A few degrees of extra warmth can cut a 12-day build down to 7.
You do not need heat every day, though. Once the starter is mature, a week on the counter at normal room temperature is usually sustainable, and many bakers leave it out and feed it twice a week. Warmth accelerates the process rather than being a permanent requirement.
Step 4: Watch for Bubbles and a Daily Rise
The first three days are mostly invisible, and that is normal. You may see a few bubbles along the sides of the jar or a faintly tangy smell by day two. Odors that smell like acetone or nail polish remover show up when the culture is hungry and acidic, and they usually mean the starter needs feeding more often or a larger feed, not that it has gone bad.
A layer of clear or greyish liquid on top is called hooch. It is a sign the starter is starving for carbon dioxide, because the organisms below it have been producing alcohol. Pour or spoon it off, then feed. It is not mold and it is not a failure, but it does mean the culture is underfed.
From around day three or four, look for a real rise: the jar level climbing over a few hours, bubbles breaking the surface, a domed top, and a texture that stretches and pulls when you drag a spatula through it. Consistent doubling, repeated across several feedings in a row, is the clearest maturity signal you will get. A single big rise means you got lucky once.
Step 5: Confirm the Starter Is Ready to Use
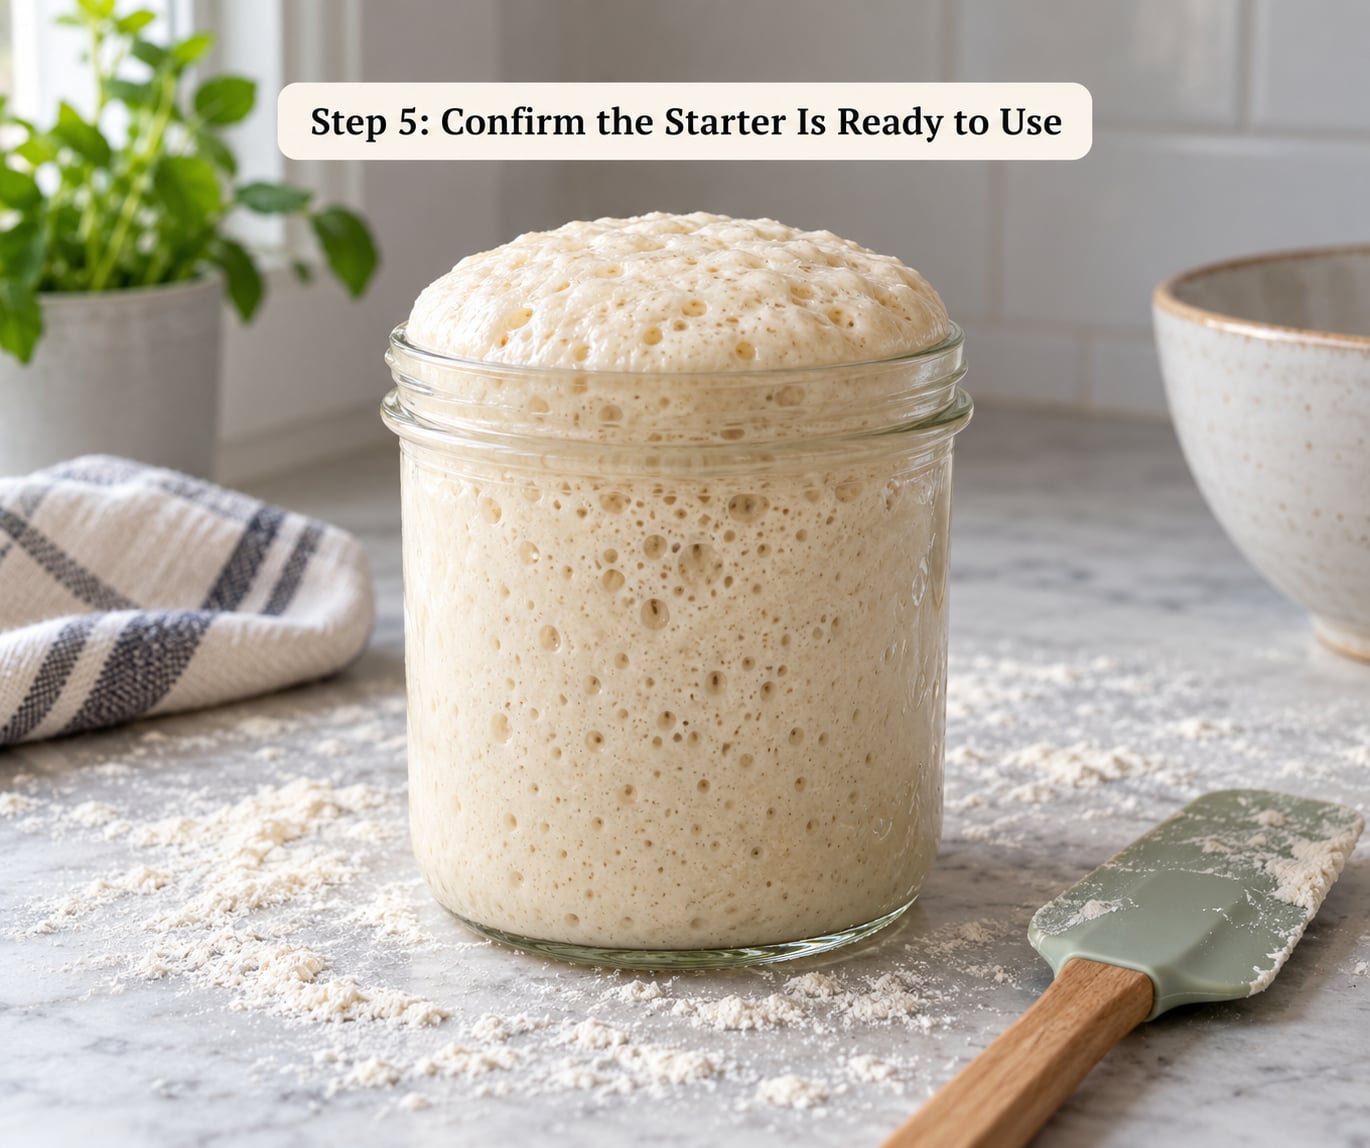
Scent alone is not a readiness test. A starter can smell pleasantly sour for days before it has enough strength to leaven bread, which is a very common way people bake a flat loaf and blame the recipe.
Use two tests together:
- Float test: Drop a spoonful of starter into a cup of water. If it floats, it has enough gas to leaven bread. If it sinks, feed it again and retest the next day. Treat this as supporting evidence, not a verdict. A weak starter can float after sitting for a while simply because it had time to collect gas, so an immediate test right after a rise is more meaningful than one taken hours later.
- Peak-and-doubling test: Feed the starter, then time how long it takes to double in height at its peak. A ready starter doubles in roughly 4 to 6 hours at 24 to 27 C (75 to 80 F). If it takes 12 hours to move at all, keep feeding.
On the first feedings, a brand new starter can take 5 to 10 days to reach reliable doubling. With a warm kitchen and a 50/50 whole wheat blend, some people get there in 7 days. In a cool kitchen with all-purpose flour, 14 days is realistic. Anyone who tells you a starter is dependable after three days is describing an unusually warm kitchen, not a rule.
Step 6: Store It for Regular Baking
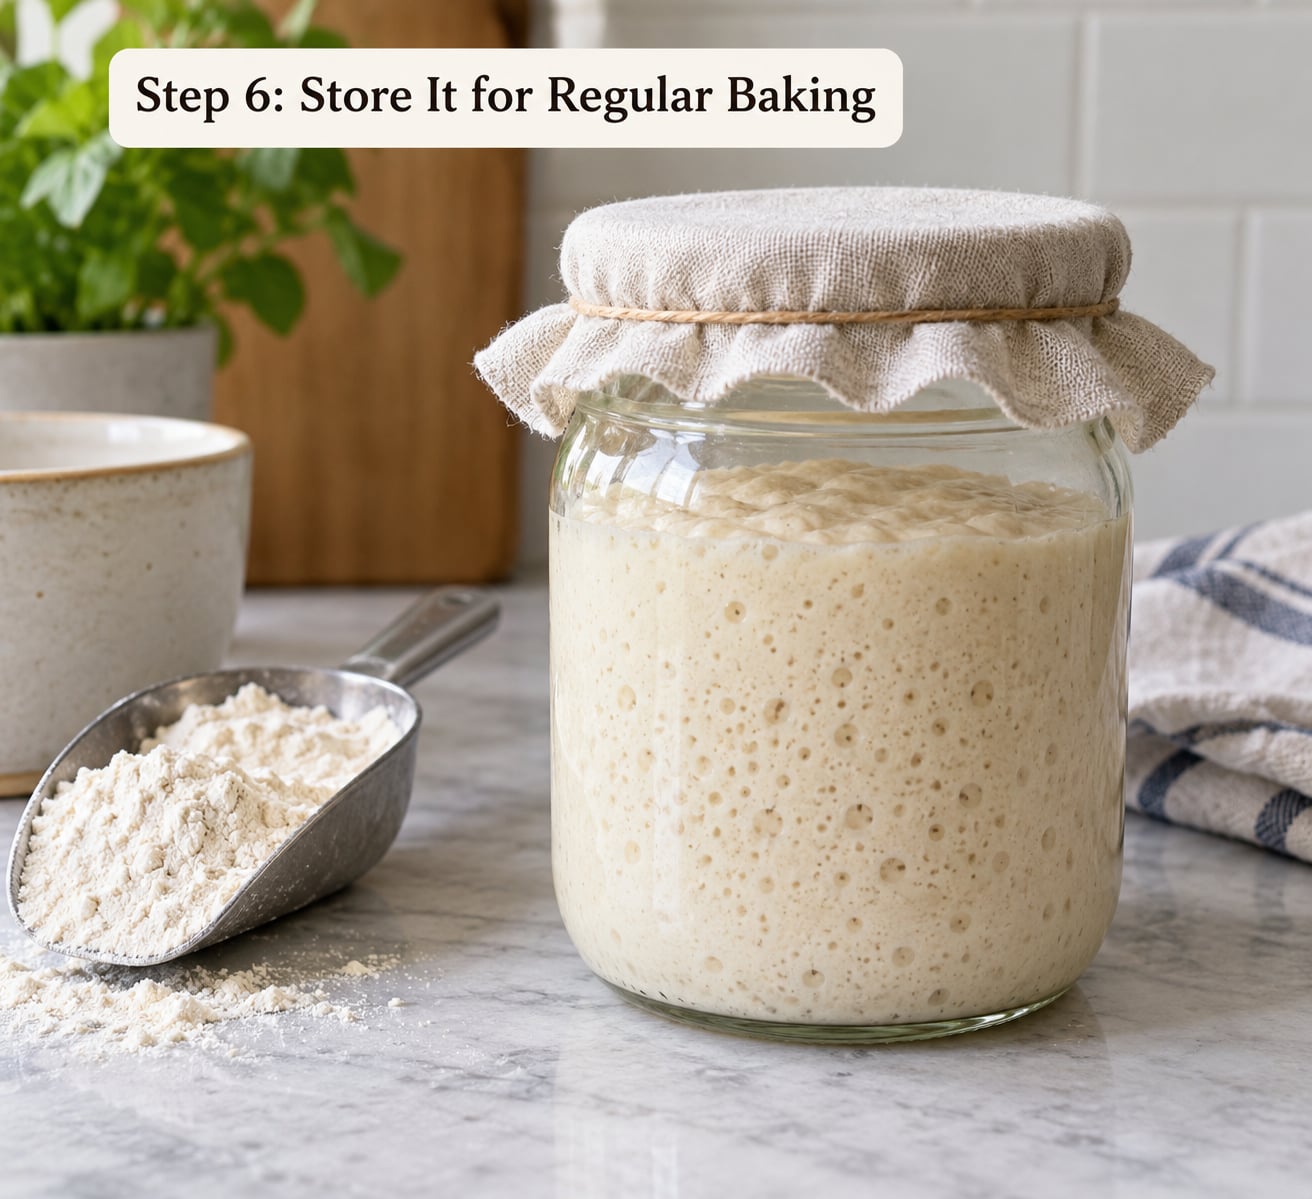
Once your starter reliably doubles in under 6 hours, switch it to maintenance mode. A mature starter keeps fine in the refrigerator, and cold storage slows the organisms down so you only feed it occasionally.
- Refrigerator, weekly baker: Feed at 1:1:1, then put the jar in the fridge. Feed once a week. If you bake more often, twice a week is plenty.
- Counter, daily baker: Leave it at room temperature and feed 1:1:1 once a day, or 1:2:2 every other day. Less storage work, but it needs attention every day or two.
- Freezer, occasional baker: Freeze 50 grams of active starter in a small container with a little flour, up to three months. Thaw in the fridge, then feed daily for two or three days before baking.
Before a planned bake, pull the jar out and feed it the evening before at 1:2:2 or 1:3:3. Let it come to room temperature, feed once more in the morning, and use it at its peak. If a week in the fridge has left it sluggish, two or three daily feedings bring it back.
The discard you set aside is flour and water, which means it bakes into something thin and crisp rather than a loaf. Turn it into discard crackers, and once you have a finished loaf, croutons from stale bread is the natural next project. For a weekend bake that uses starter heavily, try making pizza dough at home, since a 1:1:1 feeding leaves you with plenty to spare.
Storage durations, honestly: a fed starter in the fridge stays usable for 1 to 2 weeks at a time, and 4 weeks is the outer limit before it needs serious revival. Fridge water turns gray and sharp-smelling over time, so pour off the old water when you feed rather than stirring it back in.
Common Mistakes When You Make Sourdough Starter From Scratch
Nearly every stalled starter traces back to one of these. Work down the list in order.
- Starting with too little starter: A spoonful of flour and water has too few organisms to build momentum. Use at least 50 grams of established culture, or start with 100 grams of the fresh mix on day one.
- Feeding on a rigid schedule instead of watching the jar: Once the starter is active, a fixed 24-hour rule can mean overfeeding, which flattens the dough. Look at the jar and feed on activity, not on the calendar.
- Making the mixture too wet: Runny starter is hard to feed accurately and dilutes the flour over several days. Aim for thick batter and correct with 10-gram additions.
- Discarding too much culture: Halving a small jar repeatedly can stall it. Discard the minimum that gives you room to mix, and remember that 50 grams of a mature starter contains a lot of organisms.
- Refrigerating a new starter: The fridge is for mature starters. A young culture put in the cold simply stops, and it often never recovers cleanly.
- Expecting activity on day three: On all-purpose flour in a cool kitchen, day three can look identical to day one. A visible rise around days 7 to 10 is common, and giving up at day five is the most common reason a starter never gets started.
- A cold kitchen: Check the actual temperature where the jar sits. Below 20 C (68 F) a starter can sit nearly dormant, and no amount of faithful feeding fixes that on its own.
- Leaving the jar sealed airtight: A completely closed jar traps no escaping gas and no airflow, and a fully open one dries to a stiff ring on the wall. Loosely covered is the target.
Frequently Asked Questions
Can I make sourdough starter with whole wheat flour?
Yes, and whole wheat is often the fastest option. The bran and germ carry more native yeast and lactic acid bacteria than refined flour, so a whole wheat starter often shows bubbles within two or three days. Its downside is that it tends to go sour faster and looser over time. Many bakers start with whole wheat for the first week, then switch to a 50/50 whole wheat and all-purpose blend to keep the flavor balanced and the texture manageable.
How long does it take to make sourdough starter from scratch?
Plan on 7 to 14 days of daily feedings. A warm kitchen at 24 to 27 C (75 to 80 F) with a whole wheat or rye blend can reach reliable doubling in about a week. A cool room with plain all-purpose flour can take two full weeks, and that is still normal. The real test is not the calendar but whether your starter doubles in 4 to 6 hours across several feedings in a row before you try to bake with it.
Why is my sourdough starter not bubbling?
Cold is the usual answer. Below 20 C (68 F) the culture goes dormant, and a starter fed in a cool kitchen can sit for a week with no visible change. Other causes include a blend that is too wet, feeding too small a portion, and expecting activity in the first three days. Move the jar to a warm spot such as top of the refrigerator or an oven with the light on, switch to a 1:1:1 ratio by weight, and give it three more days.
How do I know if my sourdough starter has mold?
Real mold is fuzzy and comes in colors like black, green, pink, or orange, often with a musty smell. Hooch, by contrast, is a clear or grey liquid on top with no fuzz, and it just means the starter is hungry. Pour the liquid off and feed it. If you see genuine fuzzy colored growth, discard the whole jar, clean it, and restart. Mold is uncommon when starters are fed regularly, and frequent feedings are the best prevention.
Can I freeze or share my sourdough starter?
Both work. For freezing, put 50 grams of an active starter into a small sealed container with a little flour and freeze it for up to three months. Thaw it in the fridge, then feed daily for two or three days to bring it back to full strength before baking. Sharing is easy too: send 50 to 100 grams of active starter in a sealed container, and tell the recipient to feed it on their own schedule for a few days before their first bake.
What is the 1/3/3 rule for sourdough starter feeding?
It is a shorthand for a 1:3:3 feeding ratio by weight: 1 part existing starter, 3 parts fresh flour, 3 parts water. A larger feed like this takes longer to double, usually 8 to 12 hours, so it fits a once-a-day schedule or lets you skip a day without starving the culture. Beginners often find the 1:1:1 ratio easier to read, since the jar rises fast and the sign of activity is obvious. Both work; the bigger feed is for when you want more starter or more time between feedings.
Conclusion: Start With One Small Feeding
Mix 50 grams of flour with 50 grams of water in a glass jar, cover it loosely, and set it on a warm shelf. Tomorrow, discard 50 grams, add 50 grams of flour and 50 grams of water, and mark the jar. Do that once a day until the starter doubles in under six hours, and that is when you bake.
Keep 2026 sourdough starter day by day simple, and it will work. Most failures come from a cold jar, a wet mix, or giving up before the culture has had time to build.