
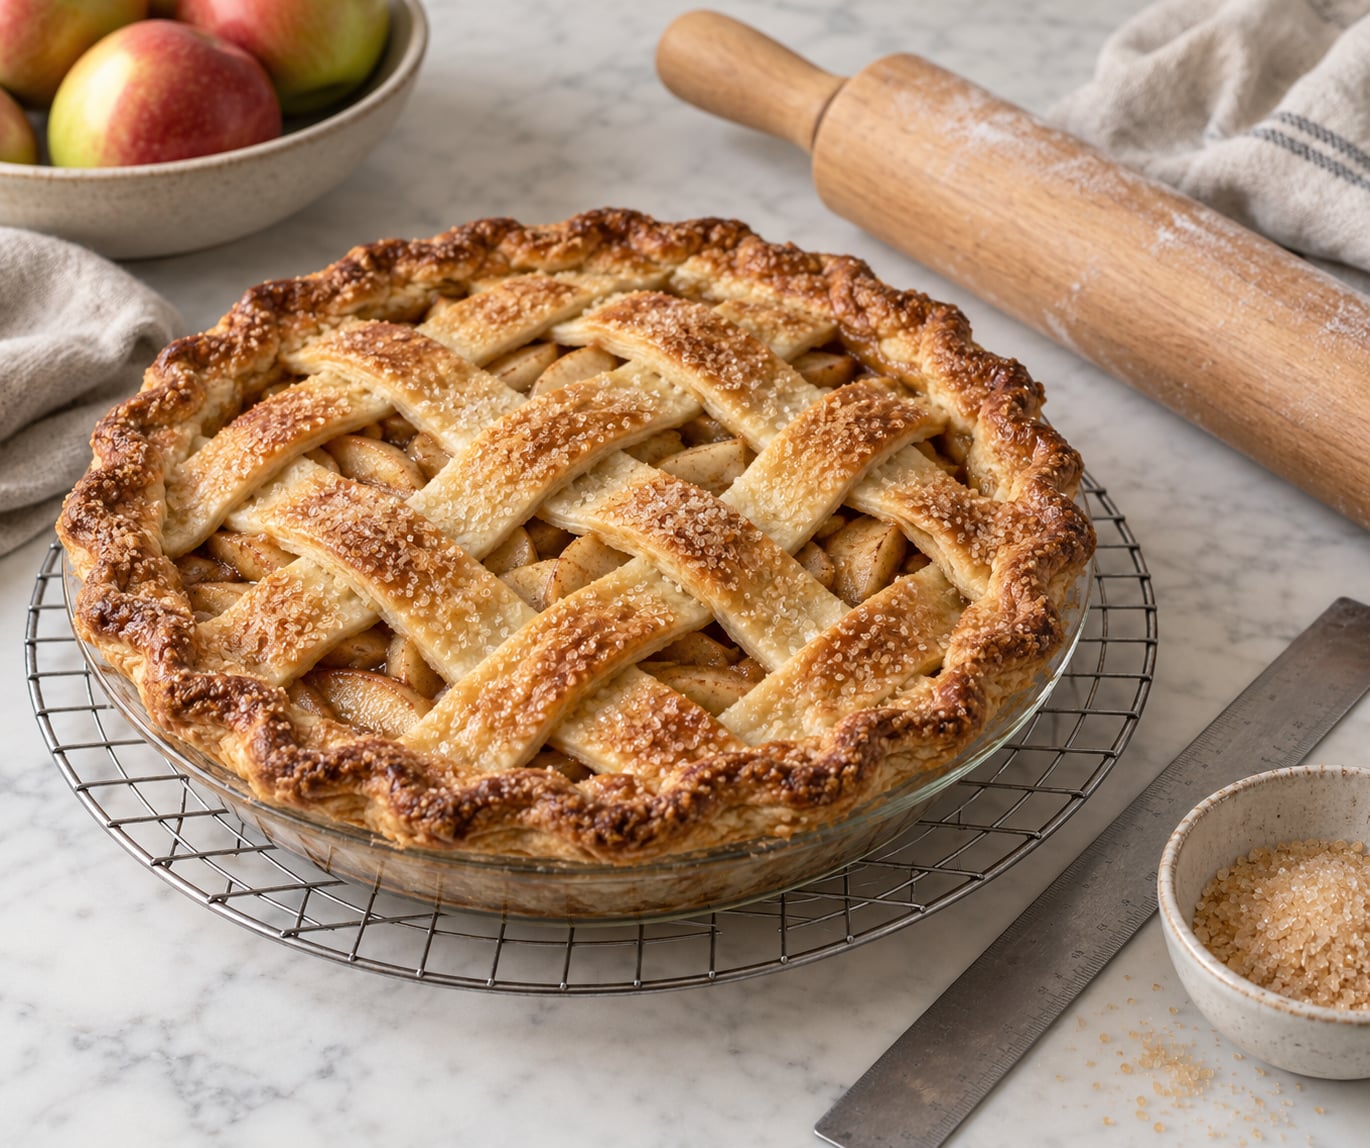
A lattice pie crust is a top crust built by cutting rolled-out pie dough into even strips and weaving them over and under one another in a basket-weave pattern. The gaps vent steam so a thick fruit filling doesn’t boil over, and the assembly takes about 20 minutes once your dough is properly chilled.
If you’re learning how to make a lattice pie crust for the first time, the weaving itself isn’t what trips people up. Cold dough is. Warm dough stretches, tears, and melts into the filling while you’re still working. Everything below assumes you keep the dough cold and measure your strips instead of eyeballing them.
Table of Contents
- What You Need
- How to Make a Lattice Pie Crust Step-by-Step
- Common Mistakes and How to Fix Them
- Frequently Asked Questions
- How wide should lattice pie crust strips be?
- Do I need to chill the strips before making a lattice top?
- How do I keep lattice strips from shrinking in the oven?
- Should I add flour to the filling under a lattice crust?
- How do I weave pastry strips without tearing them?
- Can I make a lattice top ahead of time?
- Conclusion
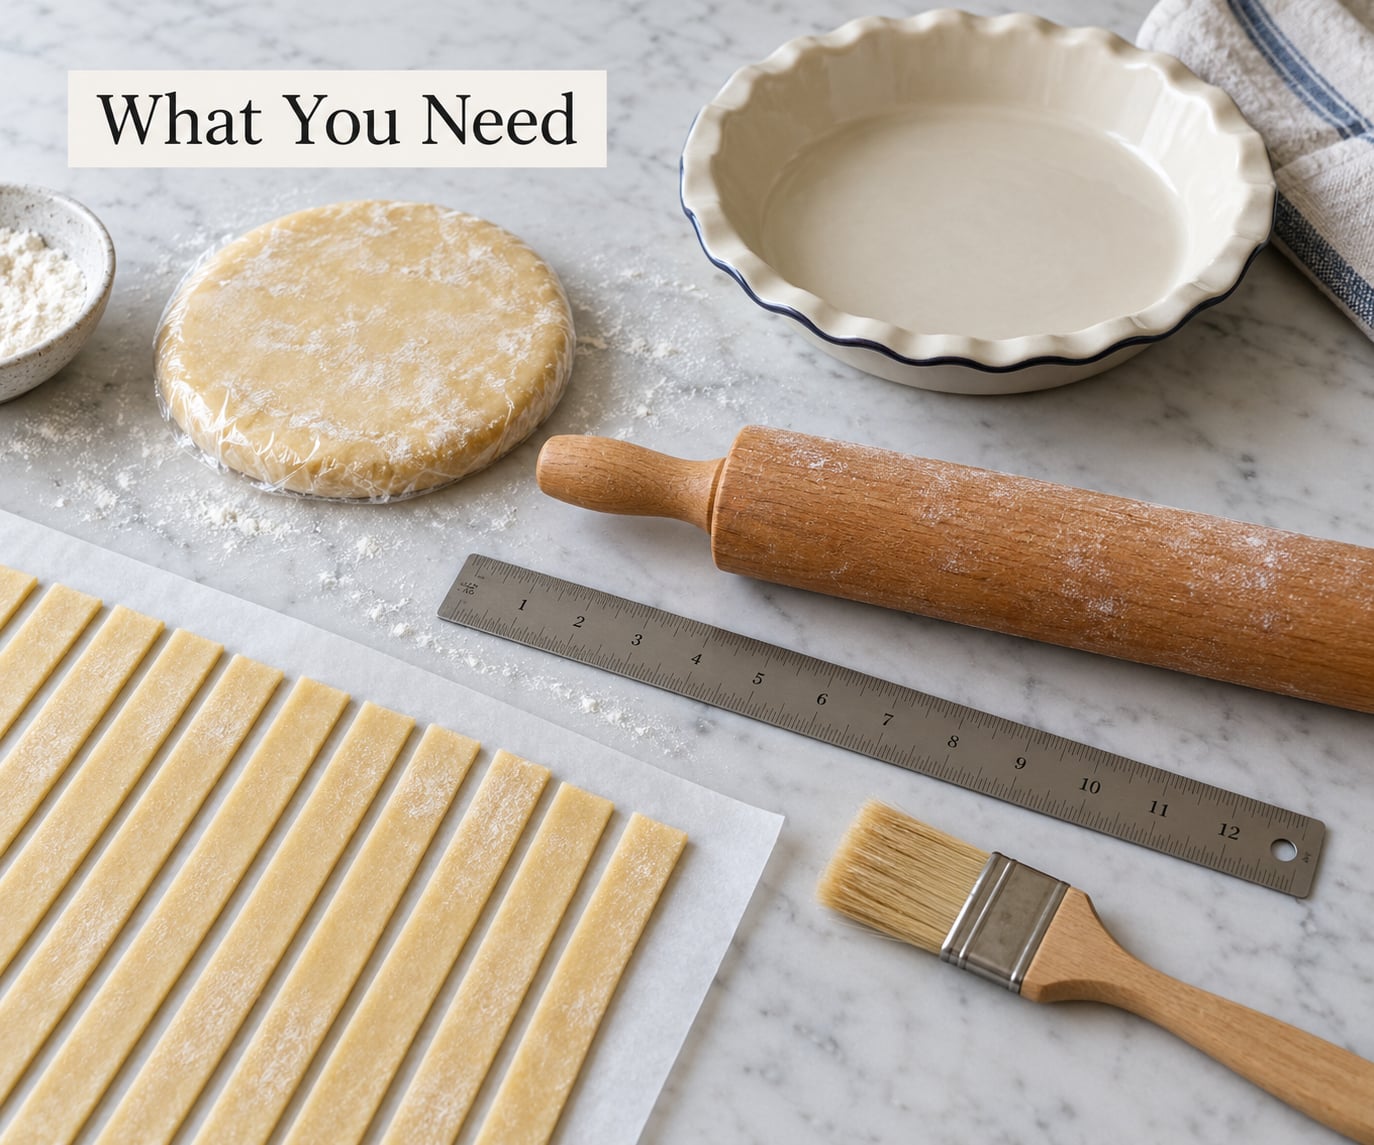
What You Need
Dough and filling
- Two discs of pie dough for a 9-inch pie, or one batch of standard double-crust dough, chilled in the fridge for at least an hour
- About 6 cups of filling — apples, cherries, peaches, rhubarb, blueberries or any mix — cooled to room temperature
- One egg and a teaspoon of water for the wash
- Coarse sugar for the crunchy finish (optional, but this is why lattice tops look expensive)
Tools
- A rolling pin at least 12 inches long
- A metal ruler or straightedge — this one tool is the difference between a tidy weave and a crooked one
- A pizza wheel or very sharp knife for the strip cuts
- A pastry brush
- A pastry cloth, or two sheets of parchment paper, for rolling and for holding cut strips
- A 9-inch pie plate and a cooling rack
- A strip of foil or a rimmed pie shield for the oven
If your dough cracks at the edge while rolling or turns sticky halfway through, that is a temperature problem with a straightforward fix — keep working cold and it behaves.
How to Make a Lattice Pie Crust Step-by-Step
The basic procedure for a lattice crust runs in this order: fit and chill the bottom crust, roll the top dough into a 12-inch circle, cut it into even strips, lay half the strips parallel across the pie, fold every other one back, lay a strip across the top, unfold, then repeat with the other set folded the opposite direction. Seal the rim, chill the assembled pie, then bake.
Prepare the Pie Dough and Filling
Take both dough discs out of the fridge 10 to 15 minutes before you roll. Fifteen minutes takes the chill off the surface so it doesn’t crack. Half an hour and the butter is soft again, which is the other half of the problem. The same restraint is what keeps a quiche with a flaky crust tender, so treat the two as one technique.
Roll the first disc into a 12-inch circle, ease it into the pie plate without stretching the sides, and crimp the bottom crust into the rim. Press the dough against the inside edge of the plate with your knuckles, because the edge is what holds the filling in later.
Now add the filling. Most bakers pack it into a mound no higher than the top of the rim, and press the fruit down firmly with the back of a spoon. That firm packing matters: loose fruit cooks down, leaves air behind it, and drops a few inches inside the pie while you are still looking at a full pie.
Shallow wells in the middle help too. A slight dip under the center of the lattice gives the strips a flat place to sit instead of a bumpy ride over chunks of fruit.
Warm filling is the single biggest reason lattices melt. Cool it first, and if you are in a hurry, put the filling bowl in the fridge for 20 minutes while you roll the top dough.
Roll and Cut Even Strips
Roll the second disc to a 12-inch circle, about 1/8 inch thick, working from the center outward so the disc stays round. A flat 12-inch circle is the useful number: it gives you strips long enough to overhang the rim by an inch on each side.
Set your ruler down and mark 1-inch intervals across the dough. Cut with the pizza wheel, moving the wheel in one long pass per cut rather than sawing back and forth, which drags the edge and makes strips narrower on one side. Lift each strip by its ends so it does not stretch.
Move the strips to a parchment-lined baking sheet as you cut them and keep them in the fridge while the filling settles. Cold strips lie flat. Room-temperature strips curl, and curled strips are the ones that wander off-center during the weave.
Strip counts by pie size:
| Pie size | Strip width | Strips each way | Total strips |
|---|---|---|---|
| 8-inch pie | 3/4 inch | 5 | 10 |
| 9-inch pie | 1 inch | 6 | 12 |
| 10-inch pie | 1-1/8 inch | 7 | 14 |
| 9-inch deep dish | 1-1/4 inch | 8 | 16 |
The leftover dough around the edge of the circle is not waste. Save it for patching tears, or roll it into the rim fold at the end.
Beginners usually do better with fewer, wider strips. Three-quarter-inch strips on a 9-inch pie are forgiving, and a wide strip needs less length to stay straight.
Weave the Lattice Pie Crust Without Tearing
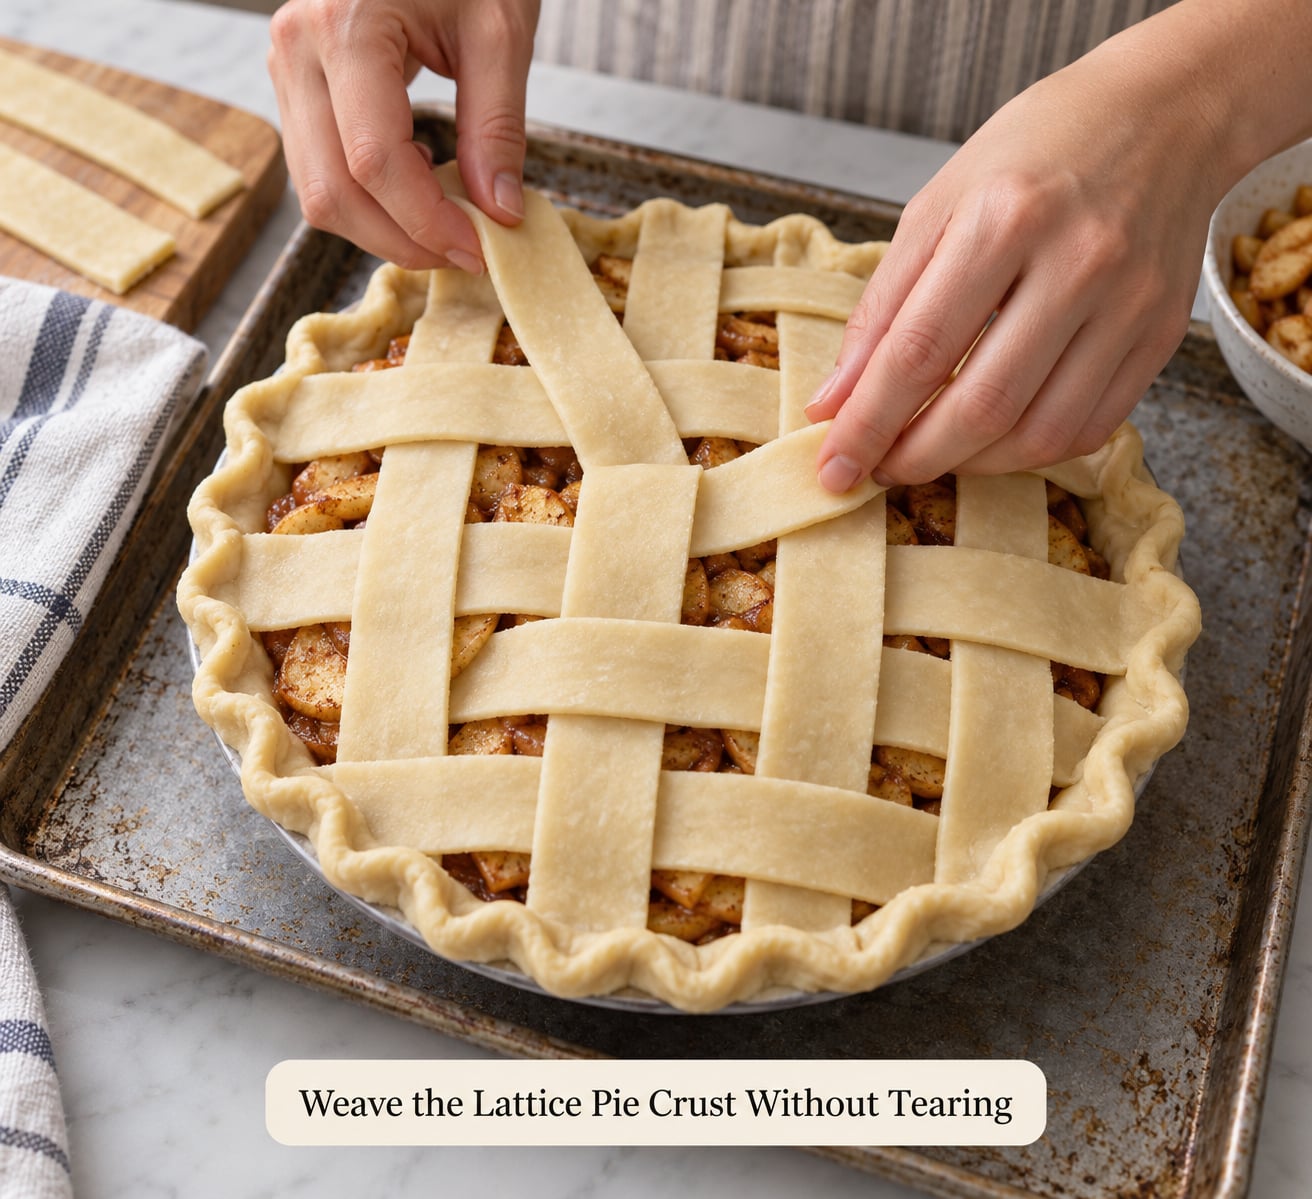
This is the part everyone wants explained once, clearly:
- Lay the first set. Place 6 strips parallel across the pie, spaced evenly, with equal overhang on both sides. Aim for roughly 1/2 inch of overhang rather than more.
- Fold back every other strip. Take strips 1, 3 and 5 and fold them toward you in a gentle arc. Keep the curve soft — a hard crease makes the strip buckle when you unfold it.
- Lay one strip across. Put a single perpendicular strip on top of the three that are still lying flat.
- Unfold. Lay strips 1, 3 and 5 back over the new strip. Do not press anything down.
- Fold back the other set. Now fold strips 2, 4 and 6 back in the opposite direction, away from you.
- Repeat. Lay the next perpendicular strip on top, then unfold 2, 4 and 6 over it.
- Alternate the over-under pattern. For each new strip, flip which set sits on top so the weave locks together instead of every strip running parallel.
The step people miss: you never press the strips onto the pie. They stick as the pie bakes, and pressing them now just pushes dough into your filling and drags it out of position.
Overhang is what holds the lattice down. If your strips end flush with the rim, they have nothing to grip and they shrink inward in the oven. Trim only after crimping.
If a strip tears, patch it with a scrap of dough and a single dab of ice water on the seam. If the strips start sticking to the filling, stop, put the pie in the fridge for 15 minutes, and continue. Nobody sees a 15-minute break in your evening.
For warm filling, weave the lattice on a sheet of plastic wrap laid over a plate, slide the whole plate into the freezer for 20 minutes, then invert it onto the pie in one motion. The frozen lattice drops onto the filling solid and stays put.
Trim, Crimp, and Finish the Pie
Fold the overhanging ends of each strip back along themselves, then tuck the folded edge down against the rim so the top crust meets the bottom crust with no gap.
Crimp or flute the edge now. For a crimp, press the rim between your thumb and forefinger all the way around. For a flute, use the back of a paring knife to press a scalloped pattern into the folded edge. Both seal the pie; fluting looks more finished, crimping is faster.
Brush the whole top with egg wash and scatter coarse sugar over it. The wash gives you that glossy deep-golden surface, and the sugar keeps the crust from looking pale once it cools.
Vent the pie. The lattice gaps do most of the work, but if your filling is especially juicy, cut a few short slits in the thickest parts of the dough between strips.
Chill the assembled pie for 20 to 30 minutes before it goes in the oven, or up to two days ahead if you keep it covered. That pre-bake chill sets the butter, firms the crimp, and cuts down on slumping and shrinking.
Bake at 425F for 15 minutes, then drop the oven to 375F and bake 40 to 50 minutes more, until the filling bubbles thickly and the crust is deep golden. A lattice top bakes in the same time as a solid one. Wrap the rim in a strip of foil or pop on a rimmed pie shield once the edges start coloring, so they don’t burn before the filling sets.
For fruit pies, thick bubbling is the doneness signal. For savory latticed pies such as chicken pot pie, the filling needs to reach 165F in the center.
Common Mistakes and How to Fix Them
Strips melt into the filling. Warm dough, or warm filling, or both. Chill the filling to room temperature, rest the strips 15 minutes in the fridge after cutting, and work in batches if the kitchen is hot. If strips are already sagging, they will not recover — start the lattice over with new strips.
The crust shrinks and the edges fall off. Dough got handled too much, or strips got stretched as you moved them, or the bottom crust wasn’t sealed. Lift strips by the ends, don’t pull them across the counter, and press the bottom crust firmly into the plate rim. An hour of fridge chill before baking also helps, and our guide to making a pie crust that does not shrink covers the blind-bake side of the problem in more detail.
The top bakes soggy. Too much liquid, or too long in the oven. Use firm fruit rather than very ripe fruit, pack it tight, and pull the pie when the crust is deep golden — fruit filling keeps cooking for a few minutes as it cools. Controlling released moisture is the same problem as in stuffing that is not soggy, just approached from the other direction.
The weave looks crooked. Strips cut freehand. Use the ruler for measurement, lay the first strip about 1/2 inch in from the rim, and space the rest with your eye using that first gap as your reference. Even spacing beats even strips every time.
Filling spills over the rim and burns on the oven floor. The pie was overfilled, or the rim was left uncovered. Fill no higher than the rim, keep the foil shield on long enough to protect the edge, and set the pie plate on a baking sheet so any leak lands on the sheet instead of your oven.
The dough is tough or crumbly. Overworked. Handle it as little as possible, flour the surface lightly rather than the dough, and if it softens while you work, give it 20 minutes in the freezer rather than the fridge, which won’t firm it up fast enough.
One last habit worth building. Photograph your lattice before it goes in the oven. My first one leaned noticeably to one side and still looked good coming out — that photo is a useful benchmark for the next pie, and it takes two seconds.
Frequently Asked Questions
How wide should lattice pie crust strips be?
For a standard 9-inch pie, cut strips 1 inch wide and about 1/8 inch thick, which gives six strips running each direction and twelve in total. Beginners often do better with wider 3/4-inch strips, since a wide strip is less likely to stretch or tear when you move it. Measure with a metal ruler instead of freehand, and cut each strip in one steady pass with a pizza wheel rather than sawing back and forth.
Do I need to chill the strips before making a lattice top?
Yes, and this is the step that separates a neat lattice from a sloppy one. After cutting, lay the strips on a parchment-lined baking sheet and refrigerate them 15 to 20 minutes while the filling settles. Cold strips lie flat and hold their shape; room-temperature strips curl and drift out of position mid-weave. If the kitchen is warm, or your filling is hot, chill closer to 30 minutes.
How do I keep lattice strips from shrinking in the oven?
Shrinking comes from stretched dough and warm butter, not from the weave itself. Roll and handle the dough as little as possible, lift strips by their ends rather than dragging them, and leave at least half an inch of overhang past the pie rim so the strips have something to grip. Chill the assembled pie 20 to 30 minutes before baking. A firmly sealed bottom crust helps too, since the top is anchored to it.
Should I add flour to the filling under a lattice crust?
Not as a thickener for taste, but a light hand is useful. Two to three tablespoons of cornstarch mixed into a 6-cup fruit filling cook the juices down into a jam rather than letting them soak the bottom crust. Skip it if you have already reduced the filling on the stove or added fresh berries that release water during baking. Too much flour turns the filling gummy and dulls the fruit flavor.
How do I weave pastry strips without tearing them?
Keep the dough cold, lift strips by their ends, and never pull one across the counter to reposition it — lift and lay instead. When you fold a strip back, arc it gently instead of creasing it sharply, because a hard crease buckles when it unfolds. If a strip tears anyway, patch it with a scrap of dough and one dab of ice water on the seam, then continue. Soggy dough tears more than dry dough, so re-chill rather than flinging flour at it.
Can I make a lattice top ahead of time?
Yes, and it is actually better the day before. Assemble and crimp the pie, cover it loosely so nothing touches the lattice, and refrigerate up to two days. Do not freeze an assembled fruit pie unbaked; the filling texture suffers, and the crust goes limp on thawing. Bake from the fridge and add 5 to 10 minutes to the baking time, since the pie starts cold. Egg wash goes on right before baking, not before chilling.
Conclusion
The first thing to do is chill your dough for a full hour and measure your strips with a ruler rather than by eye. Those two habits solve most of what goes wrong. Then roll the top disc to a 12-inch circle, cut 1-inch strips, rest them cold, weave gently without pressing or stretching, and crimp before you chill the pie again and bake it.
The weave can only be shown so well in words, but the sequence itself is short: lay, fold every other one, lay one across, unfold, and repeat with the other set folded the opposite way. Your first one will probably lean a bit. That is fine — it still tastes like pie.