
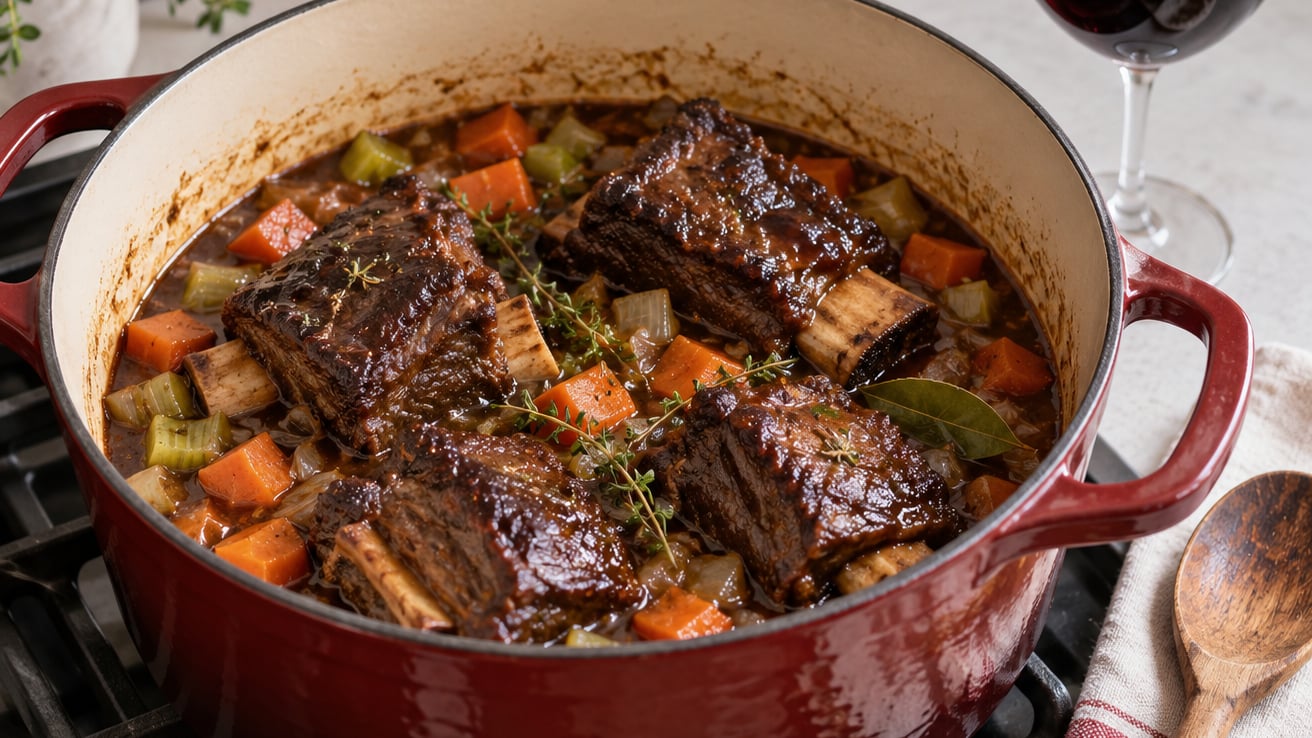
Braising short ribs means searing them hard in a heavy pot, cooking onions, carrots and garlic in the fat left behind, then adding wine and beef stock and holding the covered pot at a bare simmer for two to three hours until the meat gives way to a spoon. It takes about 3.5 hours total, and only 35 minutes of that is actual work.
The reason this method works is collagen. Short ribs are a heavily worked cut, full of connective tissue that stays chewy no matter how hot you sear them. Gentle, wet heat held just below a boil converts that collagen into gelatin, which is what gives you fall-off-the-bone texture and a sauce that thickens on its own.
One heavy pot with a tight lid is all the equipment you need. If your Dutch oven is only oven-safe to 350°F (175°C), do the whole thing on the stovetop as described below.
Table of Contents
- What You Need
- Step-by-Step: How to Braise Short Ribs Until Tender
- Common Mistakes and How to Fix Them
- Tips for Better Braised Short Ribs
- Frequently Asked Questions
- How long does it take to braise short ribs?
- Do I need to brown short ribs before braising them?
- Can I braise boneless short ribs, and will they take the same time?
- What liquid is best for braising short ribs?
- How do I know when braised short ribs are done?
- Can I make braised short ribs in a slow cooker or pressure cooker?
- Conclusion
What You Need
For a standard 5- to 6-quart Dutch oven, this feeds four generously. The quantities scale roughly linearly, so double everything for eight.
- The meat: 3 to 4 pounds of bone-in English-style beef short ribs, or about 2.5 pounds boneless.
- Fat: 2 tablespoons neutral oil such as canola or grapeseed, plus the rendered beef fat from the ribs.
- Mirepoix: 1 large yellow onion diced, 2 carrots cut into thick coins, 3 celery stalks sliced.
- Aromatics: 4 garlic cloves smashed, 2 tablespoons tomato paste.
- Braising liquid: 1 cup dry red wine plus 2 cups low-sodium beef stock, which comes out to roughly 1 cup of liquid per pound of ribs. That is enough to come most of the way up the meat without fully submerging it.
- Herbs: 3 fresh thyme sprigs, 1 bay leaf, and a small rosemary sprig if you like it.
- Seasoning: 2 teaspoons kosher salt and 1 teaspoon freshly ground black pepper for the meat, more salt for the sauce at the end.
- Equipment: one heavy pot with a lid, a Dutch oven or braiser, plus a slotted spoon, a ladle and a fine strainer if you want a smooth sauce.
Substitutions are easy here. No wine means 3 cups of beef stock plus 2 tablespoons of balsamic vinegar added at the end. Beer works in place of wine, and so does dry white. For gremolata-style brightness, keep a lemon and a handful of chopped parsley nearby to finish the dish.
If the meat comes straight from the fridge, salt it and leave it at room temperature for 20 minutes while you chop the vegetables. Cold meat steams instead of browning.
Step-by-Step: How to Braise Short Ribs Until Tender
Total time: about 3.5 hours. Active time: about 35 minutes. You can also do the browning stages a day ahead and keep the sealed pot in the fridge until you need it.
1. Choose and Season the Short Ribs
Bone-in English-style ribs have the most flavor and the most collagen, and they hold their shape through a long braise. Boneless supermarket short ribs cook faster and are easier to eat, but they need roughly 30 to 45 minutes less time or they turn to mush. Korean-style flat-cut ribs are thin and cook much faster still, closer to 90 minutes in liquid.
Trim the ribs well. Most are packaged with a thick cap of external fat and membrane that will never render fully and just makes the finished dish greasy. Pat each piece dry with paper towels, which is the single most important thing you can do for browning.
Season generously on all sides with the salt and pepper. There is no need to rinse meat before cooking, and doing so only spreads surface bacteria around your sink while rinsing away nothing useful.
Lay the ribs bone-side down when you sear them. The flat meat side takes color faster and the bone acts as a heat sink to hold contact with the pot. You can flip them at the end.
2. Brown the Ribs in Batches
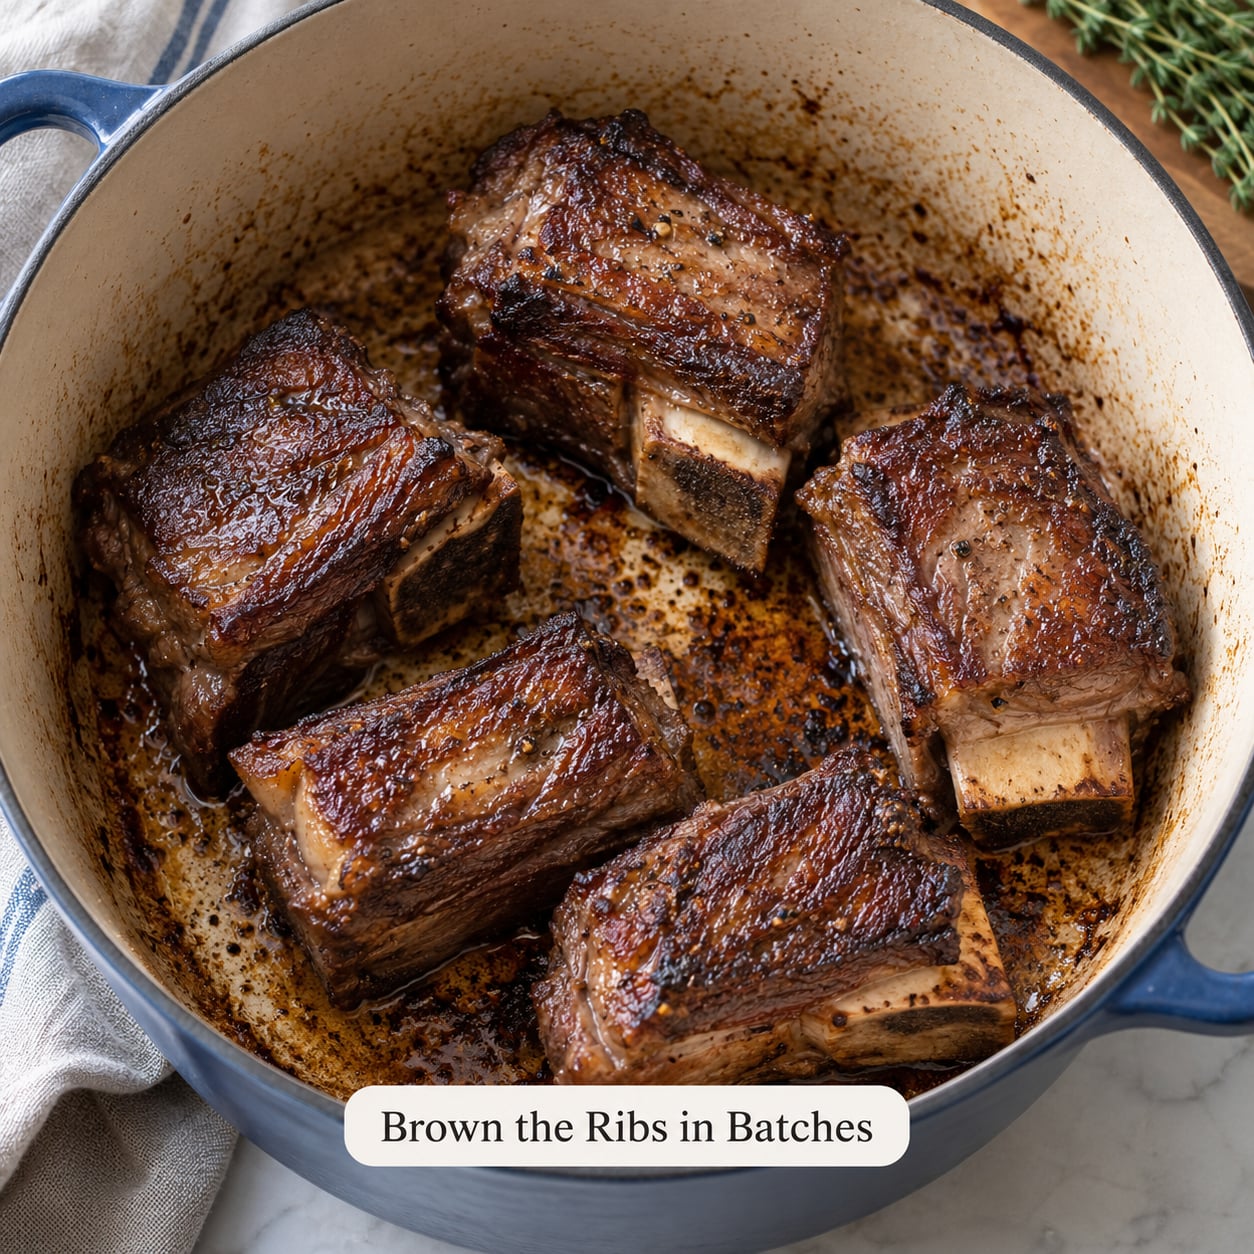
Heat the oil over medium-high until it shimmers. The pot should be hot enough that a drop of water skitters, but not smoking, or the fond will taste bitter.
Add the ribs in a single layer with space between them. Two or three pieces at a time is normal for a 6-quart pot. Crowding drops the temperature, the pot steams the meat, and you end up with pale grey ribs and no crust.
Leave each side alone for about 2 minutes. When the meat releases easily from the pot without scraping, it is ready to turn. Moving it sooner pulls the crust off with it. You are looking for deep mahogany brown on the fat cap and the flat side; pale tan means it needs another minute.
Transfer the browned ribs to a plate. You will notice a good inch of fat and browned bits collected in the pot. That fond is the flavor base for the whole dish, so resist the urge to wipe it out.
3. Cook the Aromatics and Deglaze the Pot
Lower the heat to medium. Add the onion, carrot and celery to the fat in the pot and cook for 6 to 8 minutes, stirring now and then, until the onion is soft and just beginning to color at the edges. Let the carrots keep some crunch, since they finish cooking alongside the meat.
Push the vegetables to one side, add the garlic and tomato paste to the cleared center and cook for 1 minute until the paste darkens from red to brick and smells sweet rather than raw.
Pour in the wine. Scrape the bottom with a wooden spoon as it bubbles, loosening every browned bit. Let it reduce by about half, roughly 2 to 3 minutes. If the fond catches and starts smoking, add a splash of stock immediately and lower the heat.
4. Add the Braising Liquid and Bring It to a Simmer
Add the beef stock, tuck in the thyme, bay leaf and rosemary, and return the ribs to the pot with the vegetables. Arrange them so they sit in one layer if you can, so the liquid can circulate and the heat reaches every piece evenly.
Bring the pot to a simmer on the stovetop before you cover it, then drop the heat to the lowest setting your stove allows. You want to see an occasional lazy bubble every few seconds, not a rolling boil. A hard boil moves the meat around and can toughen the surface before the collagen has a chance to break down.
Fit the lid on. If it does not sit flush, set a heatproof plate or a folded towel on top to hold in steam, since escaping heat slows the cook and dries the top of the meat.
5. Braise Until the Meat Gives Way
Keep the pot covered at a bare simmer for 2.5 to 3.5 hours. Bone-in English-style ribs usually need the full 3 hours; boneless cuts are usually ready between 2 and 2.5 hours.
Three tests tell you when the collagen has done its work. Slide a spoon between the meat and the bone: it should enter with no resistance. Push chopsticks through the thickest part and they should pierce without much force. Or probe the center, where you are looking for 190 to 205°F (88 to 96°C), well past the 145°F (63°C) USDA minimum for whole cuts, because collagen conversion happens at the higher end.
The meat should pull cleanly from the bone and hold together only loosely. That is more tender than most recipes ask for, and it is the texture worth aiming for.
You can cook well past this point without ruining the dish, which is one of the great things about braising. The meat gets looser rather than hard, and the flavor usually improves.
6. Remove the Ribs and Finish the Sauce
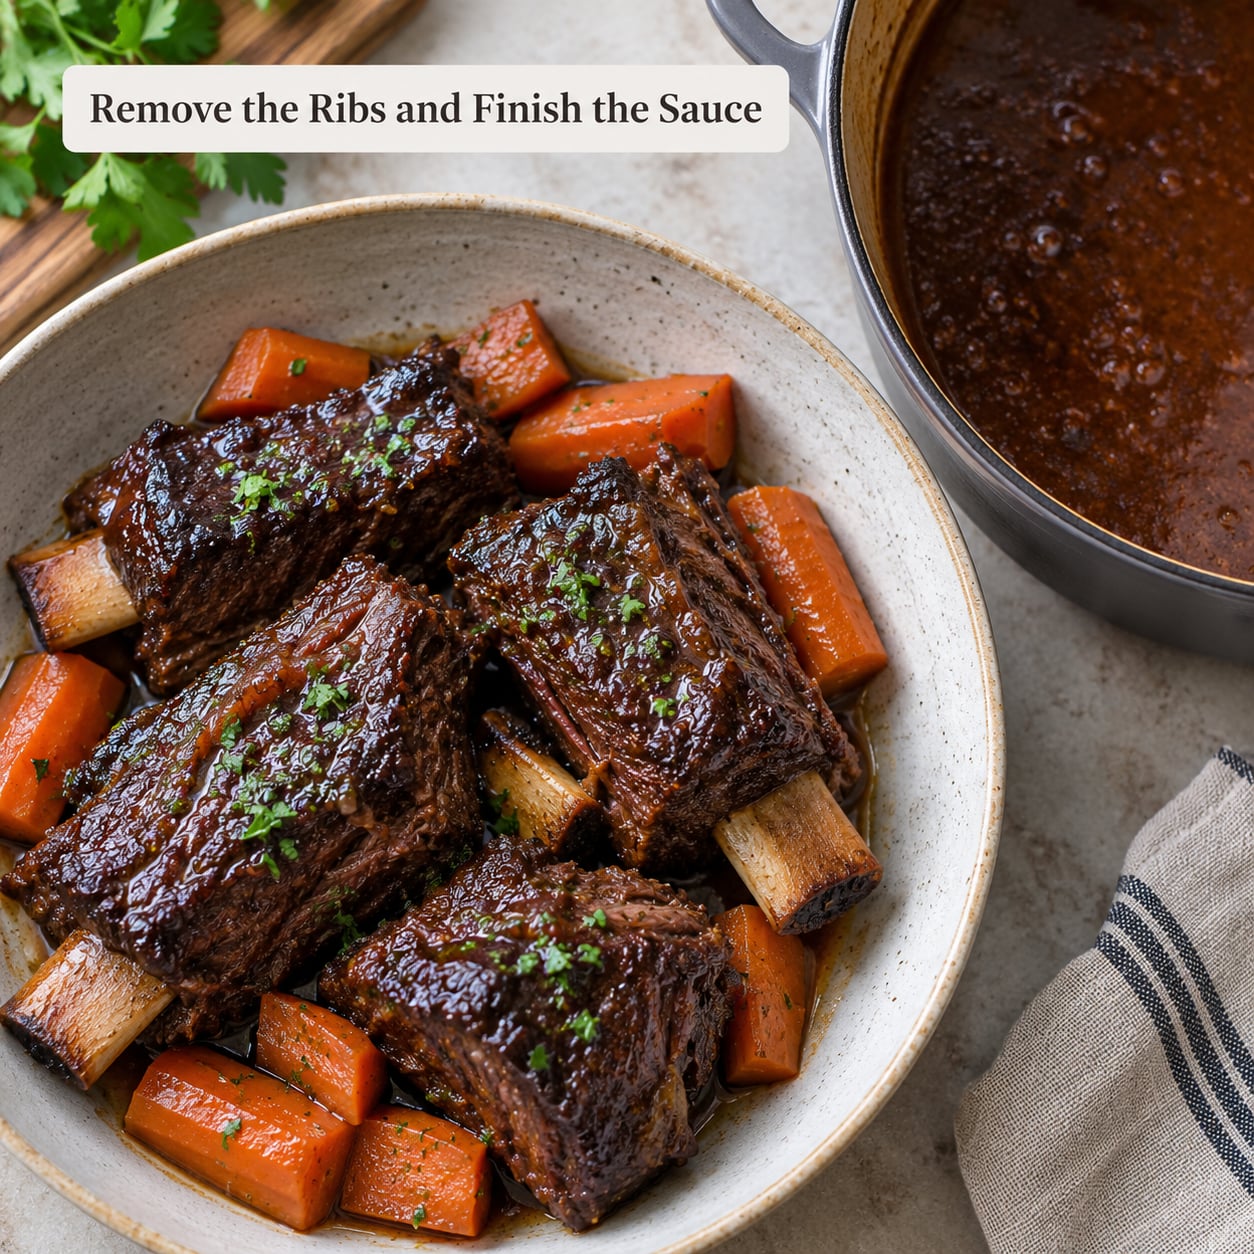
Lift out the ribs and set them on a warm platter, loosely tented with foil. Remove the herbs and, if you like a smooth sauce, lift out the cooked vegetables or strain them out.
Now deal with the fat. Short ribs render a great deal, and a slick layer across the sauce is unpleasant. The easiest method is a small spoon or a separating funnel held above the pot; a few patient minutes will get you most of it. Chill the leftovers overnight and the fat hardens into a cap you can lift off in one piece, which is the better plan when you are cooking ahead.
Reduce what remains over medium-high heat, uncovered, until it coats the back of a spoon and holds a line for a second before closing, roughly 10 to 15 minutes. It will thicken noticeably as it cools, so stop a shade shy of your target.
If the sauce is still thin at the end, whisk in a slurry of 1 tablespoon cornstarch mixed with 2 tablespoons cold stock. For a silkier finish, whisk in a tablespoon or two of cold butter off the heat, or a spoonful of the rendered fat skimmed from the pot. Taste for salt last; braising liquid usually needs more than you expect.
Serve the ribs over pappardelle, creamy polenta or mashed potatoes with the sauce poured over, and finish with chopped parsley and lemon zest if you like.
Common Mistakes and How to Fix Them
- The ribs came out tough. Almost always an under-braise or too-low a heat. Hold a real simmer, not a tepid one, and give bone-in ribs the full three hours. Cutting the heat to nothing on a low gas flame can extend the cook past four hours.
- No browning. The meat was wet, the pot was crowded, or you moved the pieces too early. Dry the ribs thoroughly, work in batches, and wait until the meat releases itself.
- The fond is bitter and black. You seared too many pieces at once and the fond cooked past golden into scorched. Pull out the burnt bits and, if the taste is still bitter, start the liquid over with fresh onions.
- The sauce is thin and watery. Reduce it uncovered and stir more often as it thickens. A starch slurry or a final butter whisk fixes it in seconds.
- A greasy film sits on top. Skim it with a spoon before serving, or defat it the next day when the fat has firmed in the fridge.
- The meat fell apart. You likely went well past done. Not a failure, but serve it over something sturdy like polenta rather than trying to plate whole pieces.
- Too much liquid diluted the flavor. You added more than a cup per pound. The liquid should come most of the way up the ribs, not well past them.
- The sauce tastes flat. Reduce it and add acid at the end: a squeeze of lemon, a splash of vinegar, or a spoon of mustard balances the richness.
Tips for Better Braised Short Ribs
Sear ahead. On a Saturday you can brown the ribs, build the aromatics and deglaze in about 30 minutes, cover, and refrigerate the whole pot. Reheat it covered over low heat the next day and continue from there. Many home cooks report the dish tastes better on day two.
Choose the wine for the sauce, not for the alcohol. A dry red with body, such as Pinot Noir or Cotes du Rhone, gives the finished sauce a rounded flavor after hours of cooking. Anything fruity and sweet turns cloying over a long braise.
Use vegetables that hold their shape. Carrots, parsnips and whole shallots soften but keep their form through three hours. Peas and asparagus do not belong in the pot; add them in the last 10 minutes instead.
Rest the finished ribs for at least 15 minutes before serving. The gelatin in the sauce sets slightly as it cools, which gives you more time to plate without everything running together.
Store leftovers within two hours of cooking and use them within three to four days, per USDA guidance. Keep the meat submerged in its sauce in a shallow container so it reheats evenly, and warm it gently with a splash of stock rather than at full heat, which dries the edges out.
Make it a make-ahead dish. Braise a day or two ahead, defat the sauce cold, then reheat covered for 30 to 40 minutes at 300°F (150°C). Leftover short ribs are excellent on bread with gruyere, folded into pasta sauce, or chopped into tacos with pickled onion.
Frequently Asked Questions
How long does it take to braise short ribs?
Bone-in English-style short ribs need about three hours of covered simmering at 325°F (165°C) to become fall-off-the-bone tender. Boneless supermarket cuts usually need only two to two and a half hours, and thin Korean-style flat-cut ribs can be done in about 90 minutes. Test with a spoon between the meat and bone rather than trusting the clock alone.
Do I need to brown short ribs before braising them?
Yes, and it is the step most worth doing well. Browning creates the Maillard crust that gives braised short ribs their deep savory flavor, and the fond left in the pot becomes the base of the braising liquid. Pat the ribs dry, work in small batches so the pot stays hot, and wait until each side releases before turning.
Can I braise boneless short ribs, and will they take the same time?
Boneless short ribs braise beautifully and are easier to eat, but they contain less connective tissue than bone-in cuts, so they need less time. Check them at two hours and pull them as soon as they yield to a spoon. Leave them for the full three hours and they will likely fall into shreds.
What liquid is best for braising short ribs?
Dry red wine combined with low-sodium beef stock is the classic choice, using roughly one cup of liquid per pound of ribs. Wine contributes acidity and depth while stock contributes body. For a wine-free version, use three cups of stock plus a tablespoon of balsamic vinegar stirred in at the end. Beer also works in place of wine.
How do I know when braised short ribs are done?
Three cues agree with each other: a spoon slides between the meat and bone with no resistance, chopsticks pierce the thickest part easily, and a probe reads 190 to 205°F (88 to 96°C) in the center. That reading sits far above the 145°F USDA minimum for whole cuts because tenderizing depends on collagen converting to gelatin, not on killing bacteria.
Can I make braised short ribs in a slow cooker or pressure cooker?
A slow cooker works well on low for 8 to 10 hours, and a pressure cooker at high pressure for about 45 minutes followed by a 20-minute natural release. Both skip the browning flavor unless you sear the ribs first in a skillet, so do that step regardless. Finish the sauce on the stovetop afterward so you can reduce it to the thickness you want.
Conclusion
Braising short ribs comes down to three things: a hard sear in small batches, aromatics and wine cooked in the same pot, and a long covered simmer that never becomes a boil. Start by browning two or three ribs at a time until the fat caps are deep brown, then hold the pot just below a simmer for about three hours.
Test with a spoon rather than a timer, skim the fat, and reduce the liquid until it coats a spoon. That is how to braise short ribs well enough that people ask for the recipe.