
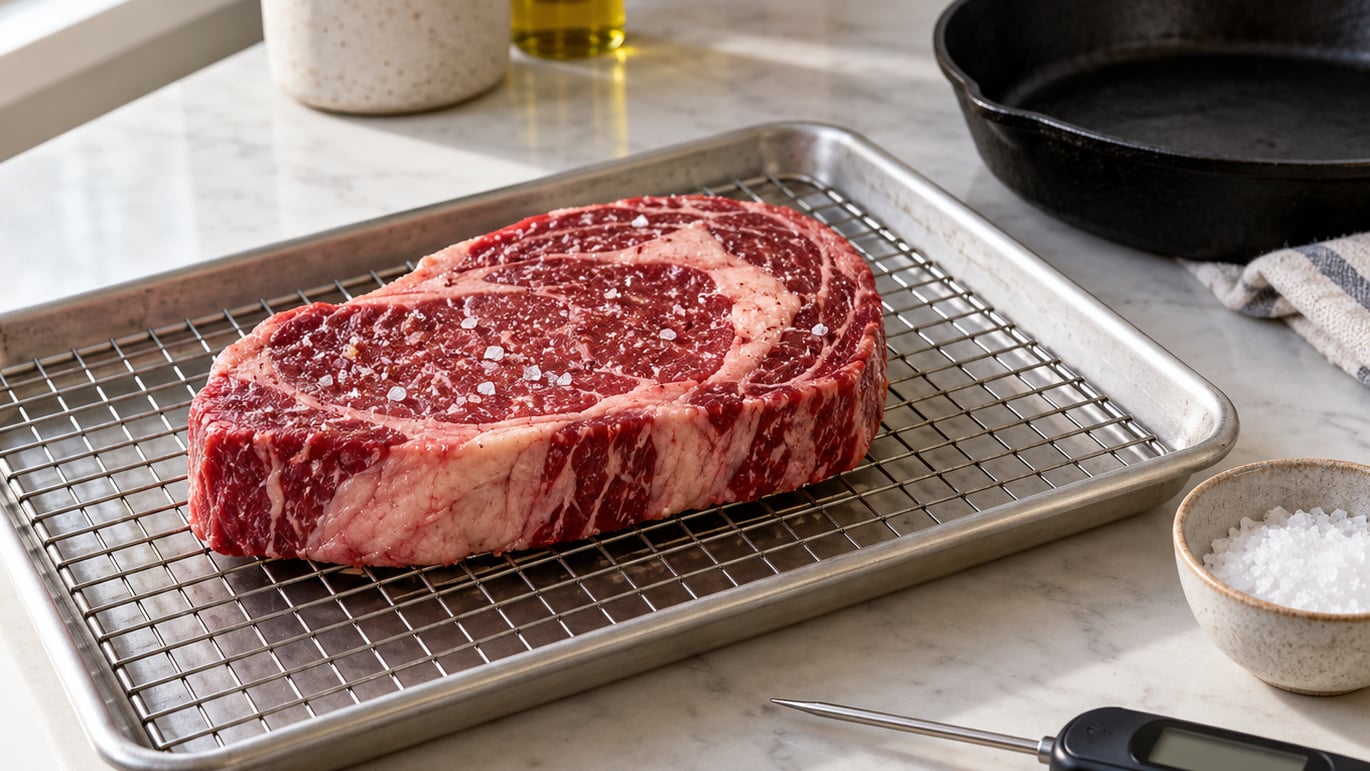
Reverse searing means cooking a steak low and slow in the oven first, then finishing it in a very hot skillet for under two minutes. The low stage brings the whole steak to temperature evenly, and the hot pan builds the crust. From prep to slicing it runs about 45 to 75 minutes, and most of that is hands-off. If you take one thing from this guide, keep an instant-read thermometer in your hand from start to finish. That single tool is the difference between a good steak and a guess.
Most of the trouble I see with this method comes down to one thing: people cook by time instead of by temperature. A reverse-seared steak is a two-stage cook, and the second stage moves fast enough that a few degrees of error shows up on the plate. Here is the whole method, with the numbers attached.
What You Need
You do not need a bag of specialty gear. You need a thick steak, a thermometer, and a way to get very hot metal.
- A steak at least 1.5 inches (4 cm) thick. Ribeye, New York strip, T-bone, porterhouse, tomahawk, and tri-tip all work well. Below an inch the oven stage finishes before a crust can form.
- An instant-read probe thermometer. This is the one item that is not optional. A leave-in probe is a nice addition when the steak is thick and the oven stage runs long.
- A rimmed baking sheet and a wire rack. The rack lifts the steak so hot air circulates underneath and the underside cooks at the same rate as the top.
- A cast iron skillet, cast iron griddle, or heavy stainless pan. Anything that holds heat and tolerates a hard sear.
- A high smoke point oil. Avocado, grapeseed, canola, or peanut oil. Olive oil is fine, but it burns first and tastes bitter once it does.
- Coarse salt and freshly ground black pepper. Plus a small amount of butter and a few garlic cloves or rosemary sprigs if you want to baste.
- Paper towels and tongs. The towels matter. Drying the surface is half the crust.
Substitutions when you do not own cast iron. A flat cast iron or carbon steel griddle works the same way, and so does a preheated stainless skillet. You can also finish under the broiler with the rack about three inches from the element, though you lose control once the door is closed, so pull early. For the low stage, a convection oven runs about 25F (14C) cooler, so set it to 225F (110C) instead of 250F (130C). On a grill, build a two-zone fire and use the indirect side for stage one, the direct side for the sear. A pellet smoker is fine for the low stage but rarely gets hot enough on the main grate to sear properly.
If you have never worked with a cast iron pan at all, our guide to how to cook a steak in a cast iron skillet covers the seasoning and heat basics first.
Step-by-Step: How to Reverse Sear a Steak
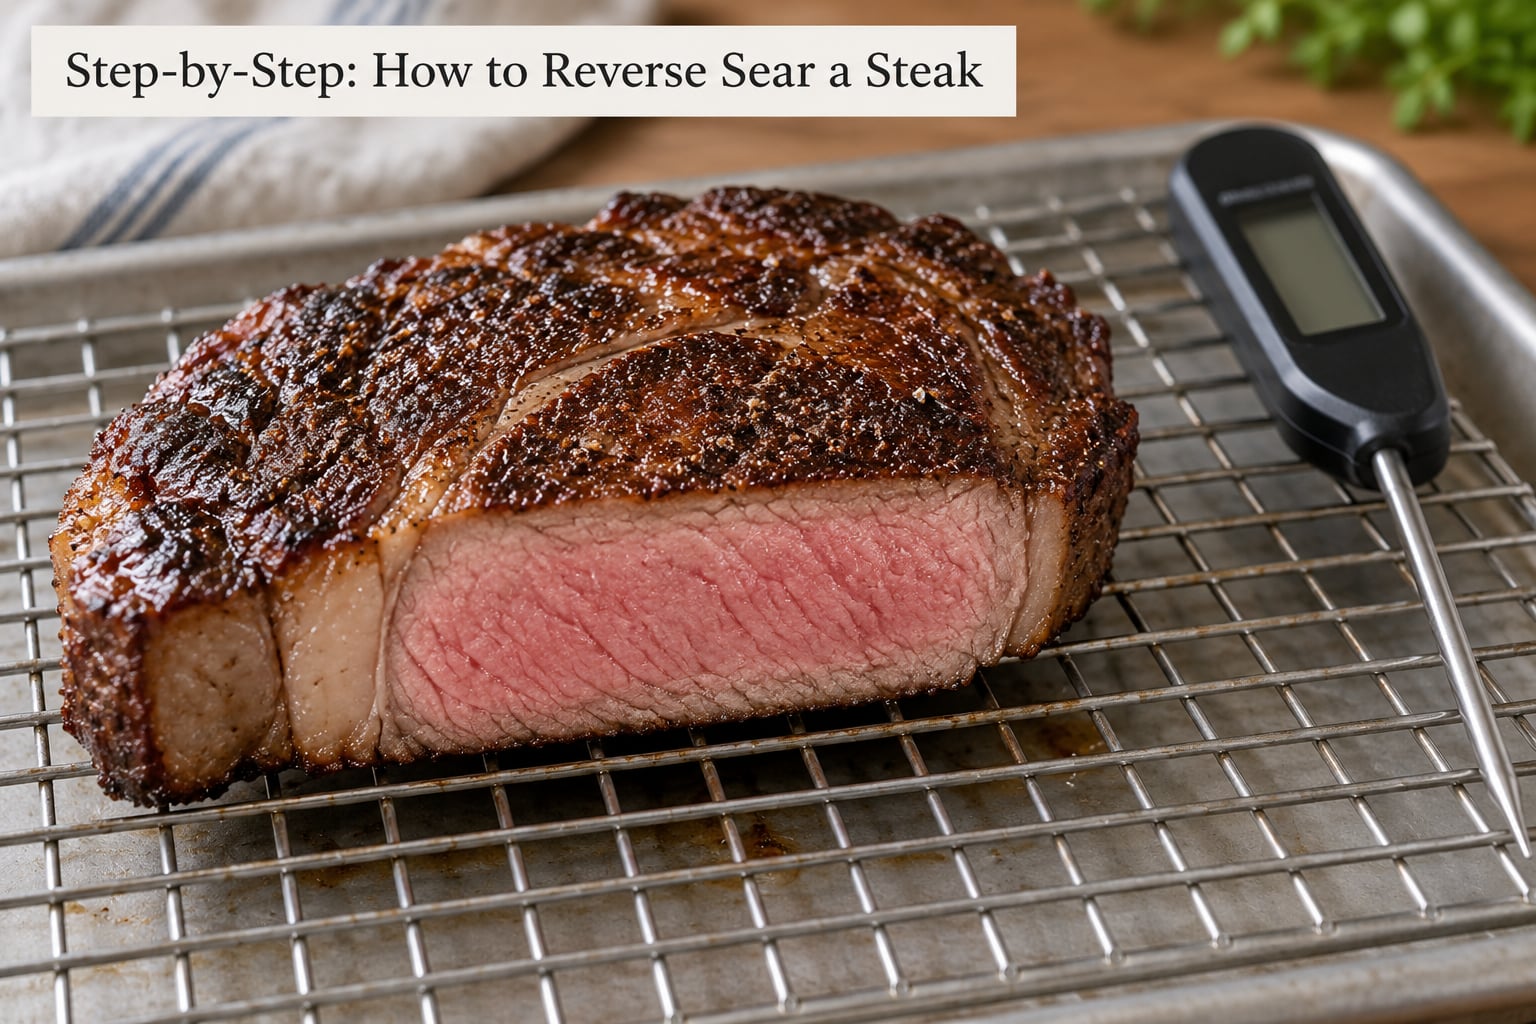
1. Choose and Season the Steak
Start with a steak at least 1.5 inches thick, trimmed if the fat cap is thicker than a quarter inch. Very thick edge fat shields the meat and stops the crust from browning underneath it.
Pat both sides completely dry with paper towels, then season. For the simplest version, salt the steak right before it goes in the oven. For a noticeably better result, dry brine it: salt both sides generously, set it uncovered on a wire rack in the fridge for 2 to 24 hours, and let it lose surface moisture. The dry surface is what allows the Maillard reaction to start, and 12 to 24 hours in the fridge is enough to noticeably firm up the exterior.
Skip the oil at this stage. A light coat of neutral oil right before the sear is all you need, and oil applied before a long oven stage just runs off and drips onto the sheet. Save the pepper for the end, since long cooking dulls it.
Do not bring the steak to room temperature first. Fridge-cold meat actually sears better, because the temperature difference between the surface and the pan is larger. A short tempering step matters for thin cuts cooked fast, not for a 90-minute oven stage.
2. Bake Low and Slow: How to Reverse Sear a Steak in the Oven
Heat a conventional oven to 250F (130C) and put the rack in the middle. A 250F (130C) oven with a 10-minute uncovered rest after baking gives the most reliable results. Push it to 275F (135C) only for a steak under 1.5 inches, and drop to 225F (110C) for anything over 2.5 inches thick or for a tri-tip, where a hot oven dries the outside before the center catches up.
Set the steak on the rack, rack over the rimmed sheet, and put the probe in the thickest part at an angle. Push the tip in from the side, not straight down, so the reading tracks the center rather than touching bone.
Pull the steak out 10 to 15F (6 to 8C) below your target. The steak keeps cooking after it leaves the oven, and the sear adds more on top of that. This is where nearly everyone overcooks. Someone who pulls at 113F and finishes at 125F ends up with a medium steak and thinks the reverse sear failed. The method worked fine. The pull temperature was too high for a long sear.
Two separate heat rises are working in your favor here. Residual heat in the steak after it leaves the oven accounts for most of it, and the sear adds a few more degrees on top, so a 1.5 inch steak pulled at 120F (49C) will land somewhere around 130F (54C) when you slice it. The temperature also climbs faster in a thick steak than a thin one, which is why the same pull number does not apply to a tomahawk and a 1.5 inch strip.
Low heat is what makes the first stage work. Gentle oven heat raises the center to temperature at nearly the same rate as the surface, so collagen relaxes and the muscle fibers do not seize the way they do under a hard early sear. You end up with edge-to-edge doneness, which is the whole point of the method.
Here are the pull and finish targets for a steak roughly 1.5 to 2 inches thick, baked at 250F (130C). Times are a rough estimate only. The thermometer decides, not the clock.
- Rare: pull at 105 to 110F (41 to 43C), finish at 115 to 120F (46 to 49C), about 20 to 25 minutes.
- Medium-rare: pull at 115 to 120F (46 to 49C), finish at 130 to 134F (54 to 57C), about 25 to 30 minutes.
- Medium: pull at 120 to 125F (49 to 54C), finish at 135 to 140F (57 to 60C), about 30 to 35 minutes.
- Medium-well: pull at 130 to 135F (54 to 57C), finish at 145 to 150F (63 to 66C), about 35 to 40 minutes.
- Well done: pull at 145 to 150F (63 to 66C), finish at 160 to 165F (71 to 74C), about 40 to 45 minutes.
Add about 8 to 10 minutes for each extra half inch of thickness. A probe in a cold steak reads low for the first couple of minutes, so give it time to catch up before you panic.
Check your thermometer before you trust it. Most digital probes are accurate to within a degree or two, but a battery that has been sitting for a year is not. Drop the probe into ice water and read 32F (0C). Boiling water is a second check, though it reads lower than 212F (100C) at altitude.
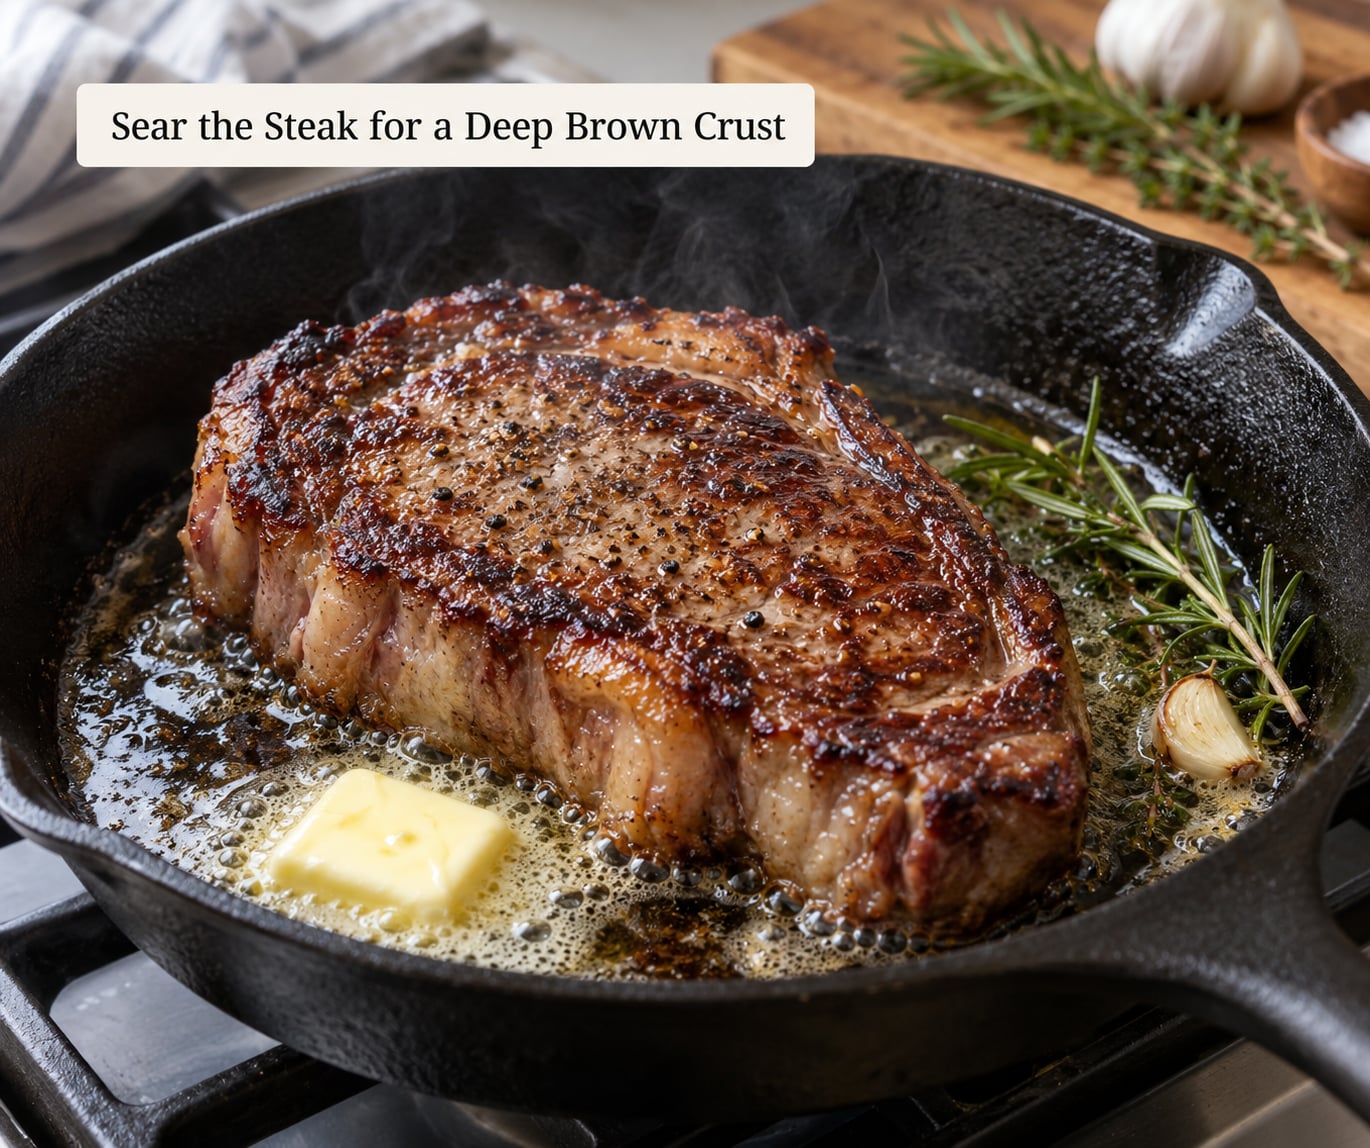
3. Sear the Steak for a Deep Brown Crust
Take the steak out and leave it uncovered on the rack for 10 minutes. This is the step people skip, and it is doing real work. The rest lets surface moisture evaporate and drops the exterior a few degrees, so the fat renders rather than smokes. A steak straight from the oven steams instead of browning, and the result is a grey crust.
While it sits, get the pan seriously hot. Five minutes on a burner set to high is a decent start for cast iron, but do not trust the clock. If you have no infrared thermometer, drop half a teaspoon of water into the pan. If it skates across the surface and evaporates in about five seconds, the pan is close to 600F (315C) and ready. If it sits in a puddle, give the burner another two minutes.
Add a thin layer of high smoke point oil and let it shimmer, not smoke. Lay the steak away from you and press it flat for two seconds. Do not move it for 45 to 60 seconds. Then lift the edge to check the color, flip, and give it the same 45 to 60 seconds on the second side. A thick tomahawk can take 90 seconds a side. Tongs held on the curved edge for the last few seconds sear that band too.
If you would rather do the low stage outside, a two-zone grill fire works well. Push all the coals to one side, cook the steak on the indirect side with the lid closed until the probe reads your pull number, then move it over the hot side for the sear. Leave the lid open during the sear so heat is radiating down onto the surface.
For the last 20 seconds, drop a knob of butter with a couple of garlic cloves or a rosemary sprig, and tilt the pan to baste. Season with flaky salt and cracked pepper the moment it leaves the heat.
If you want more practice on the pan side of the method, our cast iron steak method goes deeper on heat control.
4. Rest, Check, and Slice the Steak
Rest the steak 5 to 10 minutes after the sear. You will see sources that say skip the rest entirely, and the disagreement comes down to how long the sear ran. A short 90-second sear adds little heat and little juice, so slicing straight away is defensible. A 3-minute sear in a screaming hot pan pushes real heat into the meat, and a rest gives that heat somewhere to go. Ten minutes is never wrong.
Slice the final temperature before you cut into it, so you know what you achieved rather than guessing from the color. Then cut against the grain. Look at the cut face and find the direction the fibers run, then slice across them at a slight angle. Thin slices release far more juice than thick ones.
Season with flaky salt after slicing, not before. Salt on the cut surface draws moisture out of the exposed fibers, and the first few bites taste noticeably drier.
If you are serving this to guests, our beginner’s guide to pairing wine with steak is worth a skim before you uncork anything.
Common Mistakes
Every one of these is avoidable, and most come from skipping a step rather than from bad technique.
1. Over-searing a steak that was pulled too hot. The single most common failure. Someone pulls at 113F, holds the steak while the pan heats, and by the time it hits the skillet the surface is already well past where the sear needs to start. Pull 10 to 15F lower than your target, move the steak straight to a hot pan, and keep the sear to 45 to 60 seconds a side.
2. A cold pan. No crust, no flavor, and a gray band around the edge. Preheat longer than feels reasonable and use the water-drop test. Oil added to a cold pan also breaks down and gums the surface before the steak ever touches it.
3. Cooking by time. A 1.5 inch steak and a 2.5 inch steak at 250F are not the same job, and identical cuts from different animals cook differently. Probe every few minutes in the last third of the cook. This is the mistake that turns people off from the method entirely.
4. Using a steak that is too thin. Under 1 inch, the oven stage finishes the steak before the pan is even hot, and you end up with a gray middle with a thin sear. Cook thin steaks the traditional way, or cut a thick one into thick slices and reverse sear those instead.
5. Salting too early and then wiping the steak. Salting hours ahead is good, but patting a salted steak dry right before cooking pulls the dissolved salt back off the surface. Dry brine, then leave it alone. Only pat a steak dry when you are seasoning it fresh.
6. Slicing the instant the sear ends. The juices have not moved back into the meat yet, and cutting immediately loses them on the board. Give it the 5 to 10 minute rest. If you are reheating leftovers instead, our guide to reheating steak without overcooking it covers that case.
Frequently Asked Questions
How thick should a steak be for reverse searing?
Aim for 1.5 inches (4 cm) thick or more, ideally 1.75 to 2 inches. Below an inch the oven stage can finish the steak before the skillet is hot, leaving a gray middle under a thin crust. If your steak is thinner than that, either cook it the traditional way or cut a thick steak into thick slices and reverse sear those instead.
What oven temperature do I need for a reverse seared steak?
250F (130C) in a conventional oven is the sweet spot, and a 10-minute uncovered rest after baking gives the most consistent results. Use 225F (110C) for anything over 2.5 inches thick, and 275F (135C) for steaks under 1.5 inches. Convection ovens run hot, so drop another 25F (14C) to 225F (110C).
Is reverse searing better than a traditional sear?
For thick cuts, yes. A traditional sear cooks the outside long before the center, which produces a gray overcooked band and a raw middle. Reverse searing brings the whole steak to temperature first, so you get a deeply browned crust and an even medium-rare interior. For steaks under 1 inch it offers almost nothing, and the oven stage just adds time.
Is it safe to eat a reverse seared steak that is not well done?
The USDA recommends 145F (63C) as the safe minimum internal temperature for whole cuts of beef. A reverse-seared steak pulled at 110F (43C) and seared briefly does not reach that. If anyone in your household is pregnant, elderly, immunocompromised, or otherwise at higher risk, cook the steak to at least 145F (63C) and verify with a thermometer.
Do you need to rest a steak after reverse searing?
A short 5 to 10 minute rest is the safe advice, and it costs you nothing. Sources that say no rest is needed are assuming a 90-second sear that barely heats the meat. If your sear ran 2 to 3 minutes in a very hot pan, the rest matters more, because that heat needs somewhere to go before you slice.
Start with the thermometer. Choose a steak at least 1.5 inches thick, salt it, and put it in a 250F (130C) oven until the probe reads 10 to 15F (6 to 8C) under your target. Rest it uncovered for 10 minutes while a cast iron pan gets genuinely hot, then give it 45 to 60 seconds a side. Everything else in this guide is refinement on top of those numbers, and once you cook by temperature instead of by clock, how to reverse sear a steak stops being a technique you look up and becomes a Tuesday night habit.