
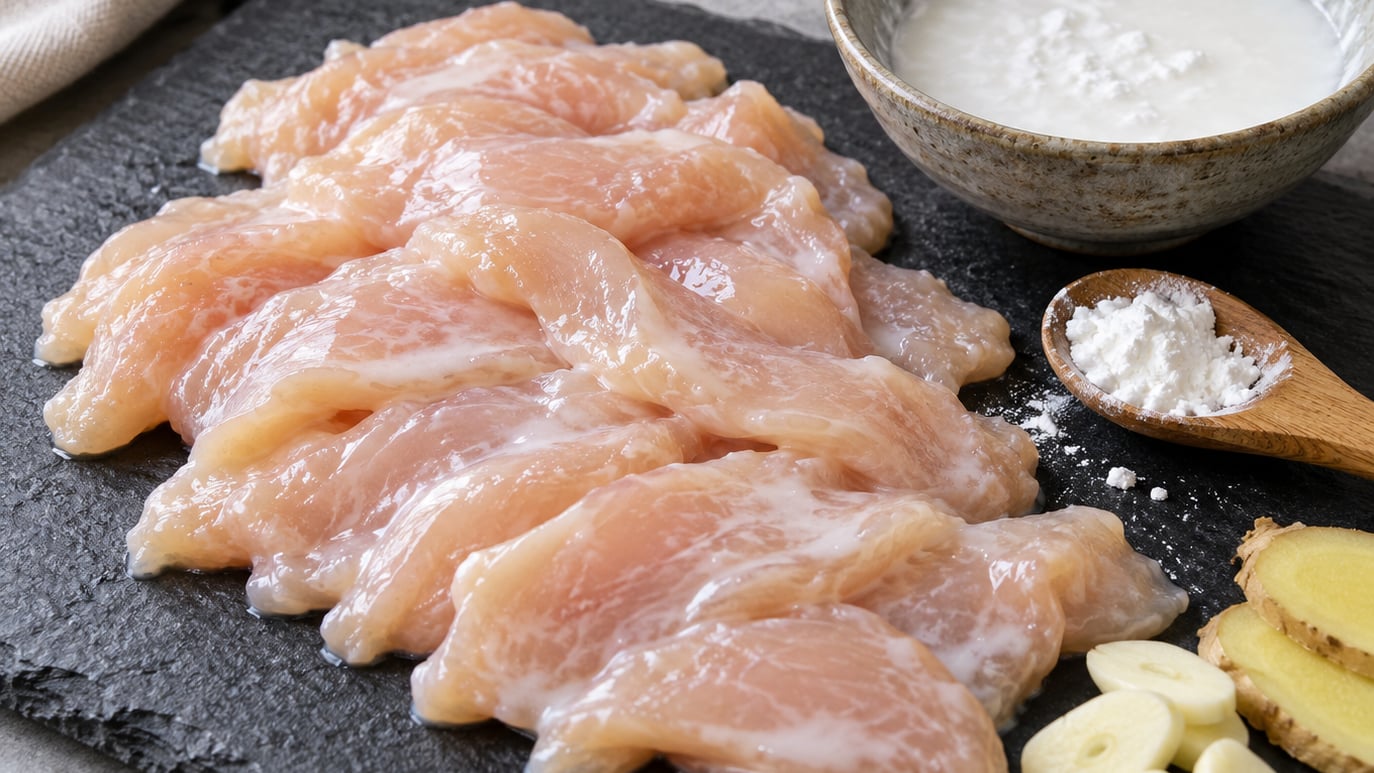
Velveting chicken is a Chinese technique where thin slices get coated in a cornstarch and egg white slurry, then briefly par-cooked so the starch sets into a thin shield. That shield is what keeps the meat tender and juicy when you hit it with a screaming-hot wok. Learn how to velvet chicken for stir fry and the pieces come out glossy, slippery and nothing like the dry, chewy breast most people end up with.
The whole thing takes about 40 minutes, most of it waiting. You need a wide pan or a wok, a wire rack or slotted spoon, and a thermometer if you want to stop guessing. Slice, coat, rest, briefly fry, then finish fast over high heat.
What You Need
Before any of the method, here is what velveting actually is. You coat raw chicken in a wet starch mixture, then cook it partway. During that partial cook the starch gelatinizes, meaning the water inside the starch swells and the coating turns into a thin gel layer clinging to the meat. Later, when the chicken hits high heat in the stir-fry, that gel layer slows heat from reaching the center and slows moisture from escaping. The protein inside has already started cooking gently, so it never gets the chance to seize tight and turn rubbery.
For 1 lb (450 g) of chicken breast or tenderloin you need:
- 1 lb (450 g) boneless skinless chicken breast or tenderloin
- 1 large egg white, beaten until frothy
- 2 tbsp cornstarch
- 1 tbsp light soy sauce, or 1 tbsp Shaoxing cooking wine, or half of each
- 1 tsp neutral oil (the sesame oil goes in later, not here)
- 1/4 teaspoon white pepper and a pinch of salt, plus 1/4 teaspoon sugar if you like
Optional: 1/2 teaspoon MSG, a grated teaspoon of fresh ginger, or a tablespoon of toasted sesame oil. Optional again for the stir-fry itself: neutral oil for the wok, 3 cloves garlic, a thumb of ginger, and your vegetables.
Equipment is simpler than the recipes online suggest. A 12-inch skillet works nearly as well as a wok, and a wire rack set over a tray is the best draining setup. Deep enough oil for shallow frying is the one thing you cannot substitute with a spritz of spray.
How to Velvet Chicken for Stir Fry: Step-by-Step
Step 1: Choose and Slice the Chicken
Slice thinly and evenly against the grain, and the cut matters less than people think. Breast and tenderloin need velveting most because they are lean. Thigh is already tender, so it needs less, and wing meat tolerates a heavier hand. Whichever you pick, cut it about 1/4 inch (6 mm) thick, or think of it as a quarter.
To find the grain, lay the breast flat and look for faint lines running one direction. Cut perpendicular to them. Slicing with the grain is the single most common reason a stir-fry stays tough even when the velveting is perfect.
Pat the pieces dry with paper towel before they hit the bowl. Surface water dilutes the cornstarch, and a thinner coating means less protection. If your slices are tearing as you cut, sharpen the knife or freeze the breast 15 minutes first.
Step 2: Make the Cornstarch Marinade
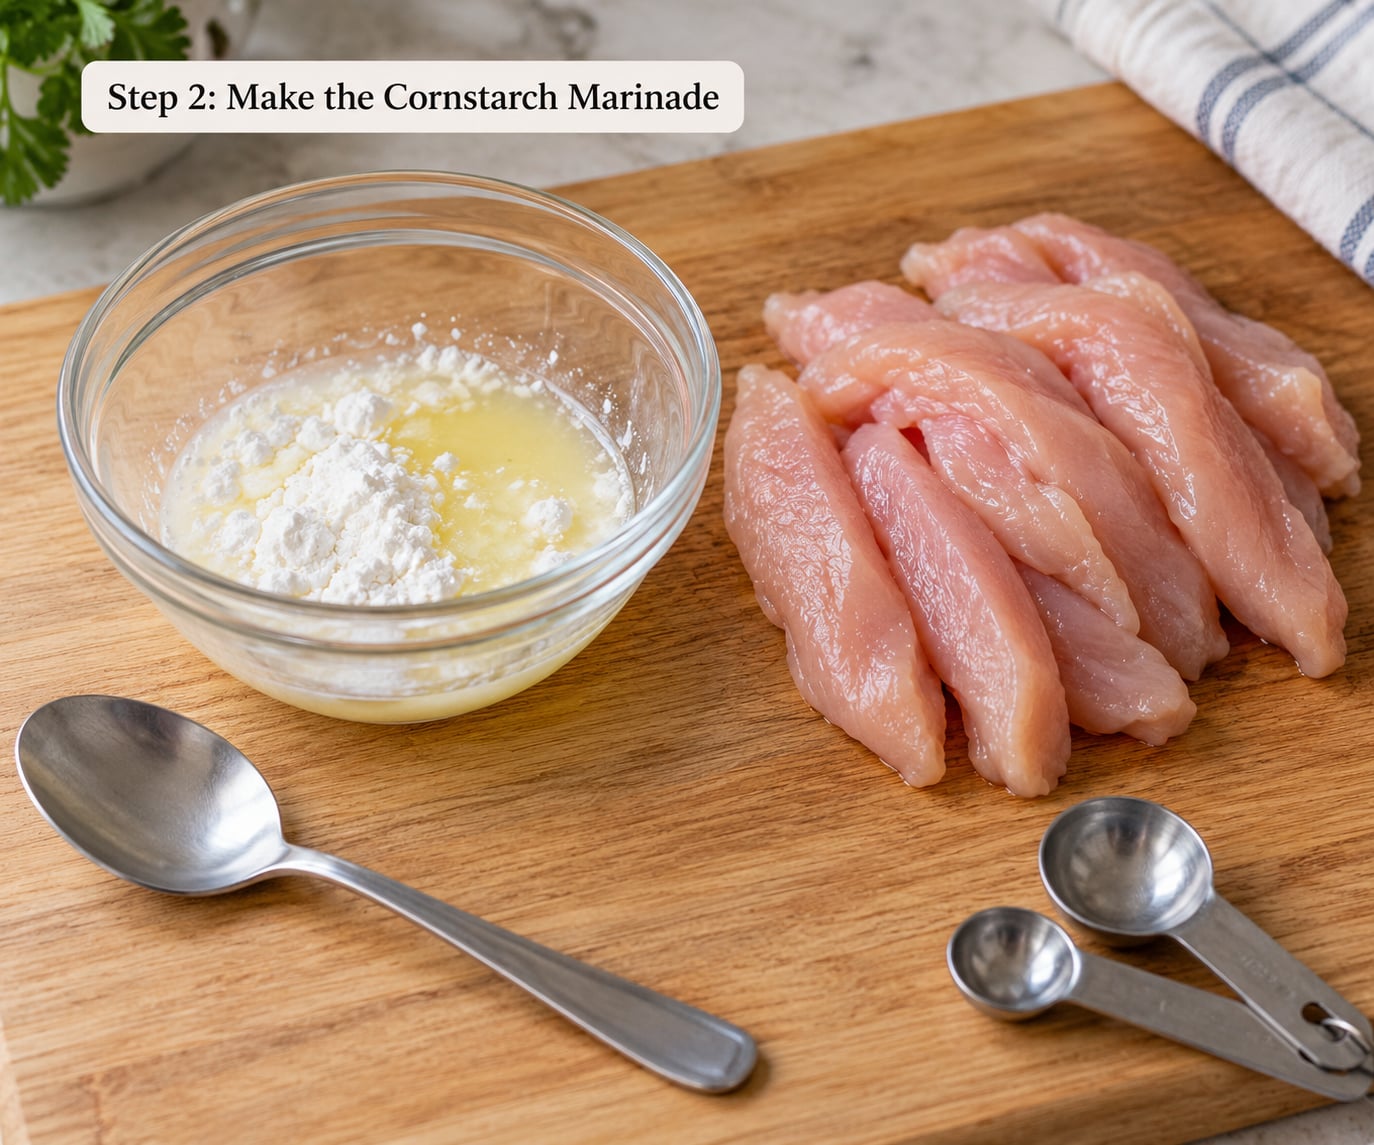
Beat the egg white until frothy, then stir in the soy sauce, white pepper, salt and oil. Add the cornstarch last and whisk or stir until the slurry is smooth with no dry pockets left at the bottom.
Each ingredient earns its place. The egg white proteins set into the coating and help it cling. Cornstarch is the tenderizer and the moisture lock. Soy sauce brings salt and color, and the wine option adds aroma without extra salt. Oil in the marinade stops the chicken from sticking to itself during the rest.
The cornstarch-to-liquid ratio is roughly 2 tablespoons of starch per pound of chicken. Too little and the shield is patchy. Too much and you get a gummy shell that turns gluey in the wok, peels off, and leaves the meat underneath as plain as if you had never bothered.
Toss the chicken in the slurry with your hands until every slice looks wet and slightly slick. Lift it out and shake off the excess. You want a thin even film, not a batter.
Step 3: Marinate and Rest the Chicken
Refrigerate for 20 to 30 minutes. That window gives the starch time to hydrate and the salt time to season inward without dissolving the coating.
Go longer only up to about 2 hours. Past that, especially overnight, the salt slowly draws moisture out of the meat and the egg white turns tacky, so what you gain in seasoning you lose in texture. If you must prep ahead, velvet the raw sliced chicken, refrigerate up to 8 hours, and add the salt back at the stir-fry stage instead.
You know the coating is right when the chicken looks pale and matte rather than wet and shiny, and the pieces sit loosely against each other instead of glued in a single lump.
Step 4: Velvet the Chicken in Hot Oil
Heat 1/2 inch (1.25 cm) of neutral oil in a wide pan, or 2 inches (5 cm) if you want a crisper edge, until a small drop of water skitters and pops. That shimmer is your cue; do not wait for smoke.
Fry in two or three small batches. A crowded pan drops the oil temperature fast, and the chicken steams in its own moisture instead of setting a coating. Use a slotted spoon or spider to keep the pieces separated, and turn them with chopsticks after 45 seconds.
Pull each batch out at 90 to 120 seconds, while the pieces are still slightly translucent in the very center. That is the point people get wrong. Fully cooking here means the second, fiercer cook has nothing left to do except squeeze the meat dry.
Drain on a wire rack, not paper towel on a plate. A rack lets steam escape instead of steaming the crust back into sogginess, and it keeps the pieces from sticking together.
A water-poach works too: simmer the pieces in barely bubbling water for 2 to 3 minutes until they turn opaque, then drain. No oil needed, no browning, but no crisp edge either. It is the better choice when you plan to put the chicken into a heavily sauced noodle dish.
Step 5: Stir-Fry the Chicken Until Tender
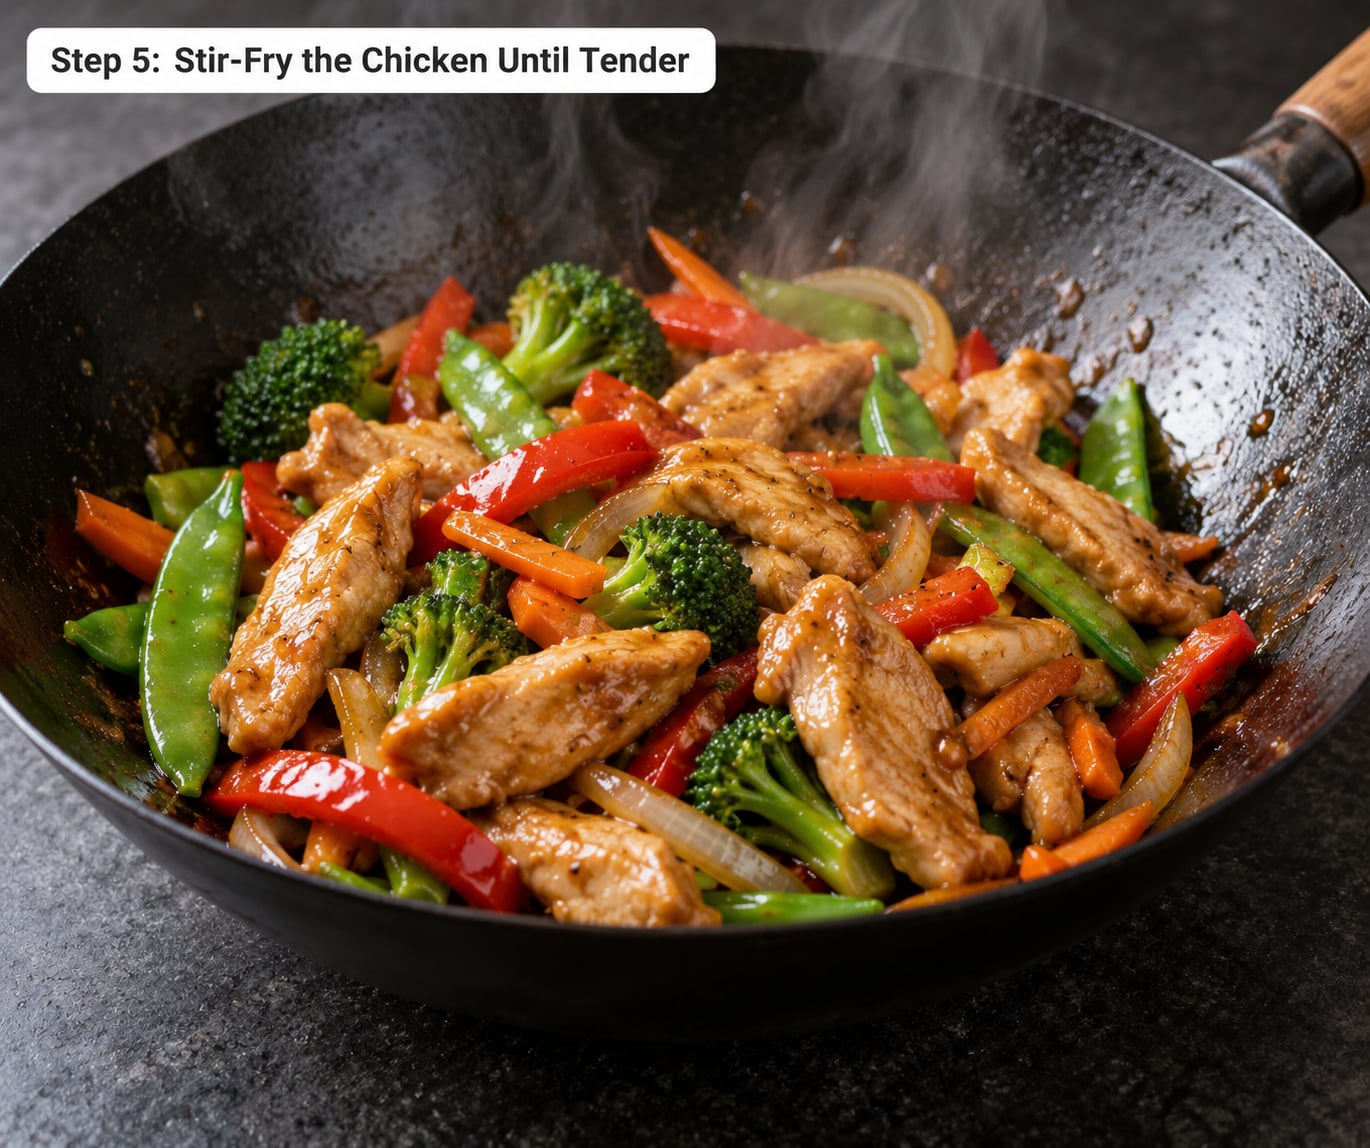
Heat the wok or skillet until it just begins to smoke, add a tablespoon of oil, and let it run. Add the drained chicken in one layer and leave it alone for 30 seconds before the first stir. That pause is where browning happens.
Aromatics go in next: garlic, ginger, and the white parts of spring onion for 20 seconds, no more. Then the vegetables, cooked hard and fast, and only then the sauce. Adding sauce early dulls everything by dropping the pan temperature before the sear finishes.
Have the sauce mixed and waiting before the pan is hot. A typical stir-fry sauce for 1 lb of velveted chicken is 2 tbsp oyster sauce, 1 tbsp soy sauce, 1 tsp sugar, a splash of water and 1 tsp cornstarch slaked in a tablespoon of water. Cook it 30 to 60 seconds until it thickens and coats the back of a spoon.
The chicken is done when the sauce clings to every piece and the thickest slice shows no pink at its center. Confirm with a thermometer in the thickest piece: 165F (74C) is the USDA minimum internal temperature for poultry. Velveted pieces cook fast, so check early rather than assuming.
Turn the heat off and toss in a teaspoon of toasted sesame oil. It is aromatic and bitter the moment it hits a hot pan, which is exactly why it goes in at the end.
Step 6: Rest, Check, and Serve
Let the finished dish sit 2 to 3 minutes before eating. The residual heat finishes the last of the cooking and the sauce sets just enough to stay on the chicken instead of pooling at the bottom of the plate.
Check the center of the thickest piece once more if you are serving to anyone pregnant, elderly, or otherwise at higher risk, since velveting changes color and makes pink harder to spot. Serve over steamed rice with the vegetables folded through, or add it to noodles if you did the water-poach.
Leftovers keep 3 to 4 days in the refrigerator. Reheat in a hot pan for 60 seconds rather than in the microwave, which dries the edges.
Common Mistakes
Watery marinade. Raw chicken carries a lot of surface moisture and the marinade adds more. Patting the chicken dry and using a light hand with the liquid stops the cornstarch from diluting into a thin soup that never sets.
Uneven slicing. Pieces cut to different thicknesses cook at different rates, so the thin ones go dry while the thick ones are still raw. Measure one piece with a ruler the first time and match it after that.
Overcrowding the wok. More than a single layer steams instead of sears. Two smaller batches finish faster and taste noticeably better than one crowded batch.
Oil that is not hot enough. Lukewarm oil gives a pale, limp coating that peels off. Wait for the water-drop skitter test, and nudge the oil down if it starts smoking before the chicken goes in.
Cooking the chicken through during the velveting step. This is the mistake that ruins the technique. Stop at 90 to 120 seconds, or at the first sign of set edges, and let the final stir-fry finish the job.
Adding the sauce too early. Sauce hits the pan, the temperature drops, and the sear you waited for never happens. Mix it first, add it last, and keep it moving.
Skipping the temperature check. Marinade, egg white and starch all disguise doneness, so a piece that looks finished can still be undercooked in the middle. One thermometer read at the thickest point settles it.
Too much cornstarch. A heavy shell steams inside, turns gummy, and the sauce glazes the outside while the middle stays chewy. Two tablespoons per pound is the ceiling, and a thin even film beats thick patches every time.
Frequently Asked Questions
How long should chicken be marinated before stir-frying?
For velveting, refrigerate the coated chicken 20 to 30 minutes. That is enough time for the cornstarch to hydrate and the salt to season without weakening the coating. You can stretch it to about 2 hours, but past that the salt pulls water out of the meat and the egg white turns tacky. Overnight marinating in a velveting slurry tends to produce mushy, watery chicken.
Do I need a wok to velvet chicken for stir fry?
No. A 12-inch stainless or cast iron skillet works about as well as a wok for both the shallow fry and the final stir-fry. What matters is that the pan is wide enough to hold the chicken in a single layer and that it can come up to high heat. A nonstick pan is gentler on the coating but will not brown the chicken as well.
Can I use cornstarch or flour for velveting?
Cornstarch is the right choice, and it is not interchangeable with flour. Cornstarch gelatinizes into a clear, tender gel that turns silky in the coating. Flour makes a dull, thicker paste that dries hard and can taste raw or pasty after the fry. Rice flour sits closer to cornstarch if that is what you have, and tapioca starch also works well.
How hot should the oil be when velveting chicken?
Aim for 350F (175C) to 375F (190C), which is hot enough to set the coating in 45 to 60 seconds but not hot enough to darken it. With no thermometer, drop a small piece of breadcrumb or a drop of water into the oil. It should skitter and bubble immediately. If it sinks and sits there, the oil is too cool and the coating will not set.
Can I use frozen chicken for stir fry?
Yes, but thaw it first and dry it thoroughly. Thaw in the refrigerator overnight or in cold water, not on the counter. Pat the sliced pieces hard with paper towel before marinating, because thawed chicken holds a lot of surface water and that water thins the cornstarch coating. Velveting frozen, breaded, or pre-cooked chicken nuggets will not work well.
What sauce goes best with velvet chicken?
Oyster sauce is the classic partner because its sweetness and body match the coating. A stir-fry sauce of 2 tbsp oyster sauce, 1 tbsp soy sauce, 1 tsp sugar, a splash of water and 1 tsp cornstarch in water works every time. Chiles and vinegar work too, such as a black vinegar and chili starch glaze, or a simple garlic and soy sauce for mild dishes.
Conclusion
The formula is simple enough to remember without a recipe: thin slices against the grain, 1 beaten egg white, 2 tablespoons of cornstarch, 1 tablespoon of soy sauce per pound, 20 to 30 minutes in the refrigerator, then 90 seconds in hot oil before the final high-heat stir-fry.
Start by slicing the chicken evenly and patting it dry, since nothing downstream can fix uneven cutting or a wet surface. Coat it lightly, keep the batches small, and stop the velveting fry while the centers are still translucent. That single discipline is what separates tender restaurant-style chicken from the rubbery kind.