
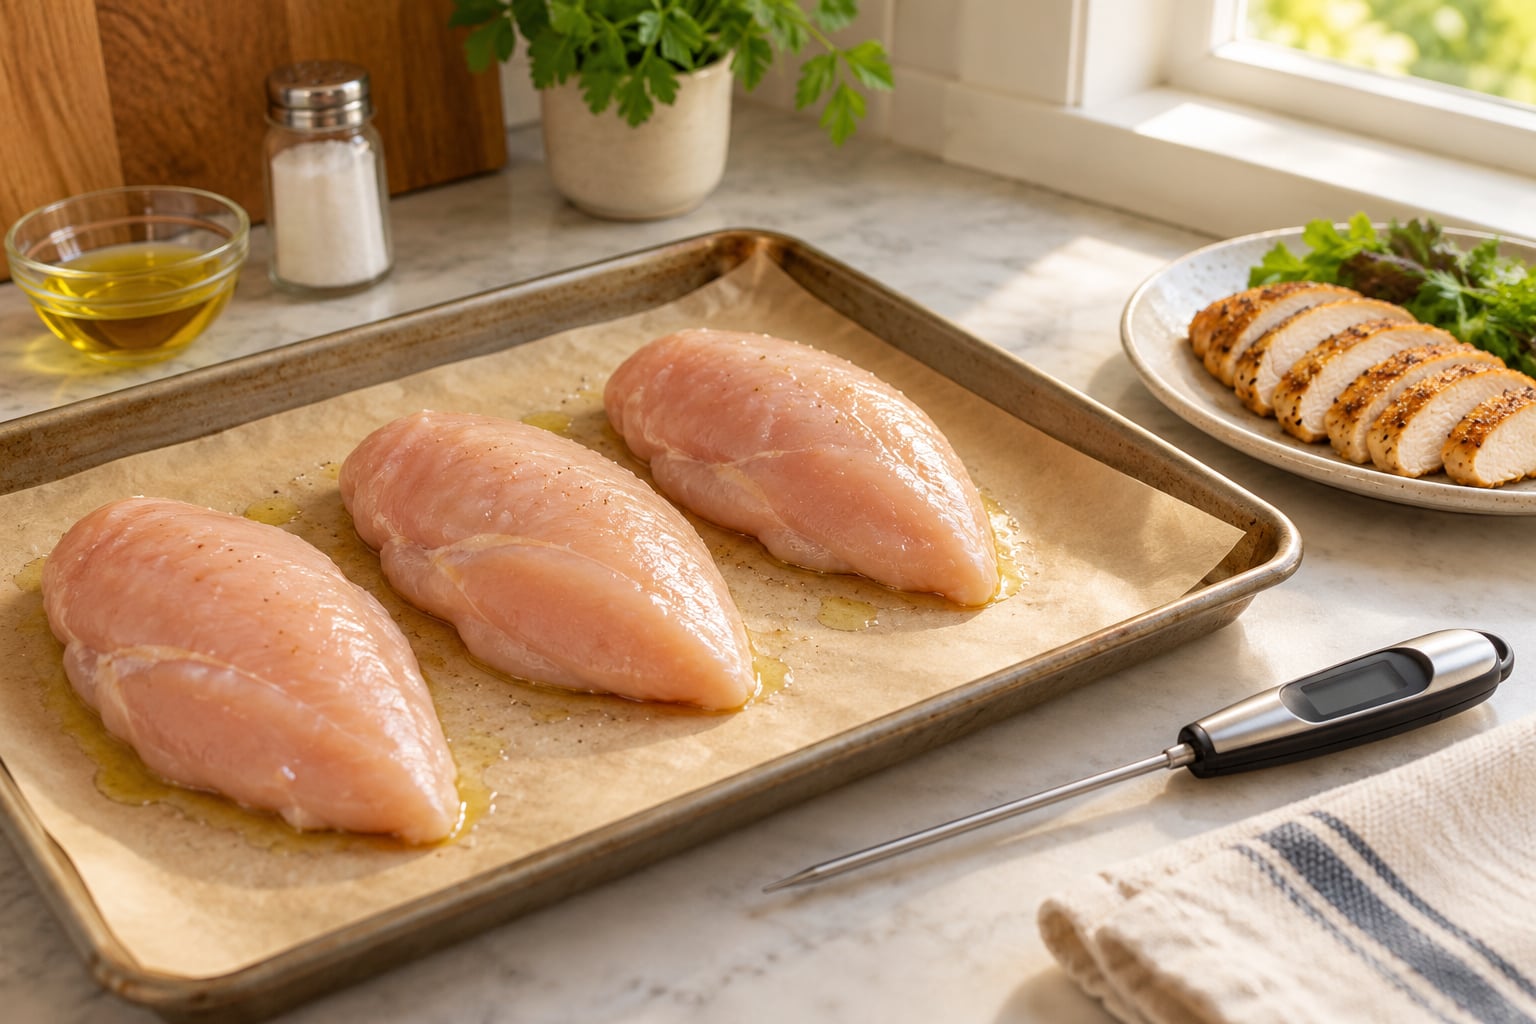
To make chicken breast juicy in the oven, pound the breasts to an even three-quarter-inch thickness, bake them at 400°F until the thickest part hits 165°F on an instant-read thermometer, and rest them 5 to 10 minutes before slicing. Total time is about 30 minutes, and the single biggest difference between juicy and dry chicken is even thickness plus a real thermometer check.
Chicken breast is the leanest cut on the bird. There is very little fat to insulate the muscle, so heat pulls water out of it faster than it can hold onto it. Once the proteins tighten past about 165°F, they squeeze instead of spring back, and that squeeze is what you see on the cutting board as a puddle.
The method below stays at 400°F instead of blasting at 450°F. A moderate oven gives the center time to reach temperature before the outside dries out, which is a gentler way to get the same result you would get from a very hot oven and a short timer. If you like the crisp edges that a hot pan gives you, the skillet version of [how to make chicken tenders in the oven](https://5anddiamondrestaurant.com/how-to-make-chicken-tenders-in-the-oven/) uses the same logic at a thinner cut.
What You Need
A short list, and only one item on it is non-negotiable.
- Boneless, skinless chicken breasts, 6 to 8 ounces each. Skinless cooks faster and browns without help.
- An instant-read thermometer. This is the tool that separates juicy chicken from guessing.
- A rimmed baking sheet with parchment or a light coat of oil, so the juices do not weld themselves to the metal.
- Olive oil or avocado oil, plus salt and pepper.
- A way to flatten the chicken: a meat tenderizer, the flat side of a skillet, or a rolling pin.
- Paper towels for patting the surface dry.
What you leave out matters as much as what you add in. Boneless skinless breasts cook in roughly 18 to 24 minutes at 400°F, while a bone-in or skin-on breast needs closer to 30 to 40. Thicker breasts need longer than thin ones, which is why every time in this guide is an estimate rather than a promise.
The seasoning method changes the timeline too. A dry brine, which is just salt on the meat 20 to 60 minutes ahead, adds time before the oven and buys you a noticeable margin of moisture. A wet marinade with acid or sugar can push the surface toward rubbery if the breast sits in it for more than a couple of hours.
Step-by-Step: How to Make Chicken Breast Juicy in the Oven
1. Prep the Chicken Breasts
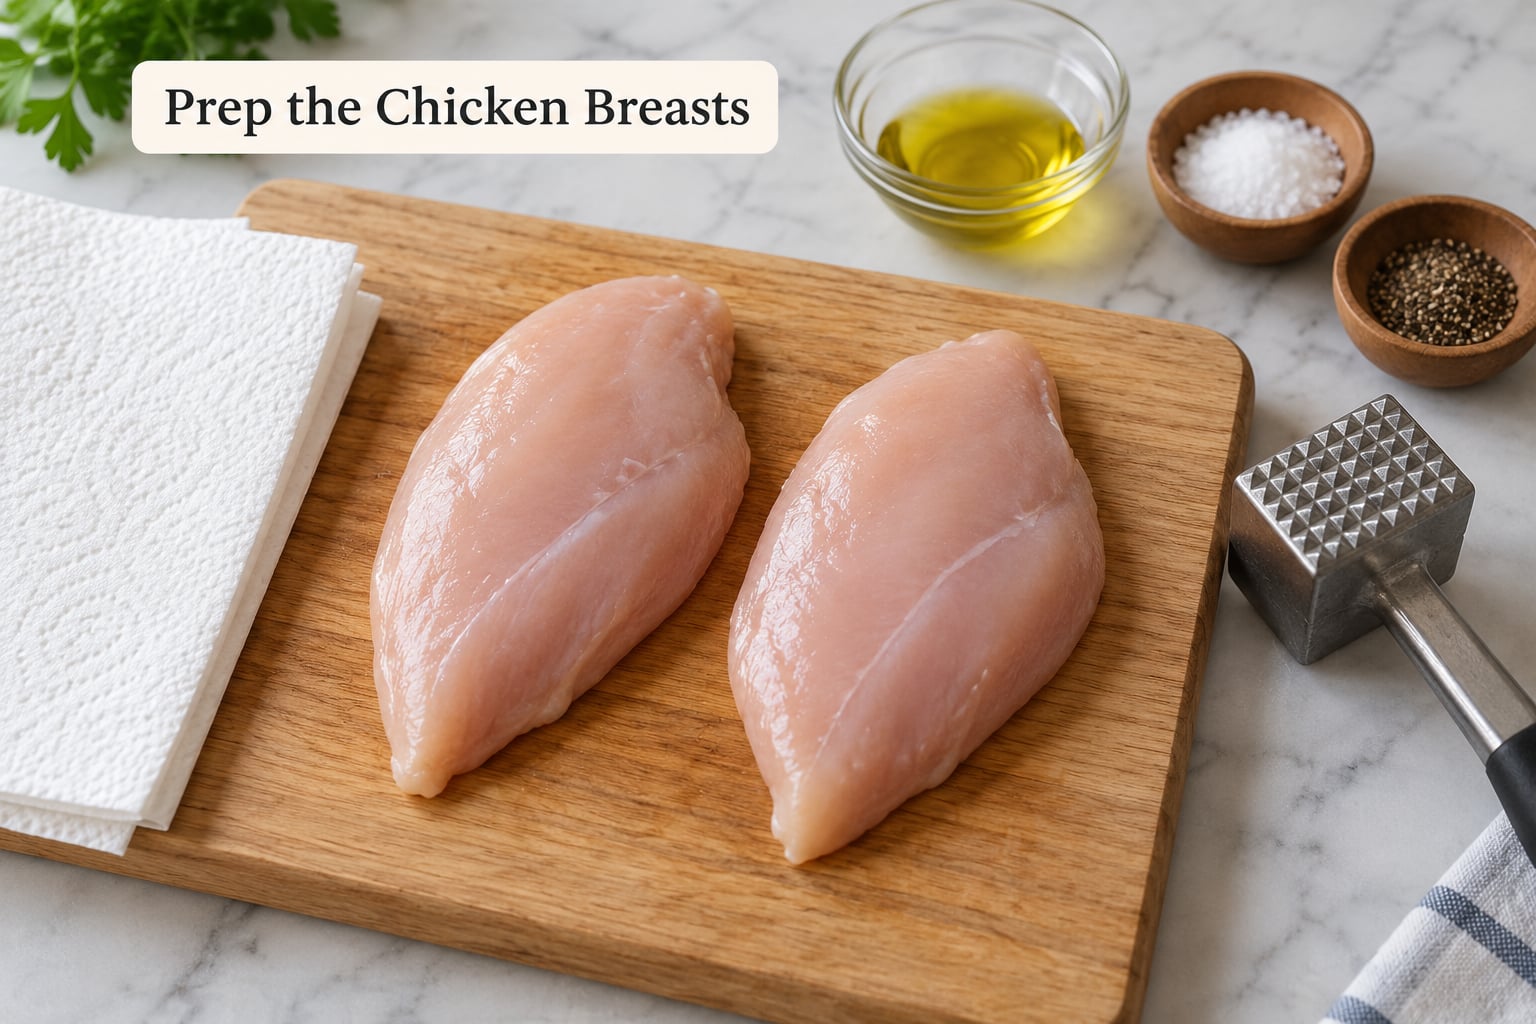
Pat each breast dry with paper towels and trim off the loose fat and any stringy bits hanging off the edges. Surface moisture is the enemy of browning, and a wet breast steams in its own puddle instead of coloring.
Then make the thickness match. Lay one breast inside a zip-top bag or between two sheets of plastic wrap, and pound it with a meat tenderizer or the bottom of a skillet until it is an even three-quarter inch from end to end. A butterflied cut works too: slice horizontally through the thickest part without separating the halves, and open it flat.
This is the step that solves the most common complaint. A breast with a thin tail and a thick center cannot cook evenly at one temperature, so the tail hits 165°F and dries out while the center is still pink.
Season both sides with salt, black pepper, and whatever else you like. If you have time, salt it now and let it sit 20 to 60 minutes before the oven. That dry brine draws a little water into the muscle, and the muscle holds onto it better once the salt has done its work.
Drizzle with a little oil and rub it over both sides so the seasoning sticks and the edges have something to crisp.
2. Start at a Moderate Oven Temperature
Heat the oven to 400°F and let it sit there for a full 10 to 15 minutes before the chicken goes in. An oven that has not recovered temperature yet is the reason so many home cooks undercook the middle and overcook the outside.
400°F is the sweet spot for juiciness. It is hot enough to set the surface of the meat quickly and trap moisture inside, and moderate enough that the center catches up before the edges turn leathery. Very high heat gives you a darker crust in less time, but it also pulls moisture out of the lean meat faster.
For a convection oven, drop the temperature to 375°F and start checking the chicken about 3 minutes earlier than the times below. Fan-forced heat circulates faster, so the same number of minutes is effectively a longer cook.
Put the sheet in the oven while it preheats if you want a head start on browning. The metal heats up with the oven and the chicken hits a hot surface the moment it lands, which helps the underside develop color.
3. Roast Until the Chicken Is Fully Cooked
Lay the breasts on the sheet with a little space between them and not touching. Two breasts can share a sheet easily; three is usually the most I would put on one pan. Crowding drops the pan temperature and traps steam around the meat, so the chicken cooks in its own moisture and never browns.
These are estimates, and breast thickness and oven performance change them. Treat the thermometer as the only real answer.
- Three-quarter-inch thick at 400°F: about 18 to 22 minutes.
- One-inch thick at 400°F: about 22 to 26 minutes.
- Thin, pounded to half an inch at 400°F: about 14 to 18 minutes.
Start checking with the thermometer at the early end of that window rather than the end. Push the probe into the thickest part of the breast, not the thin tail, and read it fast.
Pull the chicken out the moment the thickest part reaches 165°F. That is the safe minimum internal temperature for poultry, and once it comes out of the oven the internal temperature keeps climbing for several minutes. That carryover cooking is not a problem here, because it only adds a few degrees and the window between succulent and dry is narrow.
Color is not a doneness signal. You will regularly find chicken that still looks faintly pink at 165°F and is perfectly cooked, and white chicken that has been past done. Use the thermometer.
4. Rest and Check the Juiciness
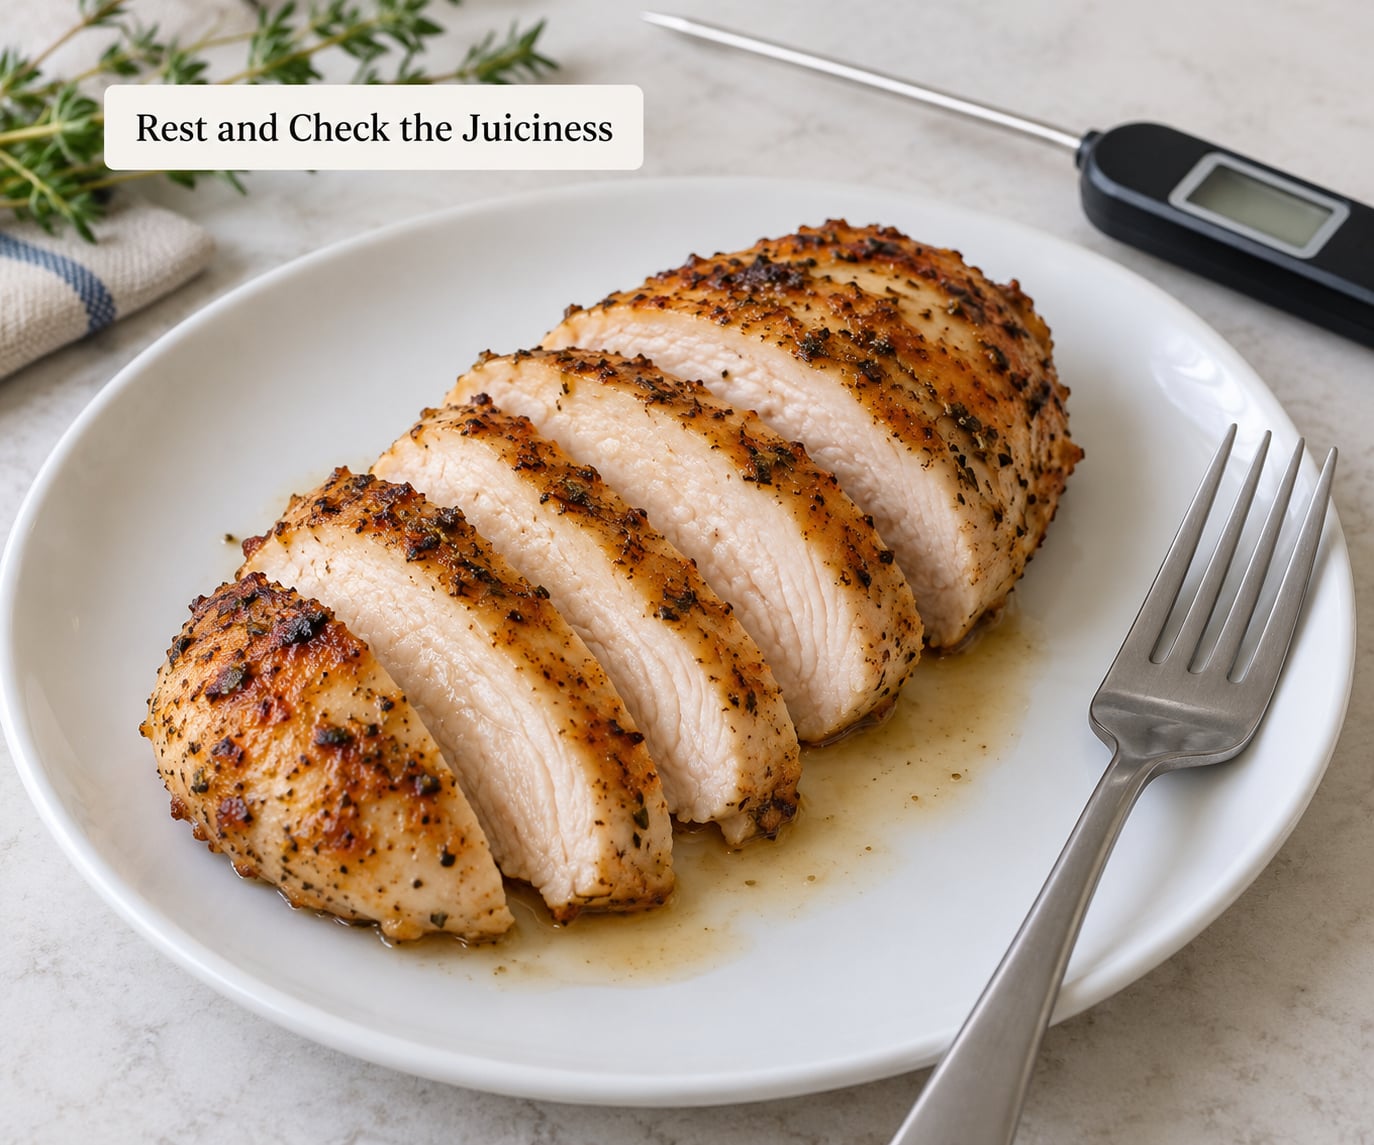
Move the chicken to a cutting board or a plate and let it sit 5 to 10 minutes. Resting is not optional. The muscle fibers are still contracting as the temperature equalizes, and slicing immediately releases that moisture onto the board instead of keeping it in the meat.
You will know it worked when you cut into the breast and see a thin sheen of clear juice inside the slices rather than a dry, chalky interior. Texture is the other tell: well-cooked breast springs back slightly when you press it and pulls apart into fibers instead of tearing in chunks.
Slice across the grain, not with it. Cutting across those short fibers is the difference between a tender piece you can chew and one that feels chewy no matter how well you cooked it.
For leftovers, refrigerate within two hours and use them within three to four days. Keep them in an airtight container with a small splash of broth or a damp paper towel if you want to reheat without drying them out.
Common Mistakes
Almost every dry breast traces back to one of these five.
Baking too hot for too long. A screaming hot oven browns the outside while the inside is still working. Fix: 400°F, and pull at 165°F rather than at a timer.
Uneven thickness. This is the big one. The thin end dries out while the thick end finishes cooking. Fix: pound to three-quarter inch, or butterfly anything thicker than one inch.
Skipping the rest. Slicing straight out of the oven drains the breast. Fix: 5 to 10 minutes on the board, covered loosely with foil if the kitchen is cold.
Crowding the pan. When breasts touch, the pan stays cool and steamy. Fix: one layer with space between the pieces, two per sheet at most for large breasts.
Cutting or testing early. Every cut releases juice, and every poke in the oven adds a couple of minutes. Fix: probe once, near the end of the estimated time, and trust the reading.
A few extra techniques worth knowing:
- Brine when you have time. Salt the breasts 20 to 60 minutes ahead, or soak them 30 minutes in a solution of a quarter cup salt per quart of cold water. Check the label first: if the chicken is already pre-brined or “enhanced” with a salt solution, skip extra salt.
- Marinate with restraint. A marinade with oil and acid works well for a couple of hours. Much longer and the acid turns the surface tacky.
- Baste only if you skipped oil. Basting late in the cook adds flavor and moisture without undoing the crust.
- Use a wire rack if you have one. It lifts the chicken off the pan so the underside cooks instead of steams.
- Save the bones. Trimmed-off ribs and breastbones go into the freezer until you have enough for [chicken stock from bones](https://5anddiamondrestaurant.com/how-to-make-chicken-stock-from-bones/).
- Thaw frozen breasts properly. Move them to the fridge overnight, or seal them in a bag and submerge in warm water for 30 to 60 minutes. Then cook from thawed, following the thickness guide above.
- Consider thighs for meal prep. Dark meat has more fat, so it tolerates longer cooking without turning dry. Many cooks do a batch of breasts for the week and a tray of thighs for Sunday dinner.
Once you have a batch done, the breast slices drop straight into [a grain bowl for dinner](https://5anddiamondrestaurant.com/how-to-make-a-grain-bowl-for-dinner/) alongside roasted vegetables and grains. They also make a decent sandwich filling, a salad topper, or a quick pasta add-in.
Frequently Asked Questions
What temperature is best for juicy oven-cooked chicken breast?
400°F is the best temperature for juicy oven-cooked chicken breast. It sets the surface quickly enough to hold moisture in, without pulling water out of the lean meat the way a very hot oven does. For a convection oven, drop to 375°F and start checking three minutes early.
How long should I bake a chicken breast at 400°F?
At 400°F, a breast pounded to an even three-quarter inch needs about 18 to 22 minutes. One-inch-thick breasts take 22 to 26 minutes, and thin breasts flattened to half an inch take 14 to 18. Treat these as estimates and pull the chicken when the thickest part reads 165°F on an instant-read thermometer.
How do I know when chicken breast is cooked through without cutting it?
Use an instant-read thermometer in the thickest part of the breast, away from the pan. The safe minimum internal temperature for poultry is 165°F. Color is not a reliable signal, because fully cooked chicken can still look faintly pink, and white chicken can already be past done.
Should I brine chicken breast before baking it?
A brine helps, but it is optional. A dry brine of salt applied 20 to 60 minutes ahead gives the breast a buffer of moisture with almost no effort. Check the package label first: pre-brined or enhanced chicken already contains a salt solution, and brining it again makes the finished breast too salty.
How do I reheat chicken breast without drying it out?
Warm it gently rather than hot. Put slices in an airtight container with a splash of broth or a damp paper towel and warm them in a low oven, or use short microwave bursts at half power with a cup of water in the microwave. Both add moisture while reheating, and either keeps a breast that was cooked properly from turning leathery.
Conclusion
Start by preheating the oven to 400°F and giving it the full 10 to 15 minutes. Pound the breasts to an even three-quarter inch, salt them if you have a few minutes, and check the thickest part with a thermometer until it reads 165°F. Take it out at that number and let it rest 5 to 10 minutes before slicing across the grain.