
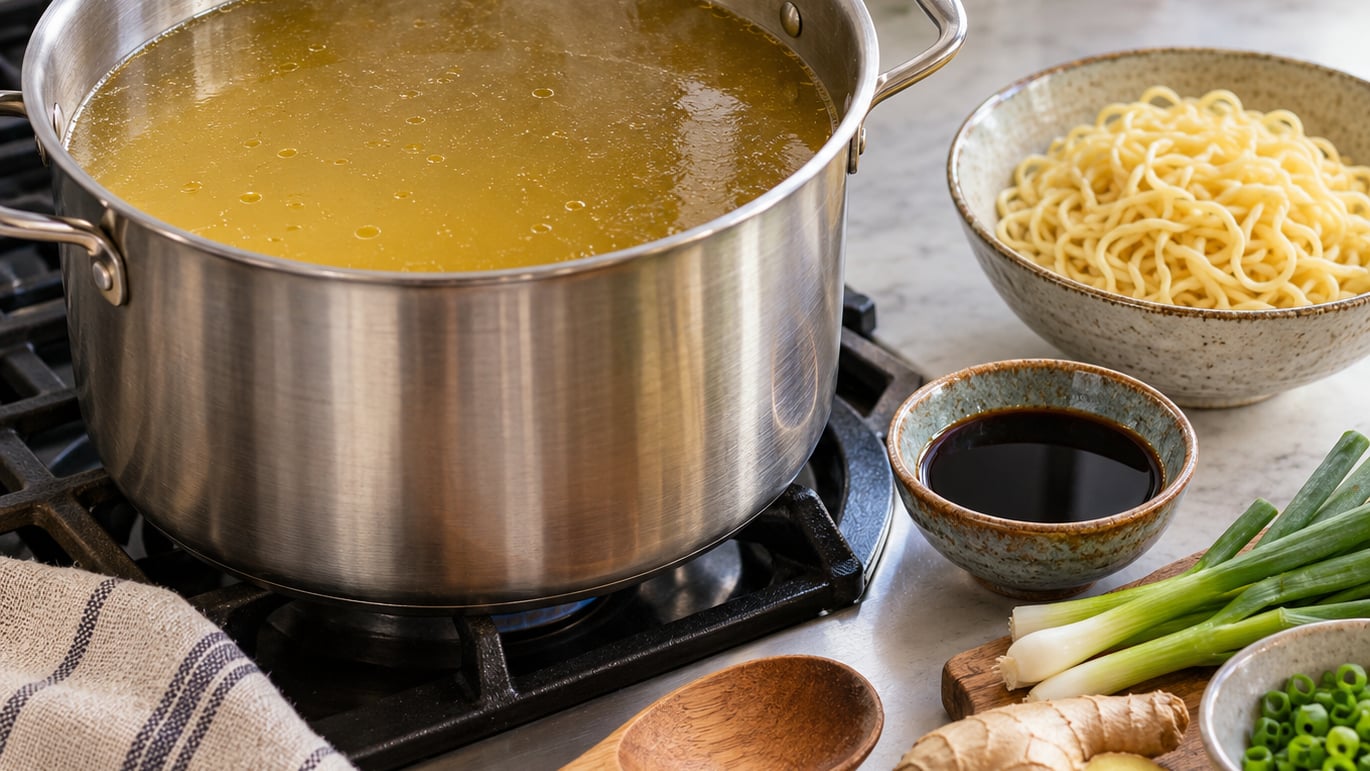
The fastest way to make ramen broth at home is to build three separate parts and combine them at the bowl: a gently simmered stock for body, a small amount of concentrated seasoning called tare for salt and character, and a spoonful of fragrant oil on top. The slow version tastes rounder, but nothing about the technique changes, and a good bowl is on the table in under an hour.
Most people who try this at home make the same three mistakes. They boil the bones hard, they season the pot too early, and they try to fix a thin broth by adding more soy sauce. Fix those and the recipe gets much easier.
A note before we start: the broth is the largest part of the bowl, so it decides whether the meal works. Toppings can rescue a mediocre bowl for a bite or two, but they will not carry it.
Table of Contents
- What You Need to Make Ramen Broth at Home
- Step-by-Step
- Common Mistakes
- Frequently Asked Questions
- What is the simplest way to make ramen broth at home?
- Why is my ramen broth cloudy?
- What is the difference between shio and shoyu ramen broth?
- Can I make ramen broth without soy sauce?
- How long does homemade ramen broth keep, and can I freeze it?
- Can I use store-bought chicken broth instead of making stock from scratch?
- Conclusion
What You Need to Make Ramen Broth at Home
Here is the honest list. Most people already own the equipment, and the ingredient list is short enough that a single supermarket trip covers it.
Equipment
Essential: a stockpot with a lid, ideally 8 quarts or larger, a fine-mesh strainer or a slotted spoon plus a regular strainer, and a container for the finished broth.
Helpful, not required: a skimmer for the foam, a thermometer if you plan to roast bones, a second pot for cooking noodles, and jars for freezing broth in single portions.
One pot can do everything if you cook the noodles in a separate saucepan of water. Cooking them in the broth is the reason many bowls come out salty and cloudy.
Ingredients
The base. For a chicken version, about 2 pounds of chicken wings, a carcass, or a mix of both. Wings are the most accessible option and carry plenty of collagen, which is what gives broth its body. For a richer, pork-led bowl, use pork neck bones or trotters, which are usually cheaper than the cuts used for tonkotsu shops.
The aromatics. One thumb-sized piece of ginger, halved and sliced; 4 to 6 cloves of garlic, crushed; and 3 or 4 scallion whites, cut on the bias. Ginger and scallion are the two that matter most. Garlic is optional and easy to overdo.
The dashi. A 2-inch square of dried kombu and a small handful of dried bonito flakes (katsuobushi) make the stock taste finished rather than plain. Dried shiitake mushrooms work in place of, or alongside, the bonito for a plant-based version.
The tare. This is the seasoning concentrate you stir into a bowl. Soy sauce makes shoyu tare, a splash of salt and sake makes shio tare, and white miso paste thinned with a little hot stock makes miso tare. You only need one to start.
The aroma oil. Any neutral oil with sliced scallion rings, grated ginger, and one or two dried chilies, warmed gently until fragrant. This is the layer people skip, and it is the one that makes a bowl smell like a ramen shop the moment it reaches the table.
Everything here is a substitution candidate. Store-bought chicken stock works as a shortcut base. Dry white wine or dry sherry replaces sake. Kombu can go in or out if you are out, though it does add depth. If you enjoy the build-and-rest rhythm of cooking from scratch, our guide on how to make pizza dough at home runs on the same logic.
Step-by-Step
Follow these in order and the result is consistent. Read the whole sequence once before you start, because the last few minutes are where the broth either comes together or falls apart.
How to Make Ramen Broth at Home with a Savory Flavor Base
The first stage is about flavor, not extraction. Raw bones in cold water give you a thin, watery result no matter how long you simmer, because there is nothing in the fat or the browned surface to dissolve.
1. Roast the bones (about 30 minutes). Heat the oven to 425°F. Spread the wings or pork bones on a rimmed sheet pan, toss them with a little neutral oil, and roast until the edges are browned and dry. If you have a large pot that is oven-safe, you can brown them in the pot itself and skip the pan.
2. Deglaze the pan (2 minutes). Pour a cup of water into the hot roasting pan and scrape. Those brown bits stuck to the metal are concentrated flavor, and leaving them behind is the most common waste in home broth. Pour the liquid into your stockpot.
3. Sàute the aromatics (5 minutes). Warm a spoonful of oil in the stockpot over medium heat, add the ginger and scallion, and cook until the scallion edges are lightly golden. Add the garlic for the last 30 seconds only. If the aromatics go dark, the broth will taste bitter.
4. Add the bones and cold water. Put the roasted bones in the pot, cover with cold water by about 1 inch, then set it over medium heat. Starting with cold water means the proteins and impurities rise to skim off instead of sealing onto the bone.
5. Skim, then add the dashi. As the water approaches a simmer, gray foam forms on the surface. Skim it off with a spoon or strainer; it is mostly protein and grit. Once the pot is at a bare simmer, add the kombu. Hold it for 10 minutes, take it out before it boils, and add the bonito flakes for the final 3 minutes, then strain them out.
How to Simmer the Broth for the Best Flavor
The simmer is the part that rewards patience, and the part people rush. What you are after is a lazy bubble every second or two, not a rolling boil.
6. Simmer gently (2 to 3 hours). Drop the heat until the surface barely shimmers and you see a bubble every second or two. A lid on, slightly ajar, holds the temperature and reduces evaporation. Do not lift the lid repeatedly; every opening drops the temperature and extends the cook.
7. Skim the fat twice. In the first 30 minutes, skim again to keep the surface clean. Then skim the rendered fat off the top and set it aside. That fat is your aroma oil, so nothing is wasted.
8. Know when it is ready. Flavor is the test, not the clock. After 2 hours, taste a spoonful: it should taste like a mild, savory stock with a hint of the aromatics, and the texture should coat the back of the spoon lightly. If you want a stronger stock, continue for another hour. If you want a light one, stop at 90 minutes and lean on the tare later.
9. Strain and cool. Pour the broth through a fine-mesh strainer lined with cheesecloth, pressing on the solids. Do not boil hard right before straining, because the agitation clouds it.
For pork tonkotsu-style broth, the process inverts: boil hard and violently so the rendered fat emulsifies into the liquid and turns it opaque and creamy. That is paitan, a different and much longer project. For a home first attempt, the gentle method above is the one to learn.
Safety note: if you use chicken, make sure the broth reaches 165°F before serving, and cool leftovers shallowly in the fridge within two hours rather than leaving the pot out to cool.
How to Season Ramen Broth Without Making It Salty
This is where home broths usually go wrong. Soy sauce and miso go into the bowl, not the pot, and they go in at the last possible moment.
10. Make the tare. For shoyu tare, combine 3 tablespoons soy sauce, 1 tablespoon mirin or sake, and 1 teaspoon sugar in a small jar. For shio tare, use 2 teaspoons salt, 1 tablespoon sake, and a small piece of kombu steeped in warm water. For miso tare, whisk 2 tablespoons white miso with 3 tablespoons warm stock until smooth. Store each in the fridge for up to two weeks.
11. Season at the bowl, in layers. Put the tare in the empty bowl first, then add hot broth and stir. Adding tare after the broth lets you taste and adjust, while pouring broth into a bowl that already holds concentrated seasoning means you cannot undo it.
12. Taste and adjust. Dip a spoon in before adding noodles. Too salty: add more plain broth a tablespoon at a time. Too flat: add 1 teaspoon more tare, or a spoonful of the dashi you strained earlier. Too thin in body: stir in a teaspoon of cold butter or a spoonful of rendered fat, which is what a ramen kitchen would do with aroma oil anyway.
13. Add the aroma oil. Warm a tablespoon of reserved fat with scallion rings, a slice of ginger, and a dried chili until the scallion sizzles, then ladle a teaspoon of the oil over the finished bowl. Skim any whole aromatics out first.
14. Cook the noodles separately. Boil fresh or dried noodles in plain water, following the package time, then drain well. Noodles cooked in the broth release starch and make it cloudy, and they drink up your seasoning before you taste it.
Common Mistakes
Each of these is a repeatable failure, and each has a specific correction. Run through this list before blaming your ingredients.
Rolling boil. A hard boil emulsifies fat and protein into the liquid, which clouds a clear broth and makes a clean stock taste muddy. Turn the heat down until the surface barely moves.
Skipping the browning. Pale bones make a pale broth no matter how long you simmer. Thirty minutes in a hot oven, plus a splash of water to lift the fond, is the cheapest flavor in the whole recipe.
Seasoning the pot early. Salt added at the start cannot be adjusted later, and the broth keeps concentrating as it reduces. Season in the bowl, every time, and taste before each addition.
Adding too much soy sauce to fix blandness. Salt and umami are not the same problem. A flat broth is usually missing dashi or aroma oil, not soy sauce. Add bonito dashi, kombu, or a spoonful of chashu braising liquid before reaching for the bottle.
Boiling the kombu. Kombu left to a hard boil turns bitter and turns the broth slick. Steep it in warm water off the heat, or add it during the simmer and pull it out before the water boils.
Cooking noodles in the broth. The starch clouds the broth and the noodles swell and dilute it. Cook them in a separate pot of salted water and drain hard.
Starting with hot water. Adding bones to already-boiling water traps the impurities against the surface instead of letting them foam for skimming. Start cold, bring up slowly.
One last tip: taste at every stage. Plain broth in a spoon, at the start, in the middle, and after straining. Three seconds of tasting is the difference between a bowl you adjust and a pot you dump.
Frequently Asked Questions
What is the simplest way to make ramen broth at home?
Pour 4 cups of store-bought chicken stock into a pot, add a 2-inch square of kombu and 4 cloves of crushed garlic, and simmer gently for 20 minutes. Strain out the solids, then finish the bowl with 1 tablespoon soy sauce, 1 teaspoon mirin, and a teaspoon of scallion oil stirred in at the end. The shortcut skips the bones entirely, so you trade body for speed, and it is the version most people should cook on a weeknight.
Why is my ramen broth cloudy?
Usually one of three things: the broth was boiling hard instead of simmering, you did not skim the foam and fat off the surface early on, or you strained it while it was still bubbling. A gentle simmer, two careful skimmings in the first 30 minutes, and letting the pot sit for five minutes before straining will clear it up. If you want a cloudy white broth on purpose, that is paitan, made by boiling pork bones hard and emulsifying the fat.
What is the difference between shio and shoyu ramen broth?
Shoyu is seasoned with soy sauce, so the bowl reads savory, slightly sweet, and dark. Shio is seasoned with salt only, plus sake and often kombu, so it tastes light, clean, and delicate, and the aroma oil is doing most of the flavor work. A salt-based shio broth takes more care to keep from being bland, which is why it is the harder one to nail at home. The base stock can be identical for both.
Can I make ramen broth without soy sauce?
Yes. Shio tare is exactly that, and miso tare seasons with fermented paste instead. For more depth without soy, steep dried shiitake in the broth for the last 20 minutes, or add a spoonful of white miso at the bowl. If you are avoiding gluten as well, use tamari or coconut aminos in place of soy sauce, and keep the bonito flakes for the umami.
How long does homemade ramen broth keep, and can I freeze it?
Refrigerated in a sealed container, a homemade broth keeps about 3 to 4 days, and 5 to 6 days if you skim the fat cap off first. Freeze it in single-serving portions rather than one large block, since one 2-cup portion is roughly one bowl and thaws in minutes in a saucepan. Leave headspace in the container, and cool the broth in the fridge within two hours before it goes anywhere near the freezer.
Can I use store-bought chicken broth instead of making stock from scratch?
Yes, and most home cooks do it more often than they admit. The store-bought base is lean and mild, so it lacks the body and richness that slow-simmered bones provide. Compensate by simmering it for 20 minutes with kombu, ginger, and scallion, then finishing each bowl with tare and aroma oil. Avoid broth that is already heavily seasoned, because you will be adding salt again at the end.
Conclusion
Start with the four steps that matter most: brown the bones and deglaze the pan, start the stock in cold water, hold a lazy simmer and skim the fat, then season at the bowl instead of in the pot. Those four cover most of what separates a good bowl from a disappointing one. Everything else, the tare variations, the aroma oils, the toppings, is decoration on a base you can make tonight.
Broth also freezes well in single portions, which makes it a good make-ahead dish. If you are cooking for a group, our step-by-step guide to how to plan a birthday dinner at home covers how to time the rest of the menu around it.