
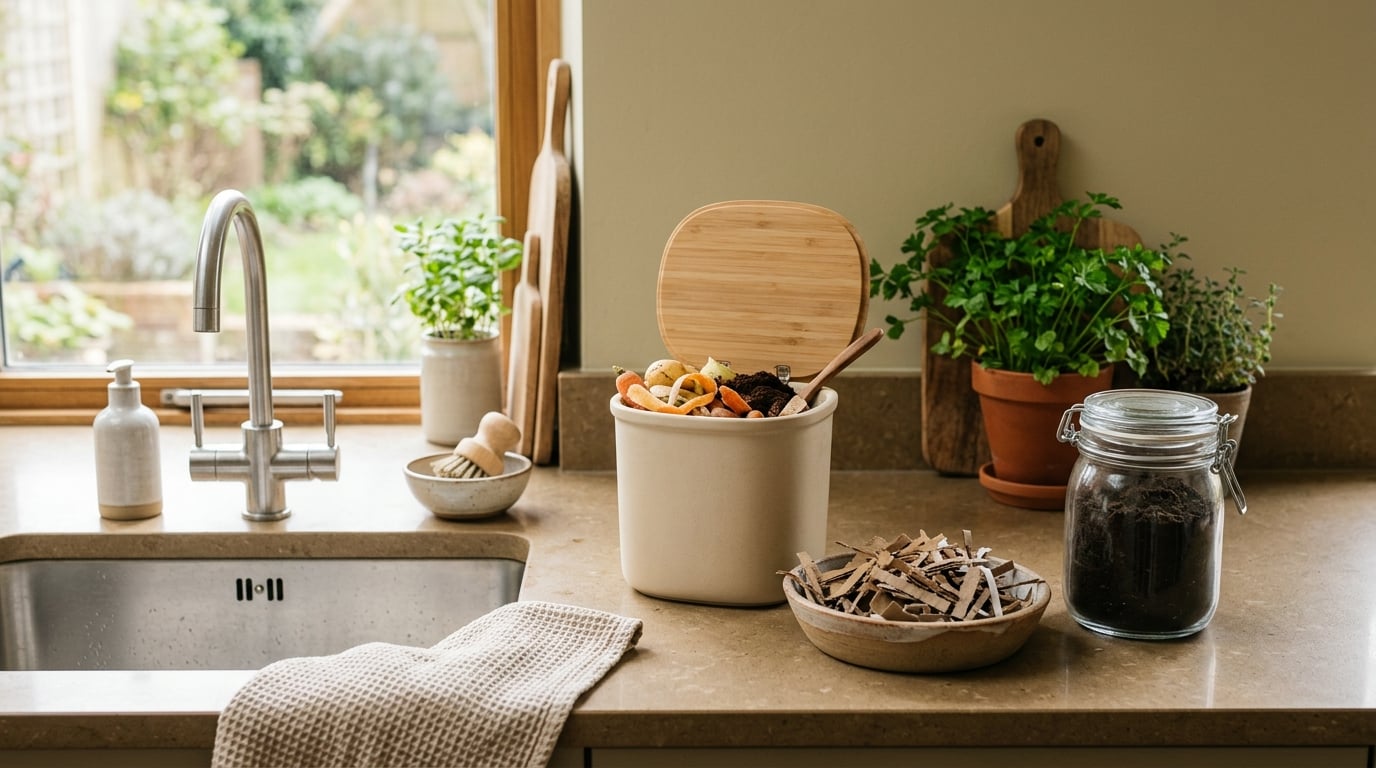
How to compost kitchen scraps in an apartment comes down to keeping food in a closed bin where bacteria and worms break it down into compost, instead of sending it to landfill. You do it with a small system on your counter or under the sink, a rule about burying wet scraps under dry material, and a lid that stays shut. Most people get through the whole setup in an afternoon.
The part that puts people off is the smell, and that fear is fair. A bin that reeks has too much wet food and not enough dry carbon, so the fix is usually a free adjustment rather than a different machine.
A second thing worth saying up front: a bin inside your kitchen is usually fine. It is a sealed container of food scraps, not an outdoor pile. Just check your lease and your building’s rules before you set it up, since a handful of buildings treat anything that smells or attracts flies as a nuisance violation.
Table of Contents
- What You Need
- Step-by-Step: How to Compost Kitchen Scraps in an Apartment
- Common Mistakes
- Adding wet food without covering it
- Adding more food than browns
- Putting meat, dairy, or oil in the bin
- Overfilling a small bin
- Leaving the lid off or cracked too long
- Putting the bin beside the stove
- Burying bokashi pre-compost too shallowly
- Putting compostable packaging in a home bin
- Not checking the rules before setting up
- Frequently Asked Questions
- Conclusion
What You Need
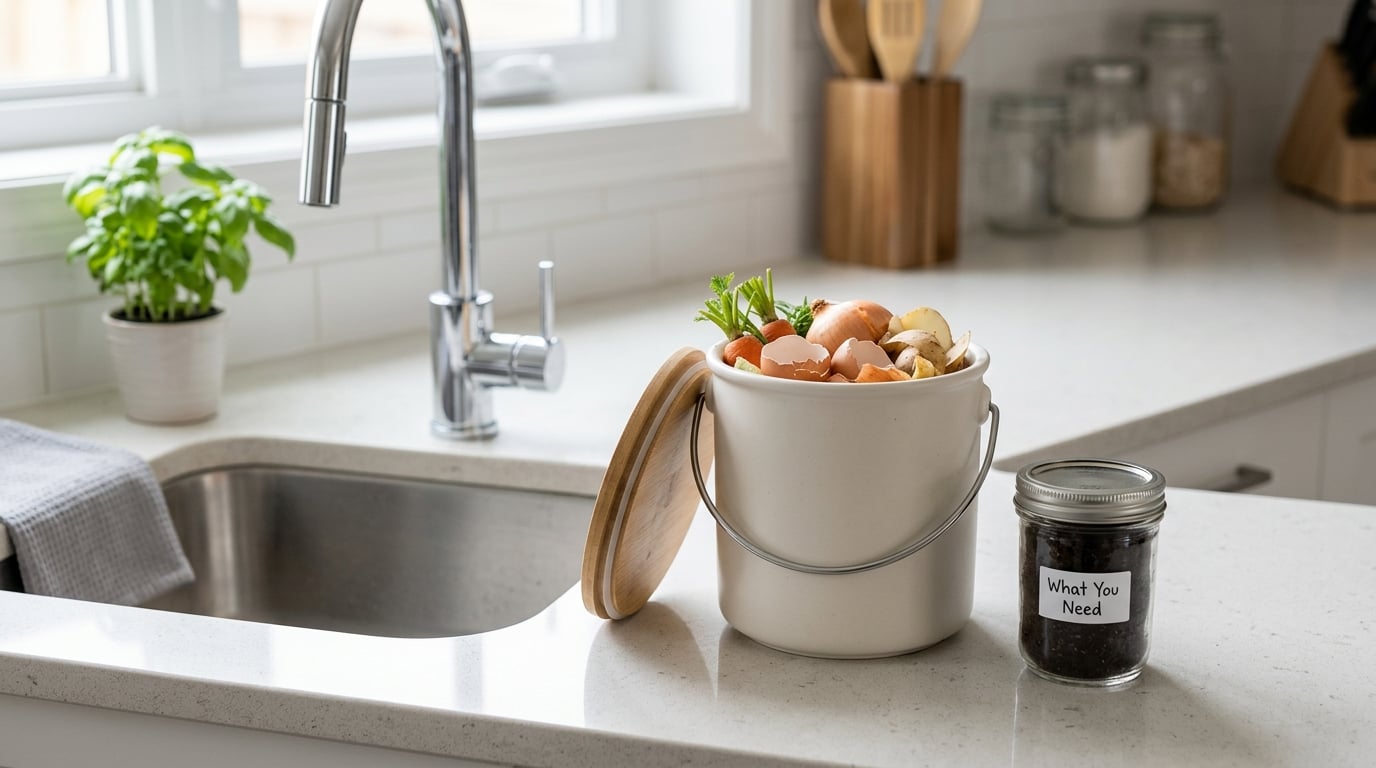
You need four things to compost kitchen scraps in an apartment: a bin sized for your kitchen, a supply of dry browns, somewhere to store finished compost, and a few odor-control supplies. Most people already own three of the four.
The bin: countertop or under the sink
A countertop bin holds roughly one to two weeks of scraps for a one- or two-person household. It sits near your prep area so you do not carry wet food across the kitchen, and it works well if you compost most days.
An under-sink bin is larger, usually three or four weeks of scraps, and holds a drip tray under the working container. It takes more floor space but almost nobody walks past it, which is why it stays tidy longer. Two working bins, one upstairs and one down, beats one big bin because you harvest each in turn.
If your kitchen is tight, look at how you’ve arranged things already. Our guide to organizing a small kitchen pantry without clutter covers the same corner and cabinet real estate a bin competes for.
Browns: the material that prevents smells
Dry browns are what keep an indoor bin from turning into a landfill in miniature. Shredded cardboard, dry leaves, plain paper, uncoated paper towels, and small amounts of plain sawdust all work. Cardboard is the easiest to keep a full season of.
Break it into pieces a few inches wide. Flat sheets compost slowly and hold moisture against the bin wall, which is how you get a moldy layer nobody wants to touch.
Storage for finished compost
Finished compost needs somewhere dry and lidded until you find a use for it. A five-pound bucket with a snap lid, or a lidded tote on a balcony if you have one, does the job. Compost that dries out and sits loses its value, so store it somewhere shaded and only as much as you will use within a couple of months.
Odor-control supplies
Three things handle nearly every smell problem: a lid that seals, a layer of dry browns on the surface of everything wet you add, and a bin with air holes and a charcoal filter. Cheap unfiltered tubs smell within weeks. It is worth spending a little more on a filtered bin.
Tools worth keeping nearby
A scoop or dedicated compostable bag for transferring scraps, gloves if you prefer them, and a damp sponge for cleaning the rim go a long way. Kitchen tongs beat a knife for small peels, and a second small container keeps the scraps from sitting open on the counter while you chop dinner.
Step-by-Step: How to Compost Kitchen Scraps in an Apartment
Six steps cover it, and each one has a visible sign that it worked. Watch for that sign before moving to the next step, because skipping ahead is what produces a bin that smells after a month.
| Step | What you do | How you know it worked |
|---|---|---|
| 1. Pick a method | Choose based on space, how often you cook, and your building’s rules | You have a bin that fits the space without blocking a cabinet or walkway |
| 2. Set up and site the bin | Add bedding, then place the bin cool, shaded, and out of the main air path | Nothing flies to it when you open the lid |
| 3. Add scraps | Only fruit and vegetable waste, coffee grounds, tea leaves, eggshells | The bin holds food without souring within days |
| 4. Cover and balance | Bury every addition under 3-4 inches of browns | You can add food and never see it from above |
| 5. Maintain | Stir weekly, check moisture, watch for flies | Contents feel like a damp sponge, not a wet towel |
| 6. Harvest and use | Sift, finish the cycle outdoors or in a sealed container, then use it | Material is dark, crumbly, and smells like soil |
1. Choose an Apartment-Friendly Composting Method
Pick the method that matches your space and your habits, not the one that sounds most impressive. Here is how the common apartment methods compare.
| Method | Space | Smell | First harvest | Accepts | Weekly effort |
|---|---|---|---|---|---|
| Worm bin | Under sink or countertop | Low once balanced | 3-6 months | Fruit, veg, coffee, eggshells | 5-10 minutes |
| Bokashi | Countertop, no drainage needed | Low, sealed | 2-4 weeks to pre-compost | Small amounts of cooked food, dairy | 10 minutes, batch-based |
| Freezer or “survival cache” | Freezer | None | Not compost | Everything, no rules | 2 minutes |
| Countertop electric digester | Countertop, needs a plug | Very low | Days to a few weeks | Almost all food scraps | Empty and rinse the pod |
| Drop-off at a community site | None indoors | None | Not yours to harvest | Whatever the site takes | One trip per bag |
A worm bin is the right pick if you want finished compost and will stir it once a week. Bokashi is the right pick if the smell question keeps you up, since the process is sealed and acid-fermented rather than exposed, and the drained liquid doubles as a fertilizer tea. Electric digesters are the lowest-effort option and the only one that needs a power outlet and produces a liquid waste stream.
Some people run bokashi and a worm bin together: ferment scraps in the bokashi bucket, then bury the pre-compost in the worm bin. Worms eat fermented food readily, which speeds things up.
2. Set Up the Bin in the Right Location
Where you put the bin decides how much trouble it causes. Under the sink, or beside the refrigerator in an unused corner, and never beside the stove or under a window you open. Heat from cooking accelerates the breakdown that creates odor, and a spot near a door carries that odor to the rest of the apartment.
Sunlight is the other enemy. Direct sun raises the temperature enough to drive off moisture and cook off the organisms doing the work, so shade beats any temperature argument.
Leave clearance around the sides for airflow and a couple of inches under a stacked bin for the drip tray. If you are testing whether your setup works, put a damp sponge next to the bin for a week. If it dries out, the site is too warm or too sunny, and no amount of browns will fix it.
Before you commit, read your lease and any building rules for terms like waste, garbage, pests, or nuisance. A one-page note to your building manager asking whether an indoor compost bin is permitted clears up most of the uncertainty people carry for years. If your building runs a shared outdoor bin or a community compost program, use that instead of starting your own.
3. Add the Right Kitchen Scraps
Add the scraps that break down cleanly and skip everything that smells once it starts breaking down. The rule most beginners need is short: food that rots on a warm countertop will rot in your bin too.
| Yes, add these | No, keep these out |
|---|---|
| Fruit and vegetable peels, cores, ends, and seeds | Raw meat, poultry, fish, and bones |
| Coffee grounds and paper filters | Dairy: milk, cheese, yogurt, butter |
| Tea leaves, loose or in compostable bags | Oily or cooked foods, including fried items |
| Eggshells, crushed | Cooked rice, pasta, and bread |
| Shredded plain paper, coffee filters | Household compostable packaging bags |
| Dry leaves, small twigs, shredded cardboard as browns | Dog or cat waste, and pet litter |
| Plant trimmings without roots | Diseased plants and anything from a chemical lawn or garden |
Two of those deserve a note. Compostable bags are made for industrial facilities with heat and airflow, so in a home bin they sit intact and add nothing but a plastic smell, which is why they belong in the trash unless your local program processes them. Citrus and onion are fine in small amounts in a worm bin, but a whole juicing session’s worth of peels can push the pH low enough to upset the worms, so bury them deeply rather than piling them on top.
4. Keep the Bin Balanced and Odor-Free
Keep roughly three to four parts dry browns to one part food scraps by volume, measured loosely by handfuls rather than weighed. You will see a lot of advice online giving different ratios; three to four parts browns is the figure that works indoors, because a closed bin has less airflow than an outdoor pile and any excess nitrogen has nowhere to go but out through the lid.
Plenty of worm composters will tell you to go further still, roughly three times as much brown material as greens. That advice is sound and errs on the safe side for a small indoor bin.
Work in layers. Chop or tear scraps small, drop them in, then cover them with 3 to 4 inches of browns before closing the lid. The surface of your bin should always be brown. When you look in and see food, the next visitor is a fly.
Moisture is a squeeze test, not a ratio. A handful squeezed should hold together and drip just a little. If water runs out of it, add browns by the armful. If it crumbles dry, add a cup of water and stir.
In summer, freeze scraps before they go in. A bag in the freezer for 48 to 72 hours kills most of the eggs and larvae that arrive on produce, and it kills the flies already inside the bin before you seal them in. Feed frozen items straight from the freezer and let them thaw in place.
5. Maintain the Compost and Check for Problems
A working indoor bin smells like a forest floor and nothing worse. That clean earthy scent is the signal that you are on track, and it is the smell to reintroduce whenever you add fresh food.
Stir or turn the contents once a week from the top down, breaking up any wet pocket and folding in browns from the edges. Cutting or shredding weekly is a good excuse to look at what you’ve been discarding, which is where a surprising share of food waste comes from.
Watch for these warning signs:
| Symptom | Cause | Fix |
|---|---|---|
| Sour or rotten smell | Too much food, not enough browns | Add cardboard by the armful, stir, and cover the surface again |
| Sweet smell | Fermenting fruit, usually too much volume at once | Add browns, stir, and freeze the next round of scraps |
| Fruit flies | Exposed food and fruit fly eggs on produce | Bury food 4 inches deep, freeze scraps first, and check the bin sits away from open windows |
| Mushy, wet contents | Excess moisture and no aeration | Add browns, stir, and leave the lid cracked for a day |
| Contents dry out | Too many browns, heat, or sun | Add water a cup at a time and stir until it feels like a damp sponge |
| White fungal growth | Normal, and harmless at this stage | Leave it. It is not mold from spoiled food |
| Nothing changes for weeks | Materials too coarse or the bin too cold | Shred the material, keep the bin between 60 and 80F, and stir more often |
| Flies moving in from outside | Bin placed near a door or an open window | Relocate indoors and close the window |
If you run a worm bin, the same table applies with one addition: worms sitting on the surface in daylight usually mean the material is too acidic, often from too much citrus or coffee. Add a layer of shredded cardboard and stop those foods for a couple of weeks.
6. Use the Finished Compost
Compost is finished when it is dark, crumbly, smells like soil, and no longer heats up when you stir it. In a worm bin, that usually lands somewhere between three and six months, and it is slow on purpose.
Sift it through a coarse screen or a kitchen strainer and return any unfinished pieces to the bin, along with a fresh layer of bedding. Do not throw out the worms; they migrate downward as you harvest from the top.
Without a garden, the finished compost still has uses. Mix a spoonful into potting soil for houseplants at repotting time. Scrape a thin layer onto balcony containers or window boxes. Share it through a local food-waste sharing network or a neighborhood group, where people with gardens and people without them meet. Some grocery stores and nurseries take clean compost or stable bedding for their soil mixes, and community gardens will often take a bucket if you ask.
Bokashi pre-compost is not finished compost and does not go in a pot. It still needs to go into soil so the organisms finish the job, and burying it 6 to 8 inches deep in a bed or a large container keeps it out of sight. The liquid that drains out of the bucket can be diluted with water and used as a fertilizer tea on plants.
Common Mistakes
Most failed apartment bins come down to a handful of habits. Each one below has a fix you can apply the same day.
Adding wet food without covering it
Never leave food exposed on the surface. Bury each addition 3 to 4 inches deep and keep the top layer brown, and most fly and smell problems never start.
Adding more food than browns
Food piled on food without dry carbon goes anaerobic, which produces the sour, rotten smell people associate with composting. Follow the three-to-four-to-one ratio by volume and add browns before you add the next batch of scraps.
Putting meat, dairy, or oil in the bin
These break down slowly, smell, and attract pests. Bokashi and electric digesters handle small amounts of cooked food; a worm bin does not. Keep them out of the worm bin entirely.
Overfilling a small bin
When the lid will not seat properly, something has to go somewhere else. A full bin that is sealed smells worse than an underfull one, so empty it on schedule and keep a second container for the week’s overflow if you cook a lot.
Leaving the lid off or cracked too long
Open lids in a warm kitchen dry the contents out and let flies in. Leave it ajar for a day when the bin is too wet, then close it again.
Putting the bin beside the stove
Cooking heat drives off moisture and speeds decomposition past the point of balance, and it carries odor through the apartment. Pick a cool corner and keep the bin out of the airflow that reaches your doors and windows.
Burying bokashi pre-compost too shallowly
Fermented scraps left at the surface dry out, attract animals, and smell. Bury it 6 to 8 inches deep in a bed or large container, or freeze it until you have somewhere to put it.
Putting compostable packaging in a home bin
Those bags and wraps need industrial heat and airflow to break down. In a home bin they stay intact and add a plastic note to the whole batch, so they go in the trash unless your local collection accepts them.
Not checking the rules before setting up
Read your lease and ask the building manager first. It takes one message, and it removes the one worry that keeps people from starting at all.
Frequently Asked Questions
How can I compost if I live in an apartment?
Use a small sealed system indoors: a worm bin under the sink, a bokashi bucket on the counter, or an electric countertop digester. Store scraps in a lidded container, bury every wet addition under 3 to 4 inches of dry browns such as shredded cardboard, and check your lease first. Many buildings also run a shared drop-off, which takes no counter space at all.
What kitchen scraps cannot be composted in an apartment bin?
Keep raw meat, poultry, fish, and bones out, along with dairy, oily or fried food, cooked rice, pasta, and bread. Pet waste and litter never go in. Compostable packaging bags also stay out, because only industrial facilities with heat and airflow break them down. In a worm bin, use small amounts of citrus and onion and bury them deeply.
What is the easiest way to compost kitchen scraps?
Bokashi is the lowest-effort option for most apartments. You chop scraps, press them into a bucket of bran to remove air pockets, close the lid, and wait two to four weeks. Nothing decomposes anaerobically, so smells and flies stay minimal. The pre-compost still has to be buried 6 to 8 inches deep in soil or a large container.
How do I get rid of indoor compost flies?
Bury food 3 to 4 inches deep so nothing is visible from the top, and keep the surface covered with browns. Freeze scraps for 48 to 72 hours before adding them, which kills fly eggs and larvae arriving on produce. Add cardboard to an over-wet bin, move the bin away from open windows and doors, and check that the lid seats fully.
Are fruit flies good or bad for compost?
They are bad news. Fruit flies signal exposed food or a bin that is too wet, and they carry bacteria to everything nearby. A small number around an outdoor pile is normal, but flies at an indoor bin mean the food is sitting visible. Bury additions, keep the lid closed, and freeze incoming scraps for a few days.
Can I put dog pee in my indoor compost bin?
No. Pet waste carries bacteria and parasites that a home bin cannot handle, and worms cannot process it. Keep pet waste and cat litter out of any home system entirely, including worm bins. Dog pee in quantity will also sour the material and create the exact odor most people are trying to avoid. If you want pet waste handled, look for a municipal program that accepts it.
Conclusion
Start with one small bin in a cool, shaded corner away from the stove, and add a steady supply of dry browns so you are never more than a week behind on cardboard. Feed it fruit and vegetable scraps, coffee grounds, and eggshells in small amounts, bury each addition under browns, and check the moisture with a squeeze test once a week.
Most people can start today with what is already in the cupboard: a lidded tub, a bag of shredded cardboard, and a bucket for finished compost. It suits the cooking side of a small kitchen, so if your counter is already crowded, take a look at organizing kitchen drawers for cooking before the bin claims the space.
Adjust based on what happens. Sour smell means more browns, flies mean deeper burial, and a bin that never changes means the material is too coarse or the spot too cold.