
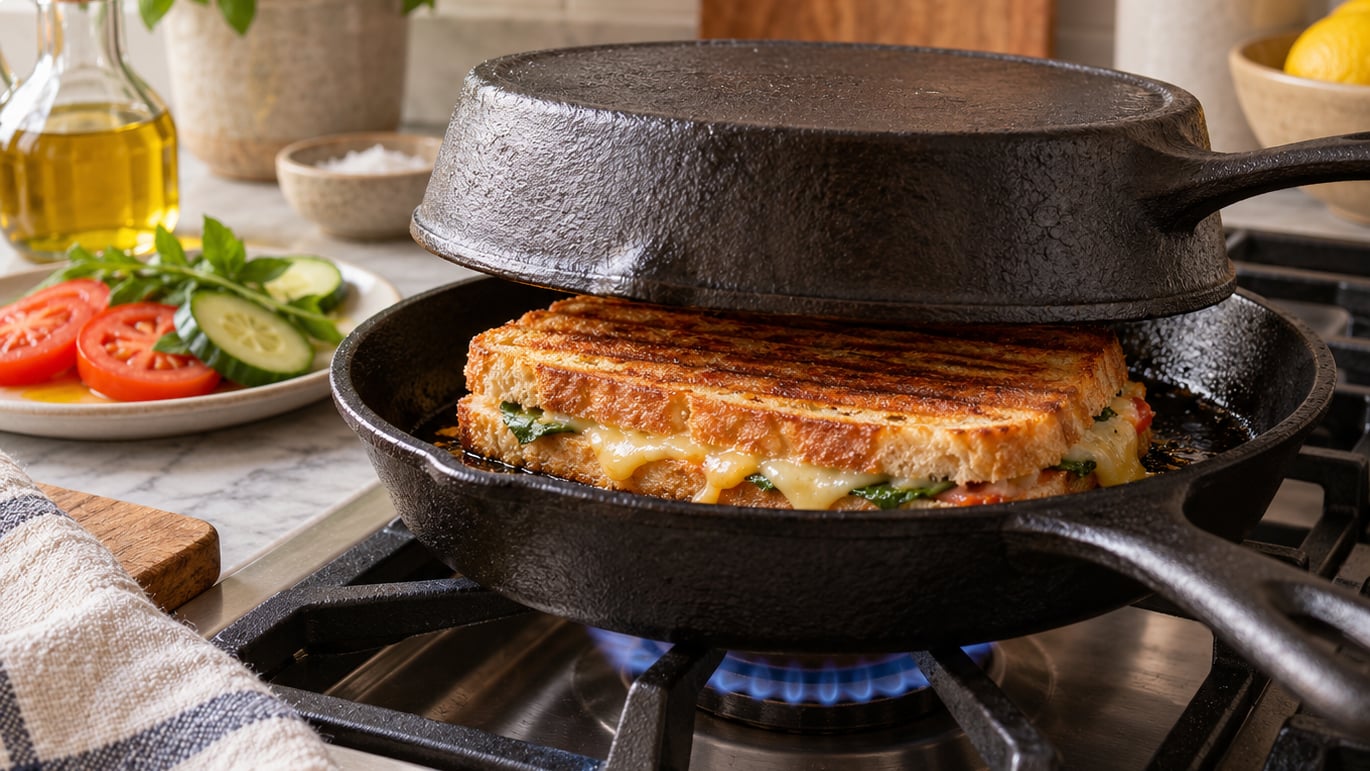
A panini without a panini press needs only two things a press would have given you: even downward pressure and heat held against both faces of the sandwich. Put your sandwich in a heavy skillet over medium heat, rest a second heavy pan on top, then finish it in a 400°F (205°C) oven until the cheese is bubbling. Fifteen minutes start to finish, one skillet to wash.
That is genuinely the whole trick. A panini press is a hinged pan that squeezes a sandwich between two hot plates. Take the plates away and you still have a hot pan and something heavy sitting on the bread, which is all the machine was doing.
What You Need
Nothing here is a special purchase. Everything works with a well-stocked kitchen drawer.
- Bread: sturdy sandwich bread, sourdough, ciabatta, or a small baguette cut to fit your skillet. Slightly stale bread holds up better under weight than a fresh soft loaf, and a day-old loaf is a good excuse for how to make croutons from stale bread if you have a lot of it.
- Cheese and fillings: mozzarella, provolone, cheddar, Gruyère, or a melt-friendly blend, plus a protein such as turkey, ham, or salami and a few vegetables. Cheese is the glue that keeps the layers from sliding apart.
- Spread: butter, olive oil, or mayonnaise for the outside of the bread. Mayonnaise browns better than butter because of its higher oil content.
- Equipment: a heavy skillet, a wide spatula, and something to press with — a second cast iron skillet, a heavy pot, a baking sheet with a couple of foil-wrapped cans on top, or a loaf pan. A paper towel or a sheet of parchment between the sandwich and the weight stops the top from sticking.
A lid is optional. It speeds up the second side if the cheese is lagging behind the crust, and it costs you nothing to leave it nearby.
Step-by-Step: How to Make a Panini Without a Panini Press
The skillet supplies the press-like contact heat, and the oven finishes the sandwich evenly. Do both and you get an even sear with a fully melted center, which neither step manages alone.
1. Choose Bread and Fillings That Melt Well
Bread thickness decides how long the sandwich needs to cook. Anything over half an inch thick will still have a cool, chewy middle when the outside is golden. Trim a small baguette or halve a thick slice rather than cooking around it.
Cheese type matters more than most people expect. Low-moisture mozzarella and provolone melt without turning oily, cheddar gets stretchy, and a soft washed-rind cheese such as Brie goes melty fast but needs less time on the heat. Lay thin slices so they cover every edge of bread; a slice that overhangs burns before it melts.
Wet ingredients are the enemy. Drain roasted peppers, pat tomatoes dry, and keep watery vegetables to a thin layer near the center. Their steam softens the bread from the inside no matter how well you press.
2. Heat the Skillet and Prepare the Sandwich
Set the skillet over medium heat and let it get properly hot before assembly — a minute or two for cast iron, about 30 seconds for a lighter pan. A cold pan soaks up fat and turns the first side pale before it ever crisps. Wipe it with a paper towel and add a thin film of oil.
Butter or coat the outside faces of the bread now, while the pan heats. Assemble with the cheese as close to both bread slices as you can, meat in the middle, and no more filling than will fit without bulging. Overstuffed sandwiches slide out from under the weight and shed their filling onto the pan.
3. Brown the First Side Under a Weight
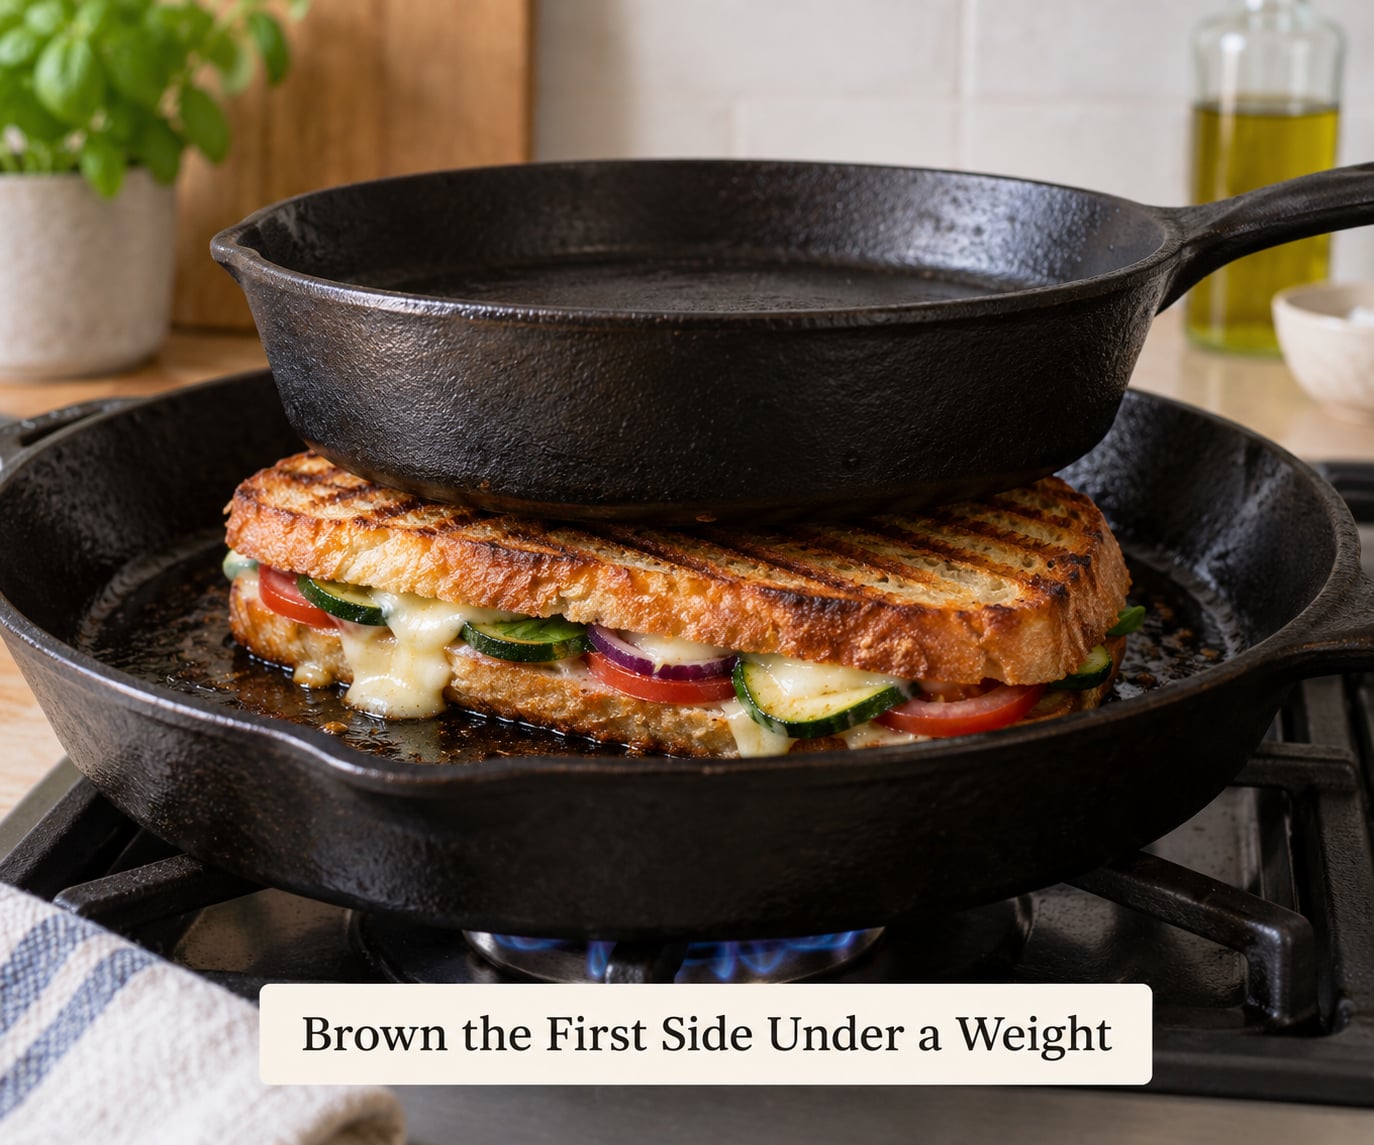
Lower the sandwich into the skillet and set the weight on top. Cook over medium heat for 2 to 3 minutes without moving it. Resist the urge to nudge the sandwich around; sliding it is what tears the crust before it forms.
How do you know the underside is ready without opening it? Slide the spatula an inch under the edge and lift just enough to see the color. Deep golden brown with a darkened line across the middle means it is ready. Pale with no color at all means give it another 30 seconds. A quick lift is the only check you need.
You are also listening for a quiet sizzle that has thinned to a lazy hiss. That sound means the moisture has left the bread and the crust is drying out.
4. Flip and Brown the Second Side
Turn the sandwich with a wide spatula, working from the far edge toward you so the whole thing moves as one piece. Put the weight back on and cook another 2 to 3 minutes.
Small or thick sandwiches cook faster than the timings suggest. A half-size sandwich on a heavy weight can be finished in 90 seconds a side, and the crust will be darker than a full-size one at the same clock time. Check it more often than the recipe says. If the second side browns faster than the first, drop the heat one notch so the cheese can catch up.
5. Finish in the Oven for Even Melting
If the cheese has melted and the bread is crisp through the center, you are done — the oven is optional. But a skillet only ever heats one face at a time, and a thick sandwich with a layer of turkey in the middle often has a cold core even when both outsides look done.
Move the whole skillet into a 400°F (205°C) oven, or slide the sandwich onto a baking sheet, for 4 to 6 minutes. The dry ambient heat is what closes the gap between the crust and the center. You are looking for visible bubbling at the cheese edge and a uniformly crisp surface all the way across.
Skip this step entirely for a single thin sandwich made with only cheese and tomato. The skillet will have done enough.
6. Rest, Slice, and Serve
Let the panini sit for 2 to 3 minutes after it leaves the heat. The cheese firms up slightly and the fillings stop sliding, which makes a clean slice possible. Cut with a sharp serrated knife in one confident motion — sawing compresses the bread and drags cheese out of the seam.
A simple green salad and a bowl of soup handle the side job nicely. For a larger table, roasted vegetables and a tray of these sandwiches work as much better than anything fussy; how to make brunch for a crowd without stress covers the rest of the menu if panini is the centerpiece. If you are cooking for a holiday, how to make a brunch for Mother’s Day at home has the timing worked out.
Common Mistakes and Tips
The bread goes soggy. Three causes, in order of likelihood: not enough pressure, weight lifted too early, or bread that was too fresh and soft. Press firmly but gently for the first 30 seconds, then release the pressure and let the residual heat finish the job. Leaving the weight on the whole time traps steam against the top crust and keeps it soft.
The browning is uneven. Check your skillet temperature before cooking rather than after. Medium heat with a properly preheated pan gives an even gold; a pan pulled straight off a high burner scorches the spots it touches first. Lower the heat once the first side is colored, and let the oven finish the job.
The cheese will not melt. It is usually the pan, not the cheese. A sandwich that hits a lukewarm skillet spends its whole cook time warming through. For stubborn cheeses, slice them thin, or shred them, and cover the sandwich with a lid for the last 60 seconds so the trapped heat works on the filling.
The sandwich falls apart when you flip it. Too little cheese between the layers, or a filling piled too high. Cheese melts into a binder during the first side — if you skipped it, the layers had nothing holding them. Assemble flatter and use a full slice of cheese on each side of the protein.
It is overfilled. A stuffed sandwich looks generous and cooks like a disaster. Halve it for the skillet and cook the two halves separately, or wrap it in foil with a seam on top so the contents stay put.
The skillet is too hot. If the bread is dark before the cheese has moved at all, the pan is above medium. That is always a heat problem, not a cheese problem.
A few habits help more than any single trick. Use slightly stale bread. Press firmly but gently, then stop pressing. Choose one filling combination and get that right before you start improvising. And if you own a press already, oil the plates or lay parchment between them — a sandwich fused to the top plate is the most common reason people give up on the appliance entirely.
Frequently Asked Questions
What can I use instead of a panini press?
A heavy skillet or cast iron pan on the stove, with another heavy object resting on top of the sandwich, does everything a press does. Good weights include a second cast iron skillet, a heavy pot, a loaf pan, or a baking sheet with a couple of foil-wrapped cans on it. You want roughly 3 to 5 pounds so the bread presses into the hot pan and the moisture gets squeezed out.
Do I really need a panini press to make a panini?
No. A press only applies even downward pressure and holds heat against both sides. A preheated skillet plus a weight on top reproduces both, and the skillet version usually browns better because you control the pan temperature. A press is worth buying if you make one or more every week and want zero fuss, but for the occasional sandwich the stovetop method is faster.
Can you make a panini in a toaster oven?
Yes, and it is the fastest method for a single sandwich. Set the sandwich on the rack with a heavy oven-safe item resting on top, toast or bake at 400°F (205°C), and flip once after about 4 minutes. Expect a soft crust rather than a true sear, since a toaster oven heats by element and radiant heat rather than contact. Broil for the last minute if you want browning.
Can you make a panini in the oven?
The oven is the best option for a batch. Put assembled sandwiches on a baking sheet, set a second sheet pan or a foil-wrapped brick on top, and bake at 400°F (205°C) for 10 to 12 minutes, flipping once at the halfway mark. The weight flattens the sandwiches so they crisp evenly, and the even oven heat means no burnt first side.
How do you make a panini in a frying pan?
Heat a heavy skillet over medium heat and coat it lightly with oil. Butter the outside of the bread, assemble the sandwich, and set it in the pan. Place a heavy pot or second skillet on top and cook 2 to 3 minutes per side without moving it. Slide a wide spatula underneath to flip, then finish in a 400°F (205°C) oven if the cheese in the center is not fully melted.
Do you have to press a panini for it to turn out right?
Pressure matters, but it is not all or nothing. Even moderate weight gives you a flatter sandwich, an evenly crisped crust, and cheese that reaches the edges in the same time the bread browns. Without it you still get a good grilled sandwich, just thicker and less uniformly crunchy. If your result keeps coming out soggy in the middle, more consistent downward pressure is the first thing to change.
Conclusion
The method that works every time is simple: assemble a sandwich on sturdy bread with plenty of cheese, brown it in a preheated skillet over medium heat with a heavy weight on top for 2 to 3 minutes a side, then finish it in a 400°F (205°C) oven until the cheese bubbles and the crust is crisp all the way through.
For your first attempt, keep it small. One medium cheese, one protein, a thin layer of vegetables, and bread lightly coated in oil. Get that one right and the rest of the variables — heavier weights, grill marks, two sandwiches at once — are easy to add.