
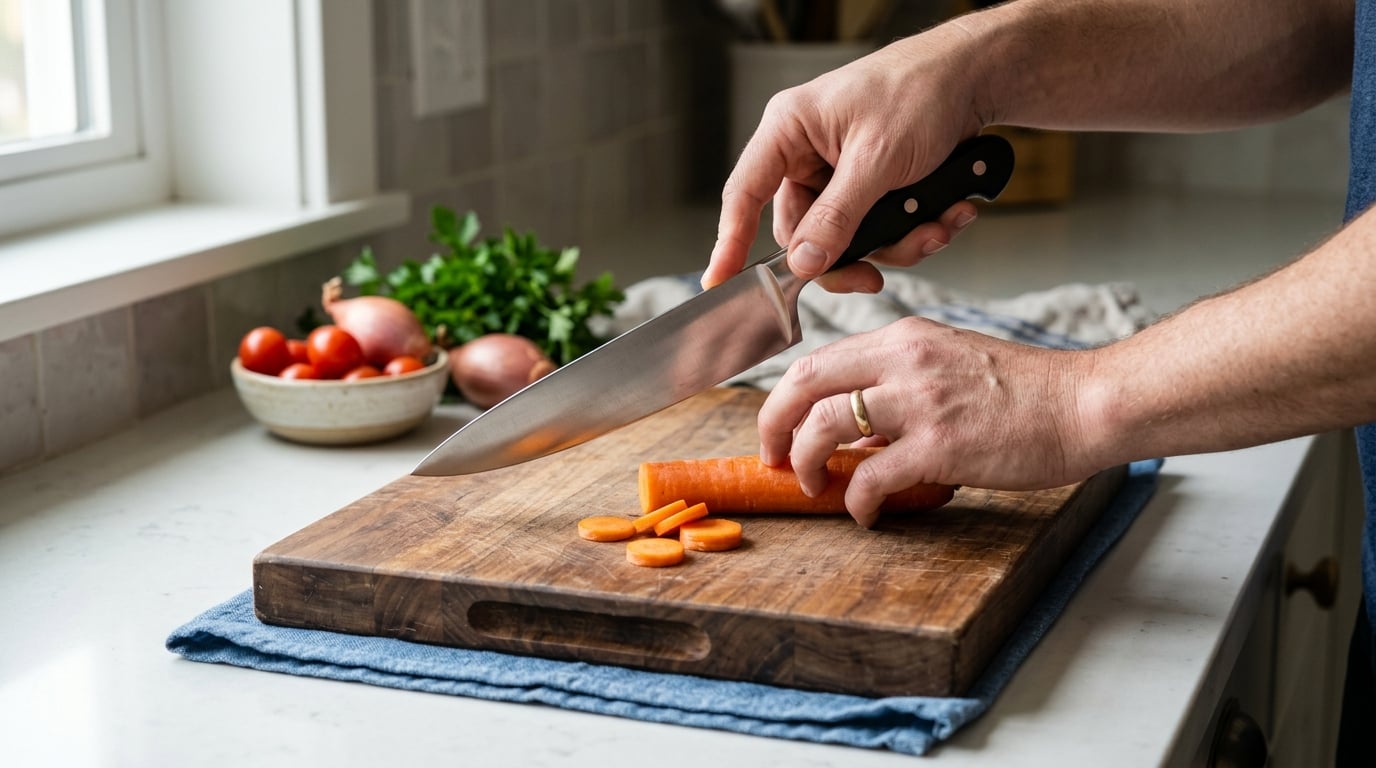
The correct way to hold a chef’s knife is the pinch grip: your thumb on one flat of the blade, your index finger curled against the other, meeting just in front of the handle, with the remaining three fingers wrapped around the handle. The knife should feel like an extension of your hand, and the grip should stay relaxed rather than clamped. Knowing how to hold a chef knife correctly takes about ten minutes to set up and a few sessions before it stops feeling odd.
Most cuts happen because of a dull blade, a sliding board, or a grip held too far back on the handle out of fear. None of those are about strength. They are about position.
Below is the whole sequence: what to have in front of you, the six steps of the grip itself, the mistakes that cause most of the injuries, and what to change for different jobs.
Table of Contents
- What You Need
- Step-by-Step: How to Hold a Chef Knife Correctly
- Common Mistakes
- Frequently Asked Questions
- What is the correct way to hold a chef’s knife?
- Should I use a pinch grip or a full fist grip?
- Where should my thumb go when holding a chef’s knife?
- How do I keep my fingers safe while cutting vegetables?
- Is it better to hold a knife with the tip pointed down?
- What grip should I use for peeling or other small knife tasks?
- Conclusion
What You Need
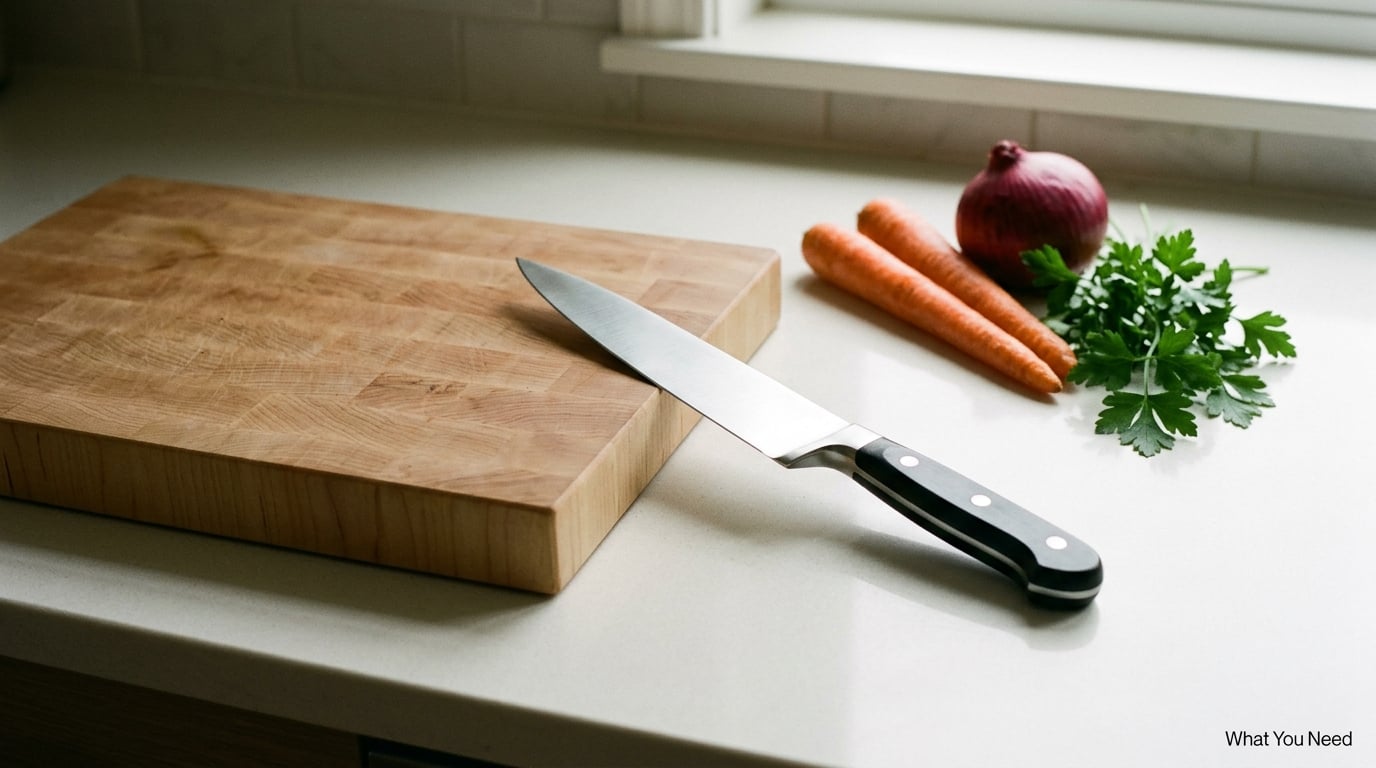
You need very little. A grip cannot be practised properly on the wrong setup, though, so these four things matter more than they sound.
- An 8 inch chef’s knife that is actually sharp. A dull edge forces you to press, and pressing is where fingers get hurt. If your knife skates off a tomato skin instead of piercing it, fix that before you worry about finger placement.
- A cutting board that will not move. Sit it on a damp towel, folded to the size of the board. The towel gives you friction so a hard chop cannot walk the board across your counter.
- Dry hands and dry food. Wipe your hands before you pick the knife up, and dry the surface of what you are about to cut. Wet skin on a handle is the same problem as wet soap on a soap dish.
- Something forgiving to practise on. A loaf of stale bread, a block of firm tofu, or a thick cucumber will let you repeat the motion a hundred times without consequences.
Height helps too. Cutting at chest height is easier on your wrist than cutting at counter height, because the forearm stays closer to neutral instead of angled down for a whole session.
Step-by-Step: How to Hold a Chef Knife Correctly
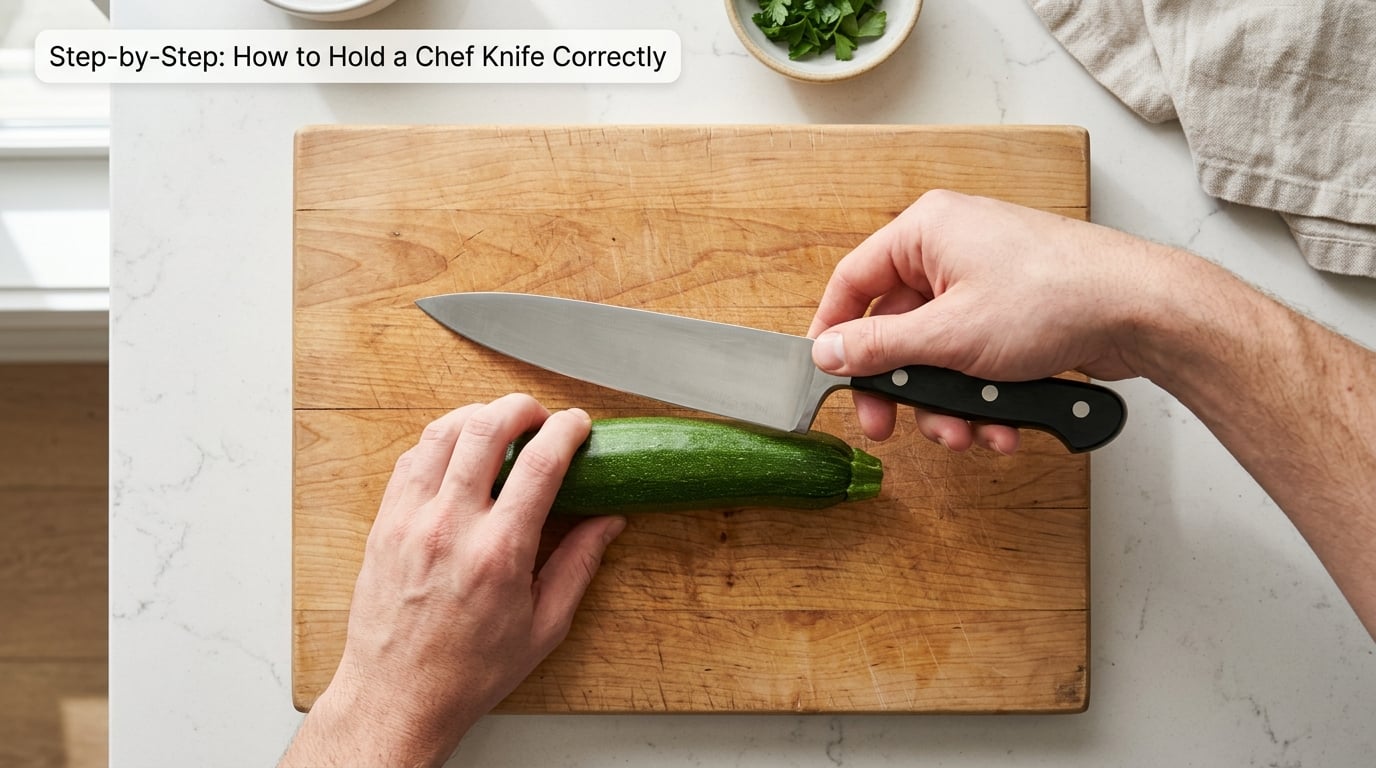
Six steps, in order. The first three build the knife hand, the next two build the motion, and the last one keeps you from carrying a bad habit into the next ingredient.
1. Set Up the Cutting Board
Put the board on your damp towel before you pick up anything. Then place your food on the board before you pick up the knife, not after.
Keep the food slightly curled and positioned so the part you are cutting sits between your guide hand and the knife, with clear counter space to the right for the slices to fall away from your cutting hand. If the ingredient is round, flatten it first with one cut so it cannot roll while you approach it.
You will know the setup is right if you can place the tip of the knife on the board just ahead of the food and the rest of the blade hovers above it without touching anything.
2. Place Your Thumb and Index Finger
Pinch the blade between your thumb and the side of your curled index finger, as close to the handle as you comfortably can.
Your thumb sits flat on one flat of the blade. Your index finger curls around the opposite side, and the pad of the fingertip meets your thumb. Anywhere from the bolster forward along the first inch or so of the blade works; the closer you are to the handle, the more control you get.
What you are touching is steel, not edge. Stay well away from the cutting side. If you are pinching so far forward that you can see the edge from above, move back toward the handle until you cannot.
You will know it is right when the knife stops feeling like an object you are holding and starts feeling like a longer thumb.
3. Wrap Your Remaining Fingers
Loop your other three fingers around the handle. Full grip on the handle, gentle pressure on the blade, and nothing squeezed white-knuckled.
Those three fingers supply the power; the pinch supplies the direction. That division is the whole point of the grip. Your middle finger usually rests just below where your index finger pinches, which is a useful landmark for finding the spot again without looking.
Hold with about the pressure you would use to hold a full coffee cup. If your forearm is tightening within a few dozen cuts, you are gripping too hard, and no amount of technique will fix it. Loosen and let the pinch do the work.
4. Position Your Guiding Hand
Curl the fingers of your other hand into a claw, knuckles forward, fingertips tucked under, thumb held back against the food or the board.
Rest the flat of the blade lightly against the middle knuckles of that hand. Your fingertips pull back and out of the path the edge travels, and the knuckles act as a moving wall that stops the blade from sliding off the food sideways.
Two habits make this work. The claw hand walks forward one knuckle at a time as you cut, staying in contact with what you are cutting, and your thumb stays behind your fingers rather than sticking up beside the blade where the tip can land on it.
For left-handed cooks, nothing changes except the mirror image: knife in the right hand, claw in the left, with the cutting motion running the other way across the board. The finger positions are identical, just flipped.
5. Use the Knife With a Stable Rocking Motion
Let the blade rock from the tip to the heel for most prep work, and keep your wrist neutral rather than bent.
Lift the tip, keep the spine of the blade in contact with the food, and let the weight of the knife do the work as it comes back down. The knife should sound like a tap, not a slam. When you need more force, use the knuckles of the claw hand as a fulcrum and push the heel down through the food.
A secure grip is what makes that possible. With the thumb and index finger on the steel, the blade tracks where you aim it instead of twisting under load, and the tip stays under control near the board instead of wandering toward your guide hand.
6. Release and Reset Between Cuts
Put the knife down and rebuild the grip whenever it stops feeling right, rather than pushing through the last few cuts.
That happens more often than people admit: halfway through an onion, after a handful of herbs, any time your hand gets warm or the handle gets slick. A three-second reset is cheaper than a bandaged fingertip.
Loosen your fingers, shake the hand out, roll the wrist, then pick the knife up again by the same three landmarks: thumb flat on the blade, index finger curled opposite it, three fingers around the handle.
Common Mistakes
There is a wrong way to hold a knife, and almost everyone does at least one of these six at some point. Each one has a reason behind it that is worth knowing.
- Holding too far back on the handle. The further back you grip, the longer the blade acts as a lever, so a small hand movement becomes a big tip movement. Pinch closer to the bolster, where the handle meets the blade.
- Flat fingertips on top of the food. This is how most kitchen cuts happen, usually at the last segment of an onion or the end of a carrot. Curl into a claw so the fingertips tuck under and the knuckles take the load.
- Pushing straight down on the spine. Driving the blade downward rather than through and forward wastes energy, dulls the edge faster, and makes you grip harder. Rock the blade and guide it instead of forcing it.
- Riding the index finger along the spine. A common instinct from paring knives, and it costs you control on a large chef’s knife. Finger on the spine means your power hand is at the tip end of the lever, where you have least authority.
- Squeezing. A tight grip causes hand fatigue and a stiff wrist within a long prep session, and a tired hand is a clumsy hand. If your forearm is burning, you are holding too tight, not working too hard.
- Letting the board slide. A board that moves mid-cut is as dangerous as a knife that slips in your hand, and it is more common. The damp towel fixes it in five seconds.
Grip and Safety Tips for Better Knife Control
A few practical adjustments that make the grip easier to live with.
- Pick a handle that fits your hand. If your fingertips cannot comfortably reach the end of the handle without stretching, the grip will be tight and rushed. Small hands do better with a thinner handle than a chunky one.
- Match the grip to the knife shape. A wa handle with a rounded spine is built to be pinched, and enthusiasts on knife forums describe the balance as excellent once you adapt. A thick, squared spine suits a full handle grip better, because a pinched finger needs somewhere to sit.
- Keep the edge sharp. A sharp knife needs less force, less force means less pressure on your pinch, and less pressure means fewer slips. Regular honing does more for your safety than any grip change.
- Dry your hands mid-session. If the handle feels slick, stop and wipe your palm. A towel between cuts is not fussiness.
- Change grip for the task, not by habit. A paring knife or peeler usually wants a pinch near the tip. A small utility knife with a short handle often feels better in a full fist. Bony or hard work can call for a reverse grip, where the blade faces away from your body, though it needs practice before you rely on it.
- Let the first week feel awkward. The pinch grip is genuinely uncomfortable for the first week or two for most home cooks. The fix is repetition on something soft, not forcing yourself through a pile of onions with a bad grip.
Frequently Asked Questions
What is the correct way to hold a chef’s knife?
The correct grip is the pinch grip. Pinch the blade between your thumb on one flat and your curled index finger on the other, just in front of the handle, then wrap your remaining three fingers around the handle. Keep the pressure light, like holding a full coffee cup, so your hand stays relaxed and the knife works like an extension of your arm.
Should I use a pinch grip or a full fist grip?
Both are safe if your fingers stay out of the blade’s path. The full handle grip is easier for beginners, small knives, and tasks like peeling. The pinch grip gives noticeably more control and precision on a chef’s knife, because your thumb and index finger steer the blade directly. If you are cutting vegetables regularly, the pinch grip is worth the short adjustment period.
Where should my thumb go when holding a chef’s knife?
Your thumb goes flat on one flat of the blade, opposite your curled index finger, as close to the handle as you can comfortably reach. That meeting point is the anchor for the whole grip. Stay on the steel, not the edge: if you can see the cutting side from above, you have gone too far forward and should move back toward the bolster.
How do I keep my fingers safe while cutting vegetables?
Curl the fingers of your guide hand into a claw, tuck the fingertips under, and keep the thumb behind them. Rest the flat of the blade against your middle knuckles as you cut and walk the claw forward one knuckle at a time. A damp towel under the board and a sharp edge do more for your safety than any finger position on their own.
Is it better to hold a knife with the tip pointed down?
While you are cutting, the tip stays on or just above the board so you keep control of the blade. When you carry the knife, turn the tip down and slightly away from your body, blade facing the floor. When you set it down, lay it flat rather than burying the edge in a pile of dishes, which is where most nicks come from.
What grip should I use for peeling or other small knife tasks?
For a paring knife or peeler, pinch near the tip of the blade with a light grip, since those knives are controlled from the point. Many cooks switch to a full handle grip for small utility work with short handles, where the full fist is more stable. Whichever you use, the guiding hand stays in the claw and the blade meets the board under control.
Conclusion
The pinch grip is the safest and most precise all-purpose hold for a chef’s knife: thumb flat on the blade, index finger curled opposite it just in front of the handle, three fingers around the handle, pressure relaxed. Pair it with the claw on your guide hand and a board that does not move, and the most common kitchen injuries stop having anywhere to happen.
Start today with the board on a damp towel and twenty slow cuts on something soft. Rebuild the grip every few cuts until your hand finds those three landmarks without thinking, then take it to real prep work. This guide covers how to hold a chef knife correctly and how to keep both hands out of trouble while you do it.