
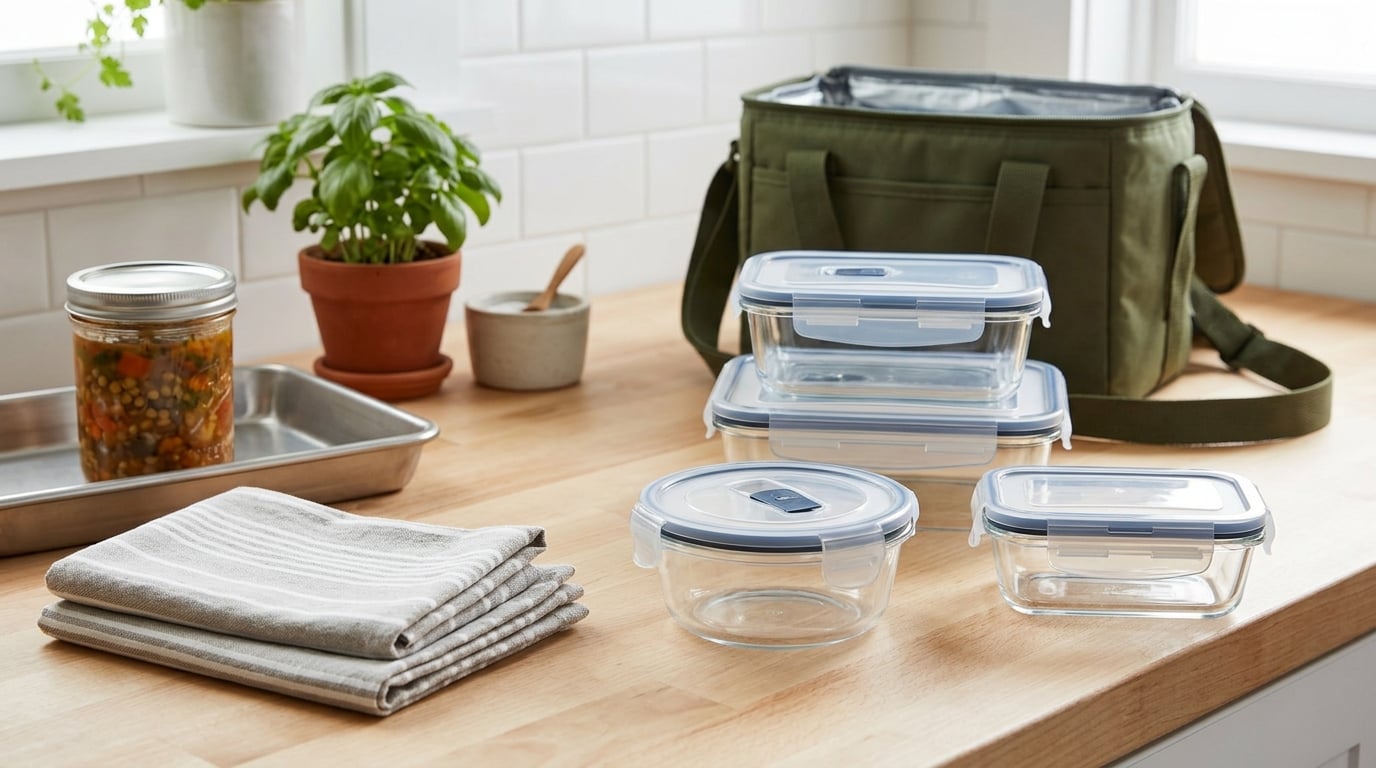
Learning how to transport food without spilling comes down to three things: a container with a real seal, contents that cannot slosh, and a vehicle setup that keeps everything upright. Get those right and a pot of chili makes the 20-minute drive to a potluck as calmly as a bag of sandwiches. The whole process takes about 15 minutes of packing, and most of it is done before you ever touch the car door.
I have watched the same disaster play out more times than I care to admit. A slow cooker insert riding loose on the passenger seat, a casserole dish sliding into the console at a stoplight, a Tupperware lid ejecting itself somewhere between the driveway and the highway. Every one of those spills had a cause I could have fixed with a towel and a rubber band.
Here is the system I use, tested over years of hauling holiday side dishes, Sunday soup to my sister’s place, and enough school lunches to fill a trunk.
What You Need
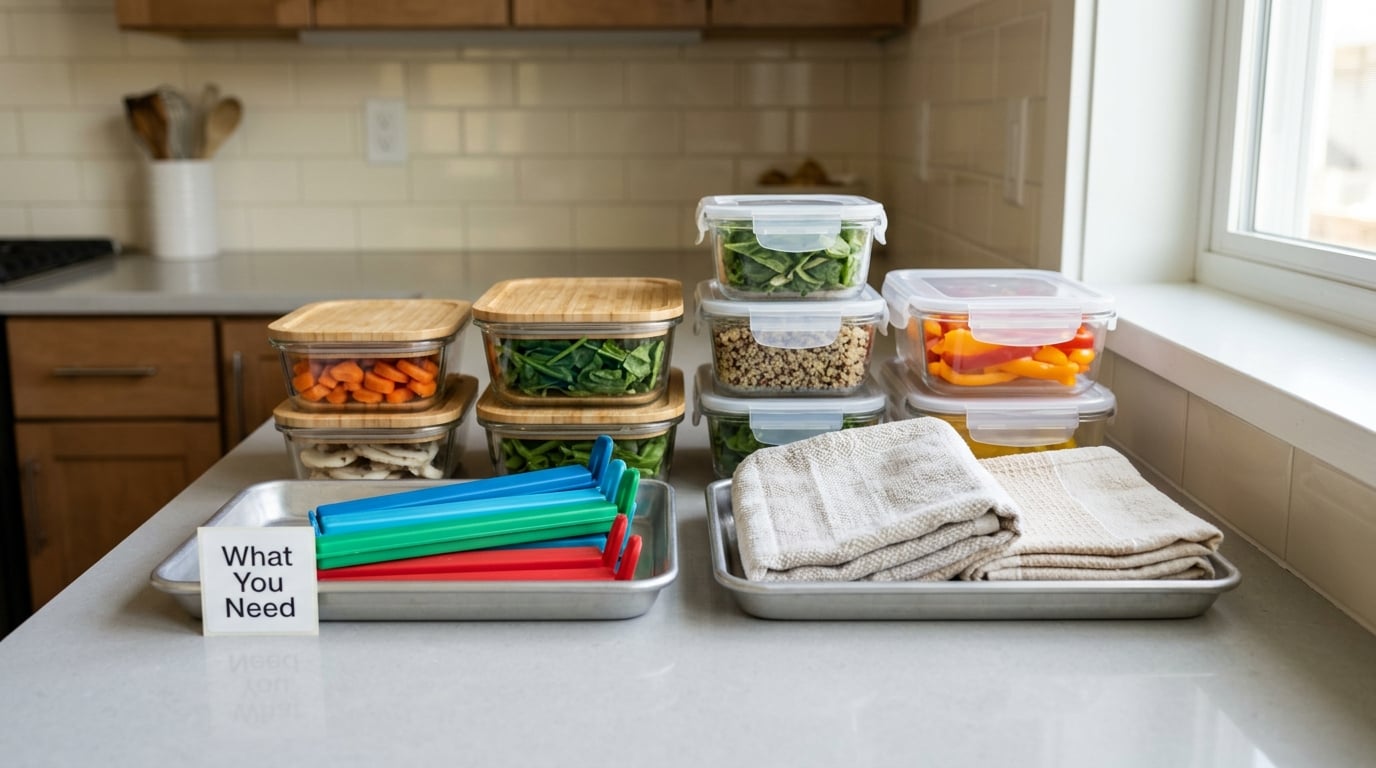
Leak-proof containers with locking lids come first, and the lock matters more than the brand. A snap-on lid with a rubber gasket, a twist-lock with visible tabs, or a wide-mouth jar with a screw ring all hold liquid. The friction-fit lids that just press down will fail in a car every time.
Beyond this, gather a shallow tray or sheet pan for anything baked, a small stack of towels or a non-slip drawer liner for cushioning, and a cooler or insulated food carrier if the trip runs past 30 minutes. A box or crate just large enough to hold your containers is the single most useful piece of gear, and a bungee cord or strap for the passenger footwell finishes the setup.
For sauces and dressings, keep small wide-mouth jars with screw lids. They pour, they seal, and they go back in the fridge without a fight.
Matching the vessel to the food is half the work:
- Glass jar with a screw ring. A silicone gasket compressed by a threaded lid seals completely, and it handles heat and cold equally well. Best for soup, stew, salad dressing, and leftovers.
- Snap-lock plastic container. A clipped lid with a molded gasket seals very well and weighs less than glass. Best for road trip food, kids’ lunches, and meal prep.
- Stainless insulated tumbler. A screw cap with a silicone ring seals tightly and holds heat for hours. Best for broth, oatmeal, coffee, and eating one-handed.
- Disposable foil tray with a tight plastic lid. The rim is pressed flat and taped, so the seal is fair and good for a single trip only. Best for potluck casseroles when nothing else is clean.
- Zip-top freezer bag inside a rigid box. A double-zip inside a crate it cannot flex is good; the same bag on its own is poor. Best for marinated meat, grilled vegetables, and soft sides.
- Bamboo or steel bento box. A snap lid, often with a silicone seal, holds up well when a divider is in place. Best for dry snacks, sandwiches, and cut fruit.
Glass keeps flavors the cleanest and handles heat well, but it is heavy and shatters if it lands wrong, so pad it and keep it low in the car. Plastic is lighter and shrugs off a drop onto a footwell, which is why it is the better pick for a car full of kids.
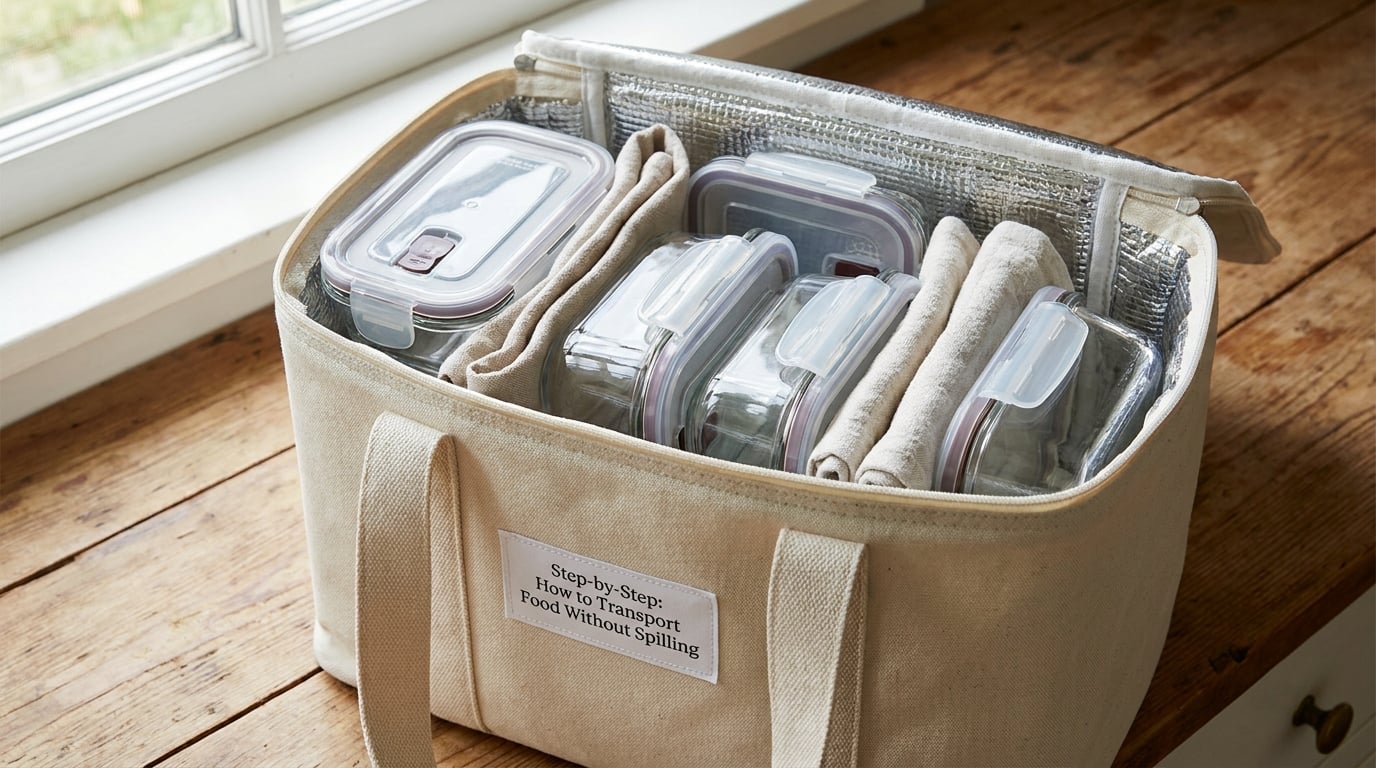
Step-by-Step: How to Transport Food Without Spilling
How to Prepare the Food
1. Cool it to the right temperature. Hot food goes into a container only if the container is rated for hot contents. Otherwise, cool it in shallow containers in the fridge first, then take it out of the fridge about 20 minutes before you leave. Room-temperature food that goes straight into a cooler in a hot car loses its safe window fast.
Cooking safety is the same math: poultry to 165°F (74°C), ground meat to 160°F (71°C), and whole cuts and fish to 145°F (63°C).
2. Leave headspace and drain the excess liquid. Fill a liquid container about two-thirds full, no more. The air gap is what keeps the lid from being pushed off by a moving wave, and a stew with a cup of loose broth in the bottom slams around far more than a thick one.
You will know you left enough room if you set the sealed container on a flat counter and the liquid does not reach the lid. Thick stew and chili need no headspace at all, and that is part of why they travel better than soup.
How to Seal Containers Properly
3. Run your finger around the gasket before you close it. A silicone ring that has dried out, picked up food debris, or come slightly out of its channel will not seal no matter how hard you press. Wipe it clean, check that it sits flat all the way around, and replace any ring that feels hard or cracked. Residue around the rim is the reason a container that used to be reliable starts leaking on trip three.
4. Lock the lid, then test the seal. Push down and turn until you feel the tabs catch, or screw the ring down until it stops. For anything liquid, test it over the sink: set the container down hard, pick it up, carry it across the room and set it down again. Ten seconds of shaking tells you more than the word “leak-proof” printed on the side.
If a container has no real lock, build one from what you own. A zip-top freezer bag fitted inside a coffee mug, a rubber band stretched across a plastic lid, or plastic wrap pulled tight under a rubber band will hold a dressing for the length of a normal drive.
How to Pack the Food for Travel
5. Nest each container in a towel-lined box. This is the step people skip and the one that saves the day. Wrap the container in a folded towel, set it into a box or crate, and pack more towels in every gap so nothing can move a full centimeter. Cushioning absorbs the sloshing energy that would otherwise drive liquid straight at the lid.
The same principle is why delivery drivers stand drink carriers against the back of the seat with the food behind them: a solid object on two sides keeps a row of containers from tipping as a group.
6. Keep the load low, level and strapped. The passenger footwell is the most stable spot in most cars because it sits ahead of the front axle. Failing that, the flat floor of the trunk works if you line it with a non-slip drawer liner or an old yoga mat. Never put a container on a seat, and never stack anything heavy on top of a dish.
Run a bungee cord or strap through the bag handles and hook it to a headrest. You should be able to push the whole load with one hand and feel nothing give.
How to Handle Soups, Sauces, and Liquids
7. Give every liquid its own upright, boxed home. Liquids get packed after the dry food, upright, in wide-mouth containers with real screw lids or snap latches. A ziplock bag of soup needs a second layer of protection: slide it inside a rigid container or a cardboard tray, because the zipper is a weak point and the bag will flex. Set liquid containers against the wall of the box with dry dishes as the brace in front of them.
Skip the sealed jar packed loose with everything else. One hard stop is all it takes. If you have a wide-mouth insulated tumbler, a serving of soup becomes a hot drink with a lid that screws down hard, which is a much easier thing to hold than a jar in a bag.
8. Manage the temperature for the length of the trip. Keep cold food at or below 40°F (4°C) with a cooler and frozen gel packs, and keep hot food at or above 140°F (60°C) in a preheated insulated carrier wrapped in towels. An insulated tumbler filled with boiling water, emptied, and then loaded with hot soup holds temperature for hours.
The safe window is short and worth knowing: perishables should not sit unrefrigerated for more than 2 hours, and only 1 hour if it is above 90°F (32°C) outside. A car parked in the sun can cross that line in a single errand. If your drive is long, pack the food cold and reheat it at the other end.
How to Check the Load Before Leaving
9. Run the 30-second load check. Push each container down and confirm nothing shifts. Pick up one liquid container and turn it upside down over the sink. Look for towels or bread in the box as improvised bumpers around anything fragile or tall. Make sure hot and cold items are separated, the dry snacks are on top where hands can reach them, and a trash bag for wrappers is in the bag.
Then drive gently for the first two minutes. Hard acceleration and late braking move the liquid more than any turn will, and most spills on the short trip happen in the parking lot.
Common Mistakes
Overfilled containers. Fill past two-thirds and the lid takes the full force of a moving wave. Fix: leave a finger-width of headspace, or transfer the overflow to a second container.
Lids that only press down. Friction lids have no positive seal, and pressure from a sloshing load pops them off. Fix: use a gasket, twist lock, or screw ring, and add a rubber band across the top as insurance on anything liquid.
Hot food poured into a cold plastic container. Most storage plastic is not meant for hot contents, and thermal expansion can warp the rim so the lid no longer seats. Fix: use a container labeled safe for hot food, or cool the dish first and reheat on arrival.
Containers riding loose in a bag. A towel wrapped around a container that can still slide inside the box does nothing. Fix: nest containers in a box so the towels are compressed, not just folded loosely around the outside.
Liquids packed beside glass and cake. One leak ruins everything it touches. Fix: put dry, delicate, and fragile items in their own bin or on the seat, and keep liquids in a separate, lower, boxed section.
Two smaller mistakes are worth naming too. Trunk organizers are fine for dry goods but useless for liquid containers, because the molded compartments do not flex with a jar. And an open bag of loose foil, deli containers, or cut fruit on the seat is a mess waiting for the first turn; put those in a lidded bin or a zip-top bag with an elastic band.
If you are feeding a crowd, the same principles scale up. Cook ahead, chill early, and finish reheating at the destination. Our guide to making brunch for a crowd without stress covers the prep side of a big morning, and it pairs well with a transport plan that keeps everything upright.
Frequently Asked Questions
What is the best way to transport food?
Put the food in a container with a locking gasket or screw lid, fill liquid dishes no more than two-thirds full, nest each container in a towel-lined box, and secure the box on the car floor with a strap. Cool hot perishables before packing and keep cold food at or below 40°F (4°C) in a cooler with gel packs. The seal stops leaks and the box stops tipping; you need both.
How long can food travel in a car?
Perishable food should not sit unrefrigerated for more than 2 hours, or 1 hour when the temperature outside is above 90°F (32°C). Keep cold food at or below 40°F (4°C) and hot food at or above 140°F (60°C) using a cooler, gel packs, or a preheated insulated carrier. Anything past that window in the danger zone should be thrown out rather than served.
What is the 2 2 2 rule for food?
The 2 2 2 rule usually means the 2-hour rule for unrefrigerated perishable food, cut to 1 hour in temperatures above 90°F (32°C). For transport, it simply means you have a 2-hour budget for a dish to sit between 40°F (4°C) and 140°F (60°C) before it is unsafe. Pack cold and use a cooler if the drive is longer than that.
How do I stop soup spilling in the car?
Use a wide-mouth jar or container with a screw ring and silicone gasket, fill it two-thirds full, and test the seal by inverting it over the sink. Set the container upright in a box lined with folded towels so it cannot tip, strap that box to the passenger footwell, and drive gently for the first few minutes. A wide-mouth insulated tumbler is an even easier way to carry a single serving.
Can I take homemade food on a plane?
Solid foods such as sandwiches, fruit, and baked goods are generally fine through security. Liquids, soups, sauces, and dressings follow the carry-on liquids rule of 3.4 ounces or less per container, all fitting in a single clear quart-size bag, and anything larger has to go in checked baggage. Wrap containers in a leakproof bag inside a box lined with absorbent material, and expect ice packs to be treated as liquids unless they are frozen solid.
What two foods never expire?
Honey and salt are the two pantry staples that keep essentially indefinitely when stored sealed and dry, though honey can crystallize and still be usable. Dried rice, beans, and lentils keep for years and are the usual third choice. For car transport, any of them is worth keeping in a sealed bin, since a dry kit never leaks and takes up very little room.
Start with the box. Get a towel-lined box or crate that holds your containers snugly, put the liquids in it first on the low side, and strap the whole thing to the passenger footwell. Everything else in this guide is a refinement of that idea, and once the towel goes in first, the spilling mostly stops on its own.
Getting the food right in the kitchen matters just as much as the packing. If you are curious why a restaurant plate seems to hold together better than a home one, why restaurant food tastes better than home cooking covers the technique side of the same conversation.