
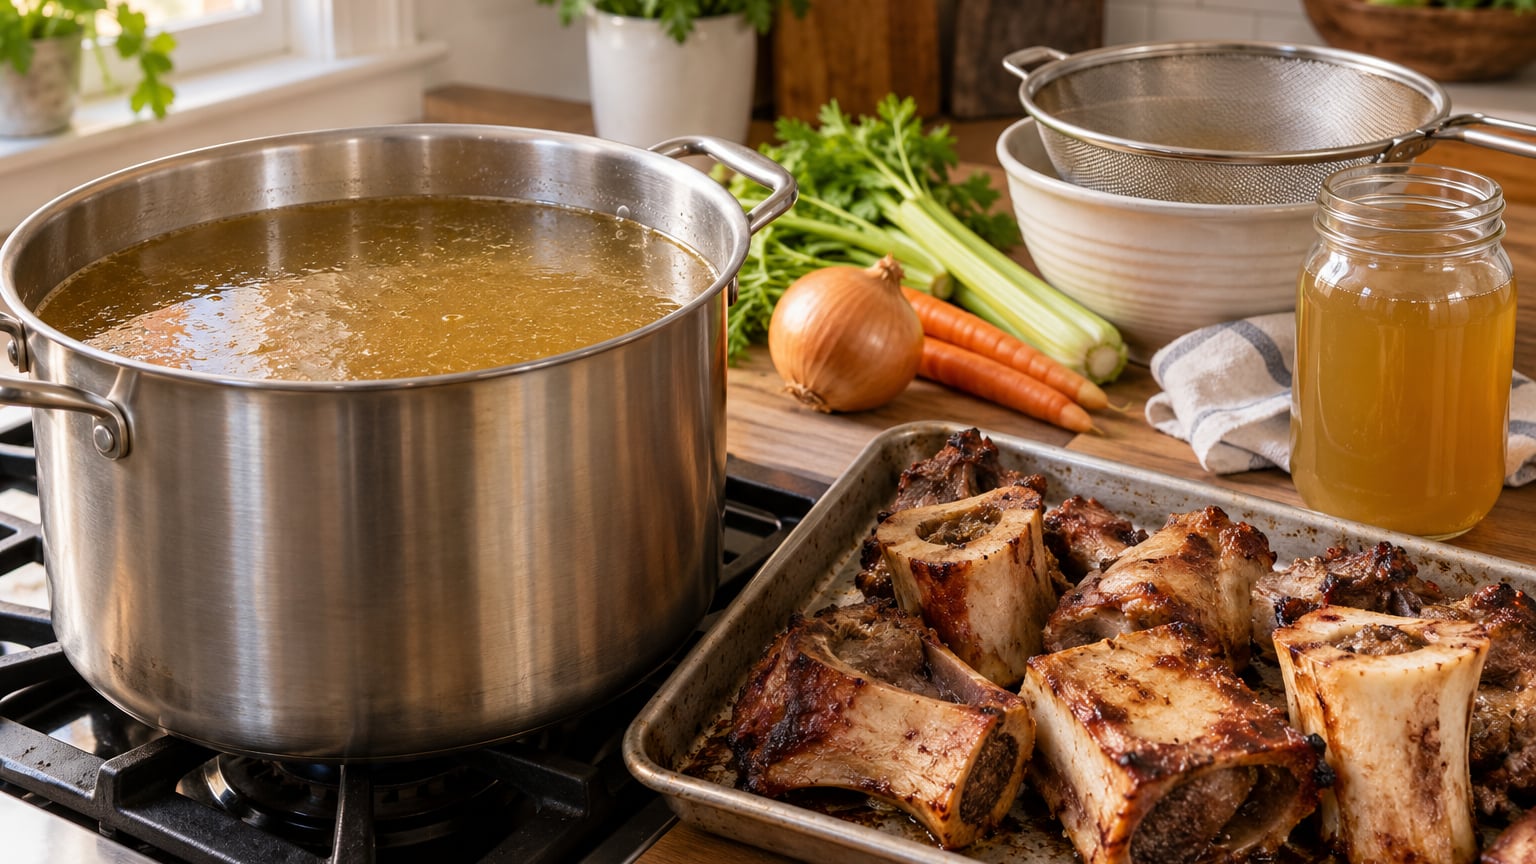
Bone broth is bones, water, a splash of vinegar, and patience. To make bone broth on the stove, you brown the bones for flavor, cover them with cold water, bring the pot to a boil once, then turn the heat down until the liquid barely moves and let it go for 12 to 24 hours. The long, quiet simmer is what turns collagen into gelatin and pulls minerals out of the bones, and it is the whole reason the finished liquid turns to jelly in the fridge.
Beginners usually underestimate the simmer and overdo the boil. A hard rolling boil makes cloudy broth, and cooking it in a pot you can walk away from is a fire risk. Here is the method I use, with the timings, cues, and safety rules that make it repeatable.
What You Need
Bone broth is forgiving, but a few things matter more than the rest. A heavy pot, a strainer you can actually hold steady, and bones with some cartilage still attached are what separate a good pot from a disappointing one.
- Bones, 3 to 4 pounds for a large pot. Chicken feet, necks, wings, and the carcass from a roast chicken gel fastest. Beef knuckle, neck, and oxtail bones give the deepest flavor but need more time.
- Apple cider vinegar, 1 to 2 tablespoons. The acid helps pull minerals out of the bone. Add it at the beginning, not the end.
- Cold water, about 1 gallon, enough to cover the bones by an inch. Cold water is the starting point, always.
- Vegetables for flavor rather than nutrition: 2 carrots, 2 celery stalks, 1 onion cut in half, and a bay leaf or two. Leaving the skins on is fine and adds color.
- Seasonings: 1 teaspoon sea salt, a few black peppercorns, and a small handful of thyme or rosemary. A spoonful of tomato paste or a few dried mushroom stems deepen it further.
- Equipment: a heavy 8-quart pot or Dutch oven with a lid, a slotted spoon for skimming, a ladle, a fine-mesh strainer, and heat-safe containers for cooling.
One habit worth starting now: keep a bag of vegetable scraps in the freezer. Onion ends, celery leaves, carrot tops, mushroom stems, and a chicken carcass all belong in the next batch. It is the cheapest way to keep the pot full year-round.
How to Make Bone Broth on the Stove: Step-by-Step
Read these steps in order once and the process becomes simple. Most of the time is unattended simmer time, not hands-on time.
How to Make Bone Broth on the Stove: Roast or Brown the Bones
Deep flavor starts before any water goes in. The oven gives you the most even browning with the least fuss, and the stovetop works nearly as well when you are short on time.
For the oven: heat to 400°F, spread the bones on a rimmed baking sheet, and roast for 30 to 45 minutes until the edges are deep brown and the marrow smells roasted rather than raw. Watch them near the end, since small bones like chicken feet go from brown to burnt fast.
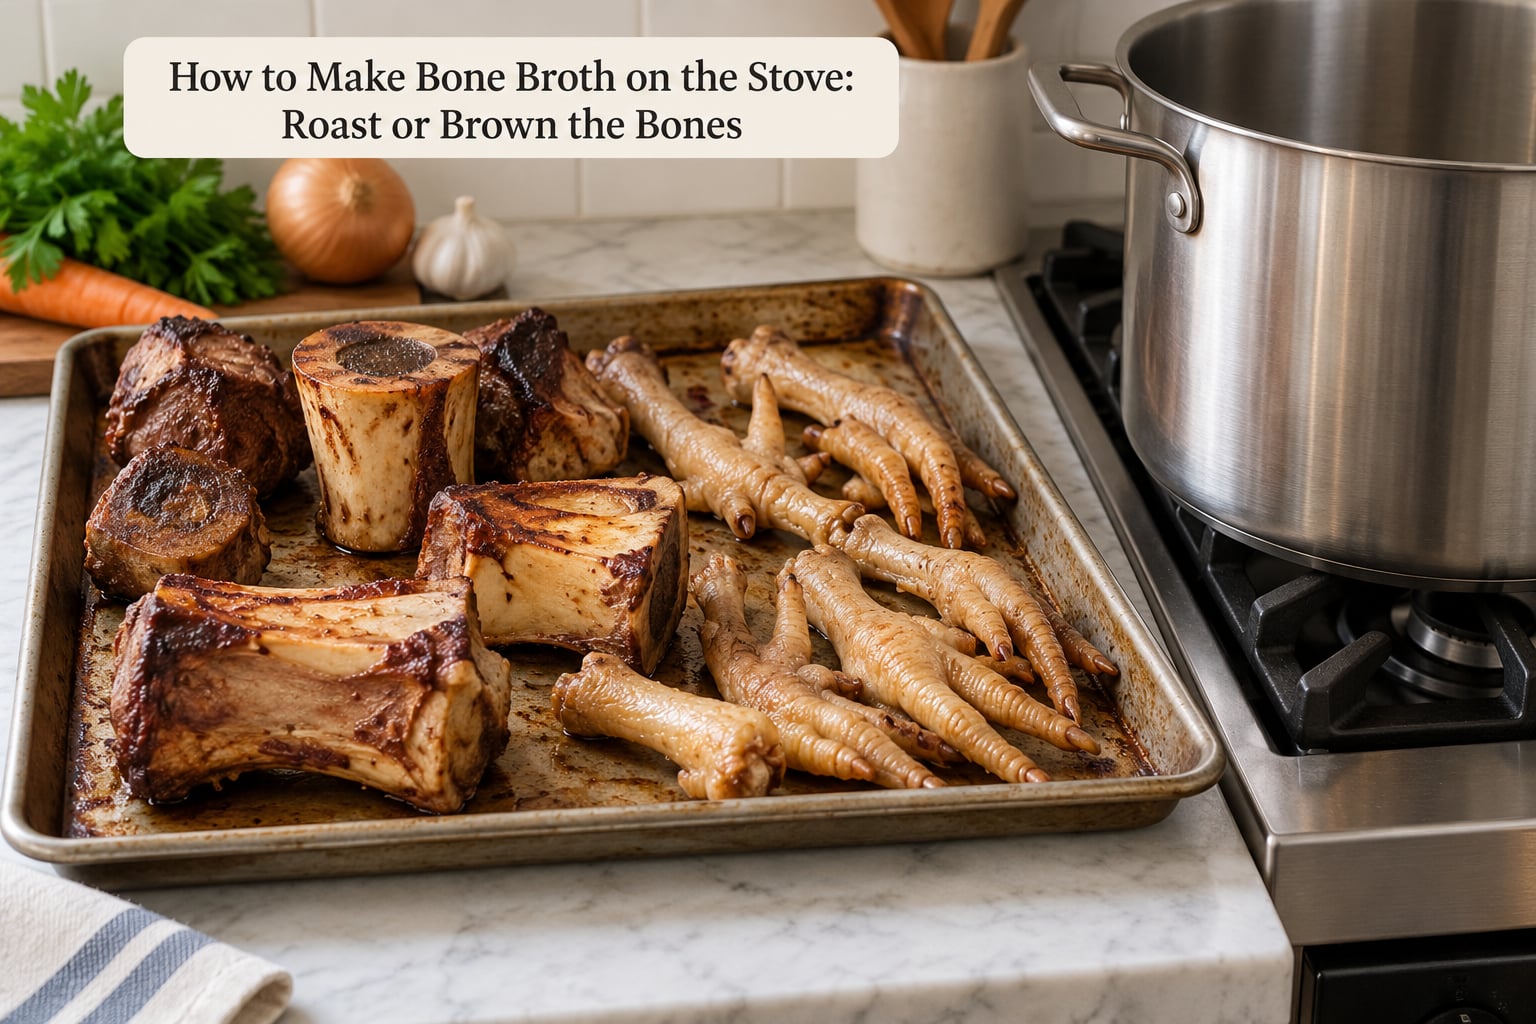
For the stovetop: set the bones in a dry, heavy pot over medium-high heat and let them brown for 10 to 15 minutes, turning with tongs until the surfaces color. A thin film of oil or butter in the pot prevents sticking. If the bones start to smoke, turn the heat down rather than adding water to a hot pot, which can spit.
Roasting is optional, not mandatory. Skipping it gives a milder broth, and that is exactly what you want for a delicate chicken sauce.
How to Make Bone Broth on the Stove: Simmer Without a Rolling Boil
This is the step where most home broth goes wrong. Bring the pot to a boil once, then drop the heat immediately and keep it there for the rest of the cook.
Put the browned bones in the pot, pour in the cold water, and stir in the apple cider vinegar. Let it come to a full boil over high heat, then reduce to the lowest setting your stove has. A lid on, ajar, holds the temperature steady and cuts evaporation.
You want a bare tremble, not bubbles you could see from across the kitchen. If the surface is rolling, your heat is too high. Turn it down and wait a few minutes; the pot holds a surprising amount of heat.
Add the vegetables and seasonings once the simmer is stable, not before. Boiling vegetables in a hard boil fall apart and turn the broth cloudy, and salt early can tighten up the finished liquid so it never gels properly. The bones get the full acidic bath from the start; the vegetables join halfway through.
Timing by bone type:
- Chicken feet, necks, wings, or a whole carcass: 8 to 12 hours. These gel fast and stay light in flavor.
- Beef or pork knuckle, neck, and marrow bones: 12 to 24 hours. Hoofed animals need the longer haul to get the connective tissue converted.
- Mixed or unknown: 12 hours is a safe middle, then taste at the end and keep going if you want more body.
A simmer you can attend beats one you cannot. The plan most people like is to start the pot early in the morning on low heat, check it every couple of hours, and turn it off that evening. That gives you 10 to 14 hours of cooking and a pot you never have to walk away from. Home cooks on Reddit describe the same routine, and a gas or electric burner left on high overnight is how a kitchen fire starts.
How do you know when it is done? Bones become chalky and pale, the surfaces look pitted rather than smooth, and thick joints pull apart easily when you test one with tongs. A bigger cue is the broth itself: drag a spoon across the back of a cold spoonful. If it leaves a clear film, there is enough gelatin.
How to Make Bone Broth on the Stove: Skim and Strain the Broth
Skimming takes five minutes and it is the difference between a clear golden broth and a cloudy one. Then straining does the rest of the work.
During the first 20 minutes, grey foam and scum rise to the surface as the proteins coagulate. Skim that with a slotted spoon and throw it away. From then on, skim the fat that collects as a pale layer on top, either with the spoon or by pouring from the back of the ladle. Skim once an hour or two, and more often in the first hour, when the mess is worst.
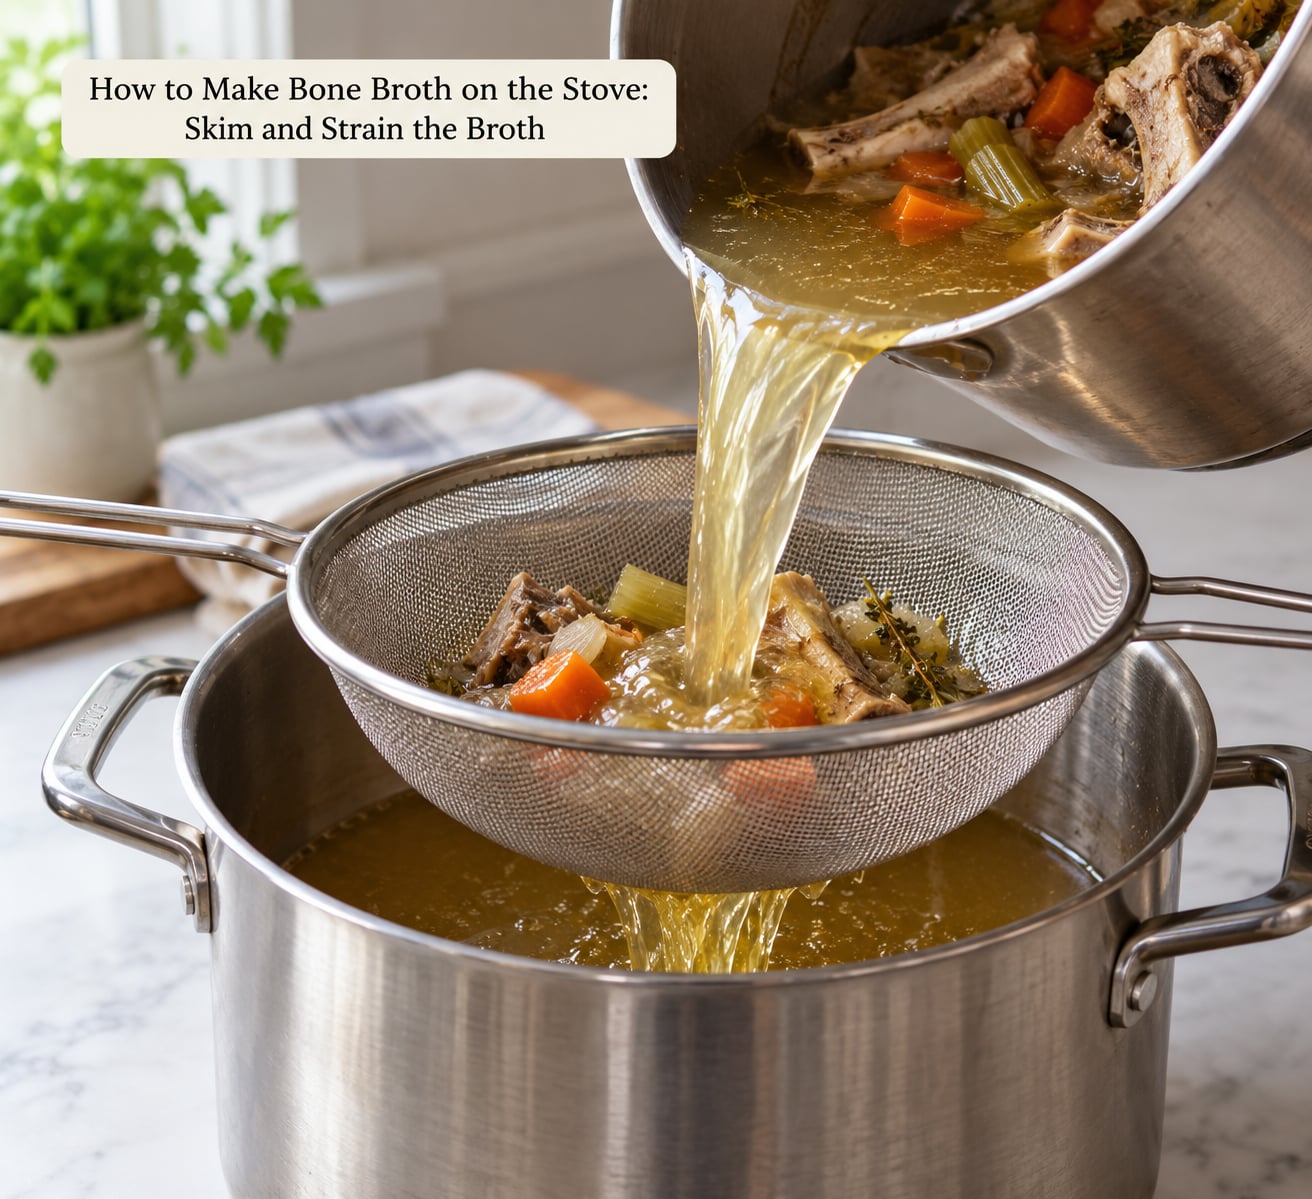
When the simmer is done, turn off the heat and let the pot sit for 10 minutes so the solids settle. Ladle the liquid through a fine-mesh strainer into a second pot. Give the solids a gentle press with the ladle, then pour the strained broth through the strainer once more if you want it clear. A coffee filter works too, though it is slower.
Cool it fast. USDA guidance for cooked broth is to get it from 135°F to 70°F within two hours, then to 41°F or below within four more hours. That means dividing it into shallow containers or an ice bath, not leaving a full stockpot to cool on the counter. Once cold, refrigerate it covered and use within 3 to 4 days, or freeze it in portions and keep it for a few months. Leave an inch of headspace in any jar you freeze, since the liquid expands as it solidifies.
For canning, bone broth is a low-acid food and a water-bath canner will not make it shelf safe. Use a pressure canner and follow the instructions in its manual, including the processing time for the jar size you use.
Once you have broth on hand, it does a lot of work. It becomes the cooking liquid for grains like farro or rice, the base for a pot of soup, or the finishing liquid for a chicken grain bowl where you want the sauce to taste like it simmered all afternoon. On a holiday morning it is the stock you would have started yourself, which is a good argument for keeping a jar in the freezer before the guests arrive.
It is also the quiet answer to a soggy-roast problem. A cup of your own broth, heated with a pan drippings and a spoon of fat, is a starting sauce for stuffing that stays crisp instead of collapsing into mush.
Common Mistakes
Almost every disappointing pot traces back to one of these.
Boiling instead of simmering
A hard boil emulsifies fat and fine bone particles into the liquid, and no amount of straining brings that cloudiness back. Bring it to a boil once to start, then turn the heat down until you see nothing but a shimmer and the occasional bubble at the edge of the pot.
Leaving the stove on overnight
Slow cooking, not unattended cooking, is the technique. A full pot of broth is a heavy pot of hot liquid, and evaporating liquid can scorch the bottom dry. Simmer while you are home, turn the heat off, and refrigerate. If you want overnight results without watching a burner, a countertop cooker set to a low heat is the safer route.
Crowding the pot
Stacked bones do not move, so water circulates unevenly and the broth extracts in patches. Fill your pot no more than two-thirds full of bones and water. Two smaller batches beat one cramped pot every time.
Adding vegetables at the start and salting early
Boiled vegetables fall apart and cloud the liquid, and salt added at the beginning can keep the finished broth from setting into a soft gel. Add vegetables and salt about halfway through the simmer.
Not skimming early enough
The first twenty minutes produce the most foam, and it sticks to the surface and into the broth if you wait. Skim, then skim again as the fat layer builds over the long hours.
Cooling it slowly
A stockpot of warm broth sitting on a counter for hours sits in the temperature range where bacteria grow fastest. Divide it into shallow containers, chill them in an ice bath, and refrigerate within the two-hour window. Once cold, cover it and use it within 3 to 4 days or freeze it.
One last tip that costs nothing: taste the broth before you season it further. Bones roasted well need almost nothing, and salt added twice is the most common reason a good pot of homemade broth gets overcorrected.
Frequently Asked Questions
How long do you simmer bone broth on the stove?
Chicken bones such as feet, necks, wings, or a carcass need 8 to 12 hours on a gentle simmer. Beef and pork knuckle, neck, and marrow bones need 12 to 24 hours because their connective tissue takes longer to convert. Bring the pot to a boil once, then keep the heat at its lowest setting so the liquid barely moves.
What is the difference between bone broth and stock?
Stock is primarily the extracted flavor of bones and meat, often skimmed for clarity and seasoned lightly. Bone broth is cooked longer, usually with a small amount of acid, so more collagen converts to gelatin. That is why bone broth turns to jelly when chilled and stock usually stays pourable, and why broth is the better choice for soups and gelatinous dishes.
Can I make bone broth with frozen bones?
Yes. Frozen bones work as well as fresh ones for broth, and freezing is often the only way to save a batch. Roast them straight from the freezer or from the oven, since they may need extra time to brown. There is no need to thaw them first, and cooking from frozen only affects timing, not the finished broth.
Why didn’t my bone broth turn into gel?
The usual causes are too short a cook, a heat that boiled instead of simmered, and salt added at the beginning, which can keep the liquid from setting. Bones with little cartilage or connective tissue also produce a thinner result. Fix it by simmering chicken feet or knuckle bones for a full 12 to 24 hours, salting only at the end, and chilling a test portion overnight to check.
Should I skim the fat off bone broth before storing it?
Skim what you can while the broth is hot, then chill it and lift off the solid cap of fat the next morning for the cleanest result. A ladle handles the loose top layer during simmering. Leaving some fat in is fine and often useful for cooking, but a defatted broth is easier to measure and reheats without a skin forming on top.
How long does homemade bone broth last?
Refrigerated in covered containers, homemade bone broth keeps about 3 to 4 days at 41°F or below. Frozen in portions with an inch of headspace, it stays good for several months. For pantry storage it must be pressure canned, because broth is a low-acid food and a water-bath canner will not make it shelf safe.
Conclusion
Start here: brown the bones, cover them with cold water and a splash of apple cider vinegar, bring the pot to one boil, then turn the heat to its lowest setting. Simmer for 8 to 12 hours for chicken or 12 to 24 hours for beef, skimming the foam early and the fat as it builds.
Strain it twice, cool it quickly in shallow containers, and refrigerate it covered for up to 3 to 4 days or freeze it in portions. That pot is the base for soups, grains, sauces, and gravies all winter long.