
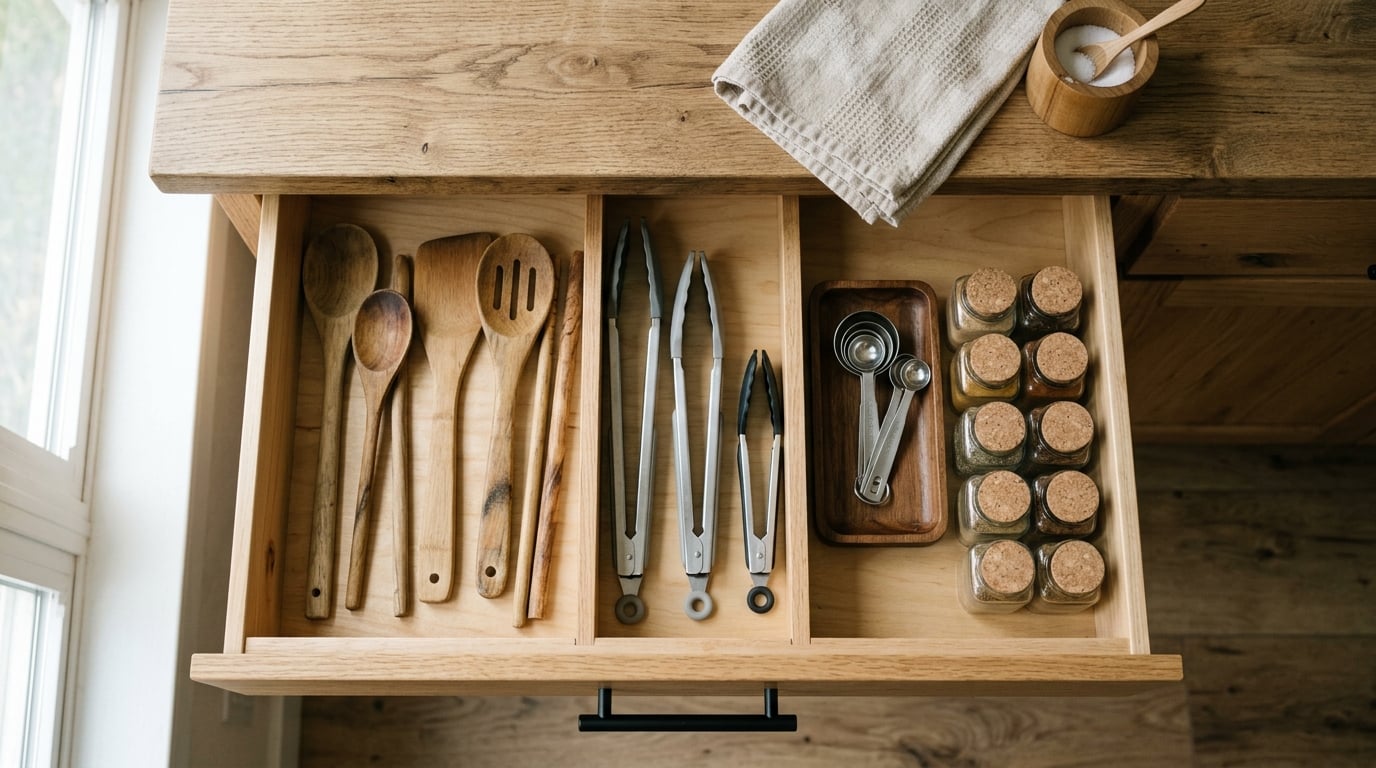
The fastest way to organize kitchen drawers for cooking is to give every drawer exactly one job, place that drawer near the zone where you do that job, clear out duplicates, then add dividers sized to that drawer’s exact width and depth. Budget one drawer at a time and 20 to 30 minutes per drawer.
The part most guides get wrong is order. People buy an organizer, then try to force their existing clutter into it. It falls apart within a week because the compartments never matched what they actually cook with. Sort first, measure, buy second.
Table of Contents
- What this system does
- What You Need
- Supplies
- The inventory method
- How to choose the right organizer for your drawer
- Step-by-Step: How to Organize Kitchen Drawers for Cooking
- 1. Define your cooking zones before deciding what goes in a drawer
- 2. Remove everything and make a simple inventory
- 3. Give each cooking category a drawer home
- 4. Arrange tools front to back by frequency of use
- 5. Store spices, oils and cooking supplies safely
- 6. Test the system while cooking real meals
- Common Mistakes
- What Not to Store in Cooking Drawers
- Small Kitchens, One Drawer and No Drawers at All
- How to Keep the System From Falling Apart
- Frequently Asked Questions
- How do I organize kitchen drawers with only one drawer?
- Where should I keep cooking utensils in the kitchen?
- How do I organize a deep kitchen drawer?
- Should I put labels on kitchen drawers?
- How often should I reorganize kitchen drawers?
- Conclusion
What this system does
- Each drawer gets one job, written on the label before anything goes in
- Tools live near the zone they are used in, not near where they were previously stored
- A utensil drawer holds three to five broad zones, not twenty tiny slots
- Everything that sits past arm’s reach needs a reason, and the reason is use
- A ten-minute monthly reset keeps the layout honest as cooking habits change
- Measuring tools never share a drawer with greasy cooking tools
Skip the whole project if you want the condensed version: one job per drawer, sorted before dividers, and zones instead of slots. That is genuinely most of the work.
What You Need
You need very little, and almost none of it needs to be bought before you start. Resist the urge to buy an organizer kit in the same trip as the planning, because organizers sized to a drawer you do not own are the single most common way this project stalls.
Supplies
- A permanent marker and masking tape or small label cards for naming each drawer’s job
- A measuring tape, for width at the front, width at the back, depth and drawer height
- A few shallow cardboard boxes or a couple of sheets of newspaper to build temporary piles on the counter
- Trash bag or donation box for the clear-out
- A damp cloth or wipe-down spray, because greasy tools need a clean drawer to sit in
- Optionally a non-slip drawer liner, cut to the exact drawer footprint
Newspaper works better than people expect for the piles. It keeps a greasy spatula from touching the counter and it makes it obvious at a glance when a pile has grown dusty or sticky.
The inventory method
Before sorting anything into categories, spread everything across three piles: daily drivers you reach for at least once a week, occasional tools used a few times a year, and a never-used pile. The never-used pile gets a 30-day test. Put those items somewhere you are not using as drawer storage, a shelf or the back of a cabinet, and anything you do not reach for in a month goes to donation, the trash or a neighbor.
This is the step that removes the drawer bloat. The most common complaint from home cooks is not that they lack organizers, it is that they own four spatulas, two garlic presses and an avocado slicer they used once and then forgot about. On r/organizing and r/CleaningTips the same complaint repeats: duplicates accumulate because tools get buried at the back of a deep drawer and nobody finds them again.
How to choose the right organizer for your drawer
Measure before you buy, and measure three ways: the width at the front edge, the width at the back, and the height available once the drawer rails are accounted for. A tray that almost fits will not close the drawer, and users repeatedly report buying organizers that were a half-inch too wide.
Material matters less than people think. Bamboo looks good and sits flat, plastic wipes clean and is cheaper, metal holds its shape longest. Washable fabric-style liners grip better than hard plastic grids, which is the main complaint about sliding tools.
| Drawer type | Depth and shape | Organizer that fits it | Watch out for |
|---|---|---|---|
| Cutlery | Wide and shallow, front-loaded | Expandable cutlery tray | Deep trays waste the back third |
| Cooking utensils | Wide, medium depth | Two or three long dividers, bamboo or plastic | Tools longer than drawer depth lie diagonally |
| Prep tools | Medium width, shallow | Diagonal dividers for peelers, graters, whisks | Shallow inserts in a deep drawer waste space below |
| Knives | Deep, narrow, low traffic | In-drawer knife block or slot insert | Blades colliding dull each other |
| Spices | Any, ideally near the stove | Angled or tiered spice tray | Glass jars tipping and breaking |
| Wraps and foil | Long, shallow | Wide wrap organizer with a cutter arm | Boxes collapsing when the drawer opens |
| Baking | Wide, deep | Vertical dividers, file-folder style | Sheets warping if stored damp |
| Deep cookware | Very deep | Lid organizer, vertical file dividers | Overweight loads and buried items |
| Tiny items | Narrow utility drawer | Modular bin cups | Cups that never get reconfigured |
That last row is the one most people overlook. Modular bin cups are the only insert that survives a change in routine, because you can move a cup instead of buying a new organizer.
Step-by-Step: How to Organize Kitchen Drawers for Cooking
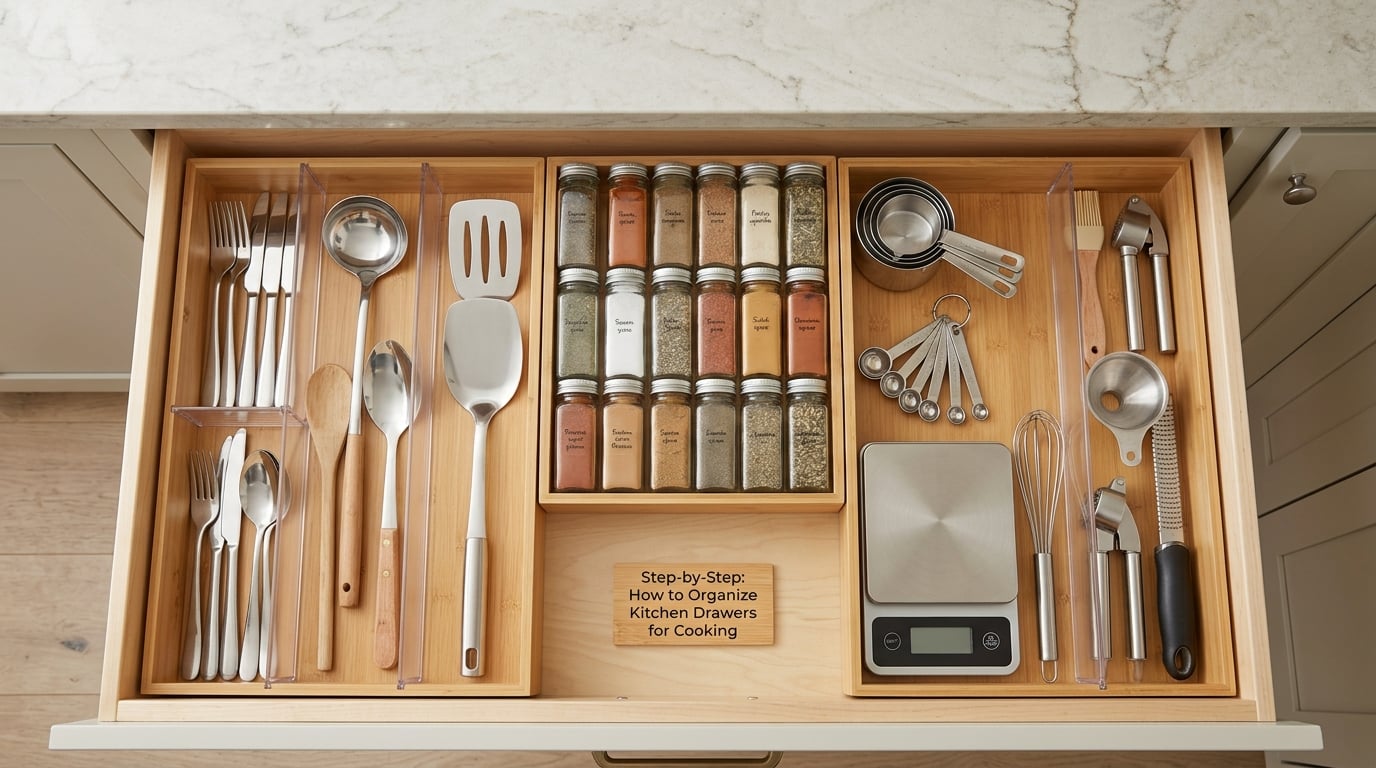
Work through these six steps in order. The sequence matters more than the individual actions, and each drawer is finished and closed before you move to the next one.
1. Define your cooking zones before deciding what goes in a drawer
Group your cooking supplies by task rather than by object type: prep, stirring and turning, heat-side tools, measuring and seasoning, and baking. Once the tasks are written down, drawer placement becomes obvious instead of arbitrary.
Most kitchens run on four or five zones. The prep zone covers the cutting board area, so knives, peelers and graters live nearby. The heat zone covers the hob, so spatulas, tongs, ladles and the spoon rest go there. The sink zone holds dish-side items. The baking zone needs sheet pans and parchment. Plating is the odd one out, because serving spoons and tasting spoons are used at the end of a meal, not the start.
Two placement rules do most of the work. Keep the drawer you use most within about 18 inches of the hob, and keep everything you use daily inside the hand-reach band, roughly from waist to chest height. Professional organizers say the same thing: distance is what costs you time, not storage capacity. Items used most go closest to where your hands already are.
2. Remove everything and make a simple inventory
Empty the drawer completely and wipe it out. Then sort every item into the three piles: daily drivers, occasional tools, and the never-used test pile. Duplicates collapse here. Four spatulas become two, and the two thinner, longer ones go in front because they are the ones you actually reach for.
Run the never-used pile through a 30-day test before it goes anywhere near a drawer. Items that fail the month get donated. A lot of organizing advice skips this and the drawer quietly re-clutters within a season.
Handle knives separately while everything is out. Blades in a pile dull each other, and a dull knife is both slower and more dangerous. Keep them in a block or in a rack while you sort, not loose in a heap.
3. Give each cooking category a drawer home
Now assign the categories to actual drawers based on where those drawers sit. A drawer below the hob is a heat-side drawer. A drawer near the sink takes the dish and cleaning side. A drawer on the prep counter takes knives and prep tools. The drawer closest to your dominant hand takes the daily drivers, whatever its physical location.
Label before you fill. A strip of masking tape and a marker on the drawer front takes ten seconds and saves you from reopening the wrong drawer while a pan is heating. Long term, labels are what keep a system intact, because the person who breaks the arrangement is usually someone who did not know the logic behind it.
If you have more categories than drawers, merge rather than stack. Two categories that get used together can share a drawer with a single divider between them. Four categories crammed into one drawer with no separation beats eight categories in four drawers where two of them are always empty.
4. Arrange tools front to back by frequency of use
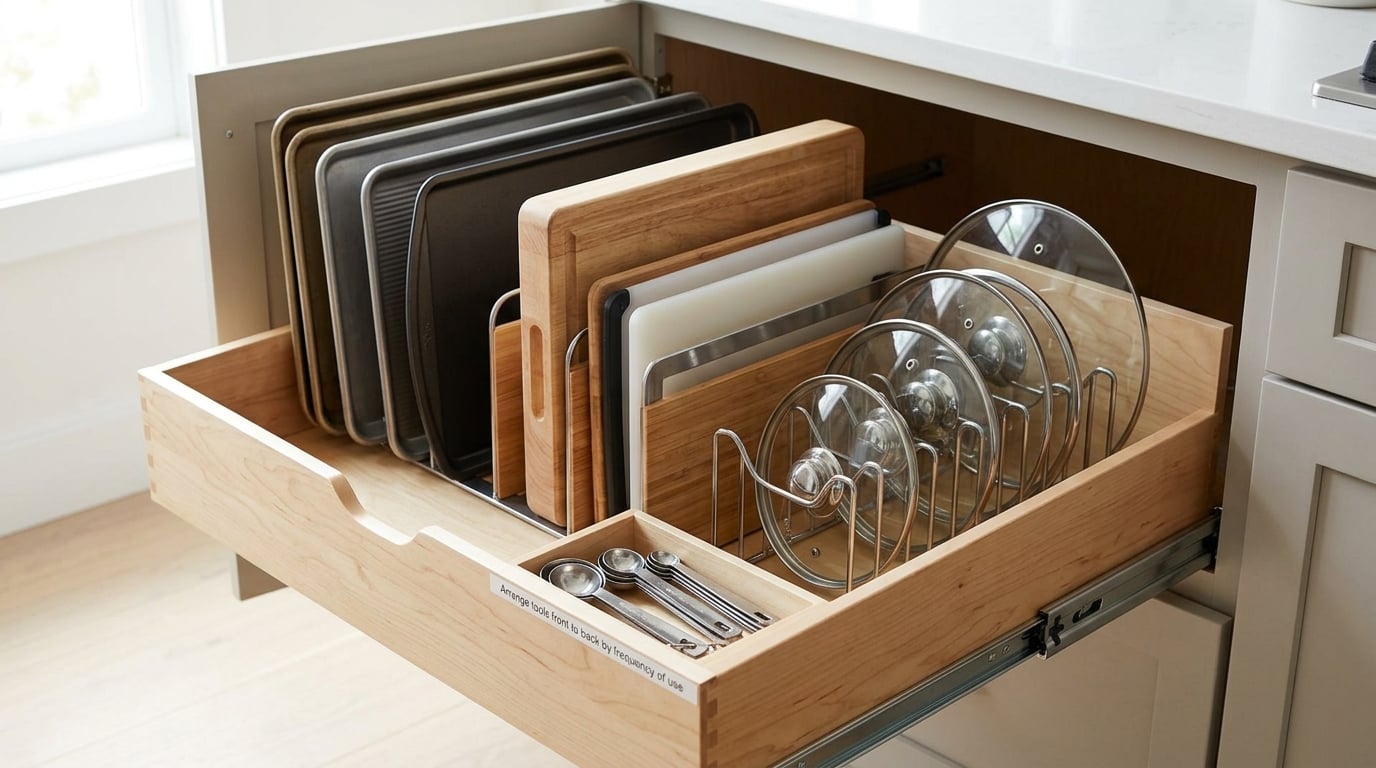
Place the tools you grab constantly at the front and the occasional ones at the back. Group related items together inside each zone so that a whole task is one grab: peelers with the grater, spatulas with tongs, ladles with the serving spoons.
This is where the length problem shows up. Utensils longer than the drawer is deep lie diagonally across everything and cover the tools underneath, which is the single most repeated physical complaint from home cooks. Two fixes work. Diagonal dividers angle long tools such as rolling pins and large whisks so they sit against the wall instead of across the drawer. Vertical dividers store flat items like baking sheets, lids and cutting boards on edge, file-folder style, so nothing lies on top of anything.
Put down a liner cut to the drawer’s exact footprint. Things sliding across every time you pull the drawer open is one of the top reasons people abandon a system, and a washable grip liner fixes it for very little.
5. Store spices, oils and cooking supplies safely
Keep spices in one zone, ideally in a drawer near the hob so seasoning happens without walking. An angled or tiered spice tray makes labels visible when the drawer is open, which is the whole point. Keep glass jars upright with a lip or divider in front of them so a pulled drawer does not send them tipping.
Store oils where they are used, not where they are pretty. Tall bottles in a shallow drawer lie down and leak, and oil on a drawer base is a smell you will live with. A deep bin with a lip, or a door-mounted rack if you have one, keeps bottles upright. For cooking oils you use weekly, a small lidded container in the heat-zone drawer works and stops the drips.
Two safety points that people skip. Keep heat-sensitive items out of any drawer directly above the hob, since the underside of a pan gets hot enough to affect them. And check your deep drawer rating before loading it with cast iron or a full set of cookware. Residential drawer slides are usually rated for much lighter loads than the drawer looks like it can take, and heavy items belong on the lowest rail or on a shelf.
6. Test the system while cooking real meals
Cook three or four normal meals before you call it done. This is the step most guides on how to organize kitchen drawers for cooking leave out, and it is the only one that tells you whether the layout works. Pay attention to the two-second reach test: if you cannot put your hand on a tool within about two seconds of deciding you want it, the layout is wrong, no matter how tidy it looks closed.
Write down what breaks. The measuring spoons migrate toward the spoons. The foil ends up somewhere nobody planned. The vegetable peeler is always in use and you put it at the back. Move those items, and only those items, then cook again.
After the test meals, remove anything that still has not been touched. Be honest about it. A drawer that is 80 percent full and you can find everything in is a better system than a drawer packed to the rails.
Common Mistakes
Almost every failed kitchen drawer arrangement traces back to one of these. Each has a straightforward fix.
Buying organizers before sorting. You end up with inserts shaped for a life you do not have. Sort first, measure the drawer, then buy what fits the job you actually assigned it.
Using tight slots instead of broad zones. This is the big one. Slot-style organizers photograph beautifully and fail on contact with real weeknight cooking, because you will not return a greasy spatula to an exact slot with hot hands. Three to five forgiving zones per utensil drawer survive; twenty small compartments do not. Several threads on r/CleaningTips describe buying slotted organizers, cooking, failing to re-file the tools precisely, and quietly giving up a week later.
Mixing unrelated categories in one drawer. The result is digging through grease to find a tablespoon. Measuring tools always get their own small drawer or their own bin, never a corner of a utensil drawer.
Wasting prime drawer space on occasional items. The front row belongs to what you touch weekly. If something is used a few times a year, it goes at the back, in a deeper drawer, or on a shelf.
Putting shallow organizers inside deep drawers. The empty space underneath looks like an invitation to stack and re-clutter. Either buy an insert that fills the depth, or use the leftover depth deliberately with a second layer on risers.
Skipping labels. An unlabeled drawer gets re-evaluated by whoever opens it next, usually at the worst moment. A strip of tape and a marker is a five-minute fix with a long payoff.
Not replacing what you got rid of. A 30-day test only works if the drawer it freed stays free. Use a one-in one-out rule: nothing new goes in a cooking drawer unless something comes out.
Forgetting to reset. Cooking routines change. School year, baking season, batch cooking on Sundays, a new appliance. Ten minutes a month is enough to catch the drift before the drawer returns to its original state.
What Not to Store in Cooking Drawers
Some things belong elsewhere, and putting them in a cooking drawer is how a good system turns into a junk drawer.
- Mystery screws, spare hardware, washers and string, which belong in a labeled hardware tin
- Takeout menus, stray receipts and unopened mail, which belong in a bin near the door
- Old batteries, remote controls and charging cables, which belong near where they are used
- Refrigerated or perishable items, which never belong in a drawer at all
- Cleaning chemicals under the sink, kept separate from food tools and out of a child’s reach
- Single-use gadgets, which should pass the 30-day test before they take drawer space
- Loose blades without covers or a block, kept sheathed or slotted
- Overlapping duplicates, which is the number one reason cooking drawers feel full
Small Kitchens, One Drawer and No Drawers at All
If you have one or two drawers, the zone method still applies but you split zones vertically instead of horizontally. A single drawer becomes four zones left to right: heat tools nearest the hob side, prep tools next, measuring tools in a small bin, and baking items at the far end. Two long dividers and one small bin do the whole job.
One-drawer kitchens get the most search interest and the least advice, so it is worth saying plainly: you do not need more drawers, you need a hard rule about what stays in the one you have. Anything not used weekly goes on a hook, a rail or a shelf.
For kitchens with no drawers at all, move the same logic upward. A wall rail or pegboard holds the daily tools where you can lift them off with one hand. A magnetic knife strip mounted away from the hob keeps blades out of a cabinet and off the counter, and it is gentler on edges than a drawer full of knives rattling against each other. An over-the-door rack on the cabinet nearest the prep counter gives you a drawer-shaped surface without a drawer. A countertop crock takes the two or three tools you use constantly, which frees a zone in the drawer for everything else.
Several home cooks recommend a small magnetic strip for knives over drawer storage specifically because blades that touch in a drawer dull faster.
How to Keep the System From Falling Apart
Run a ten-minute reset once a month. Wipe out the heat-side drawer, return anything that migrated, and check that the front row still holds the tools you actually use. Once a season, do the full triage again: anything untouched since the last season leaves the drawer.
The ten-minute rule for buying: if a new tool goes into a cooking drawer, something comes out. That single rule stops the slow accumulation that undoes everything else.
Frequently Asked Questions
How do I organize kitchen drawers with only one drawer?
Split the single drawer into three or four zones left to right instead of top to bottom: heat tools on the side nearest the hob, prep tools next, measuring tools in one small bin, and occasional or baking tools at the far end. Two long dividers and one bin handle it. Anything not used weekly goes on a wall rail, a hook or a shelf instead, and a one-in one-out rule keeps it from creeping back.
Where should I keep cooking utensils in the kitchen?
In one dedicated drawer within roughly 18 inches of the hob, since that is where you use them. Divide it into three to five broad zones, not individual slots: spatulas and tongs together, ladles and serving spoons together, whisks and skimmers together. Put the tools you reach for daily at the front of the drawer and the occasional ones at the back.
How do I organize a deep kitchen drawer?
Use the depth rather than fighting it. Store flat items like baking sheets, cutting boards and pot lids vertically in dividers so nothing lies on top of anything else, and keep heavy items on the lowest part of the drawer where the slides carry them best. Add a non-slip liner cut to the exact footprint, because heavy things sliding back every time you open the drawer is what turns a deep drawer into a black hole.
Should I put labels on kitchen drawers?
Yes, a strip of masking tape and a permanent marker is enough. Labels matter more than dividers over the long term, because the person who breaks your arrangement is usually someone who did not know the reasoning behind it. Write the drawer’s job, such as heat tools or measuring, not a list of contents that will be wrong within a month.
How often should I reorganize kitchen drawers?
Ten minutes a month for a quick wipe and a return of anything that migrated, and a full re-triage once a season. Cooking routines change with the school year, baking season and batch-cooking weeks, so a seasonal pass catches tools that quietly stopped earning their drawer space. Re-sort one drawer at a time, never the whole kitchen in one afternoon.
Conclusion
The method is simple: one job per drawer, tools placed near the zone they are used in, duplicates cleared before anything is bought, dividers sized to the drawer you actually own, and forgiving zones instead of tight slots. That is enough to make weeknight cooking noticeably less cluttered.
Start with one drawer, and make it the one holding your most-used cooking tools. Empty it on the counter, sort into three piles, run the 30-day test on the pile you are unsure about, put the survivors back by frequency, and label the front. Twenty minutes, one drawer, done. Repeat.